Automation#23: Automate Guided Conversations in Zoho Desk with Business Hours

Hello Everyone,
This week's edition introduces a custom function designed to automate Guided Conversations in Zoho Desk, based on your business hours. With this feature, you can align the bot's behavior with your business schedule, ensuring a smooth and professional customer experience.
This week's edition introduces a custom function designed to automate Guided Conversations in Zoho Desk, based on your business hours. With this feature, you can align the bot's behavior with your business schedule, ensuring a smooth and professional customer experience.
Self-service platforms are now a cornerstone of effective customer service, improving productivity for both customers and support agents. With the evolving nature of customer support, self-
service has become indispensable. It saves time and provides quick access to solutions, empowering customers to address their concerns efficiently.
Zoho Desk's Guided Conversations serves as a robust self-service tool, offering Tier-1 solutions to customers through an intuitive interface. For more complex or escalated queries, the bot seamlessly connects customers to a live agent, ensuring both self-service and human assistance for effective issue resolution.
However, businesses often have non-working hours, such as weekends or holidays, when agents are unavailable. In such cases, configuring your Guided Conversations based on your business hours is essential. During non-working hours, the bot can:
- Notify customers that your business is currently closed, along with your operating hours.
- Provide an option for customers to submit a ticket, ensuring their query is addressed promptly during working hours.Configure your Guided Conversations today and streamline your customer support process!
How to incorporate this custom function within your GC flow?
1. Go to Setup (S) >> Self-Service >> Guided Conversation.
2. Choose the Department and click on Create Flow.
(If you would like to add this to your existing flow, click on the ellipsis icon under Published Flows and click on the Edit button.)
3. Select the channels, give a Name and Description, and click Next.
4. Click on the + icon, add the Webhook block, under Perform Actions.
5. Enter the Block name as Business Hours, Choose Get under Method.
 Note: In the Business Hours URL, replace .com with .in/.eu/.ca/.sa based on your DC
How to fetch the Business Hour Id?
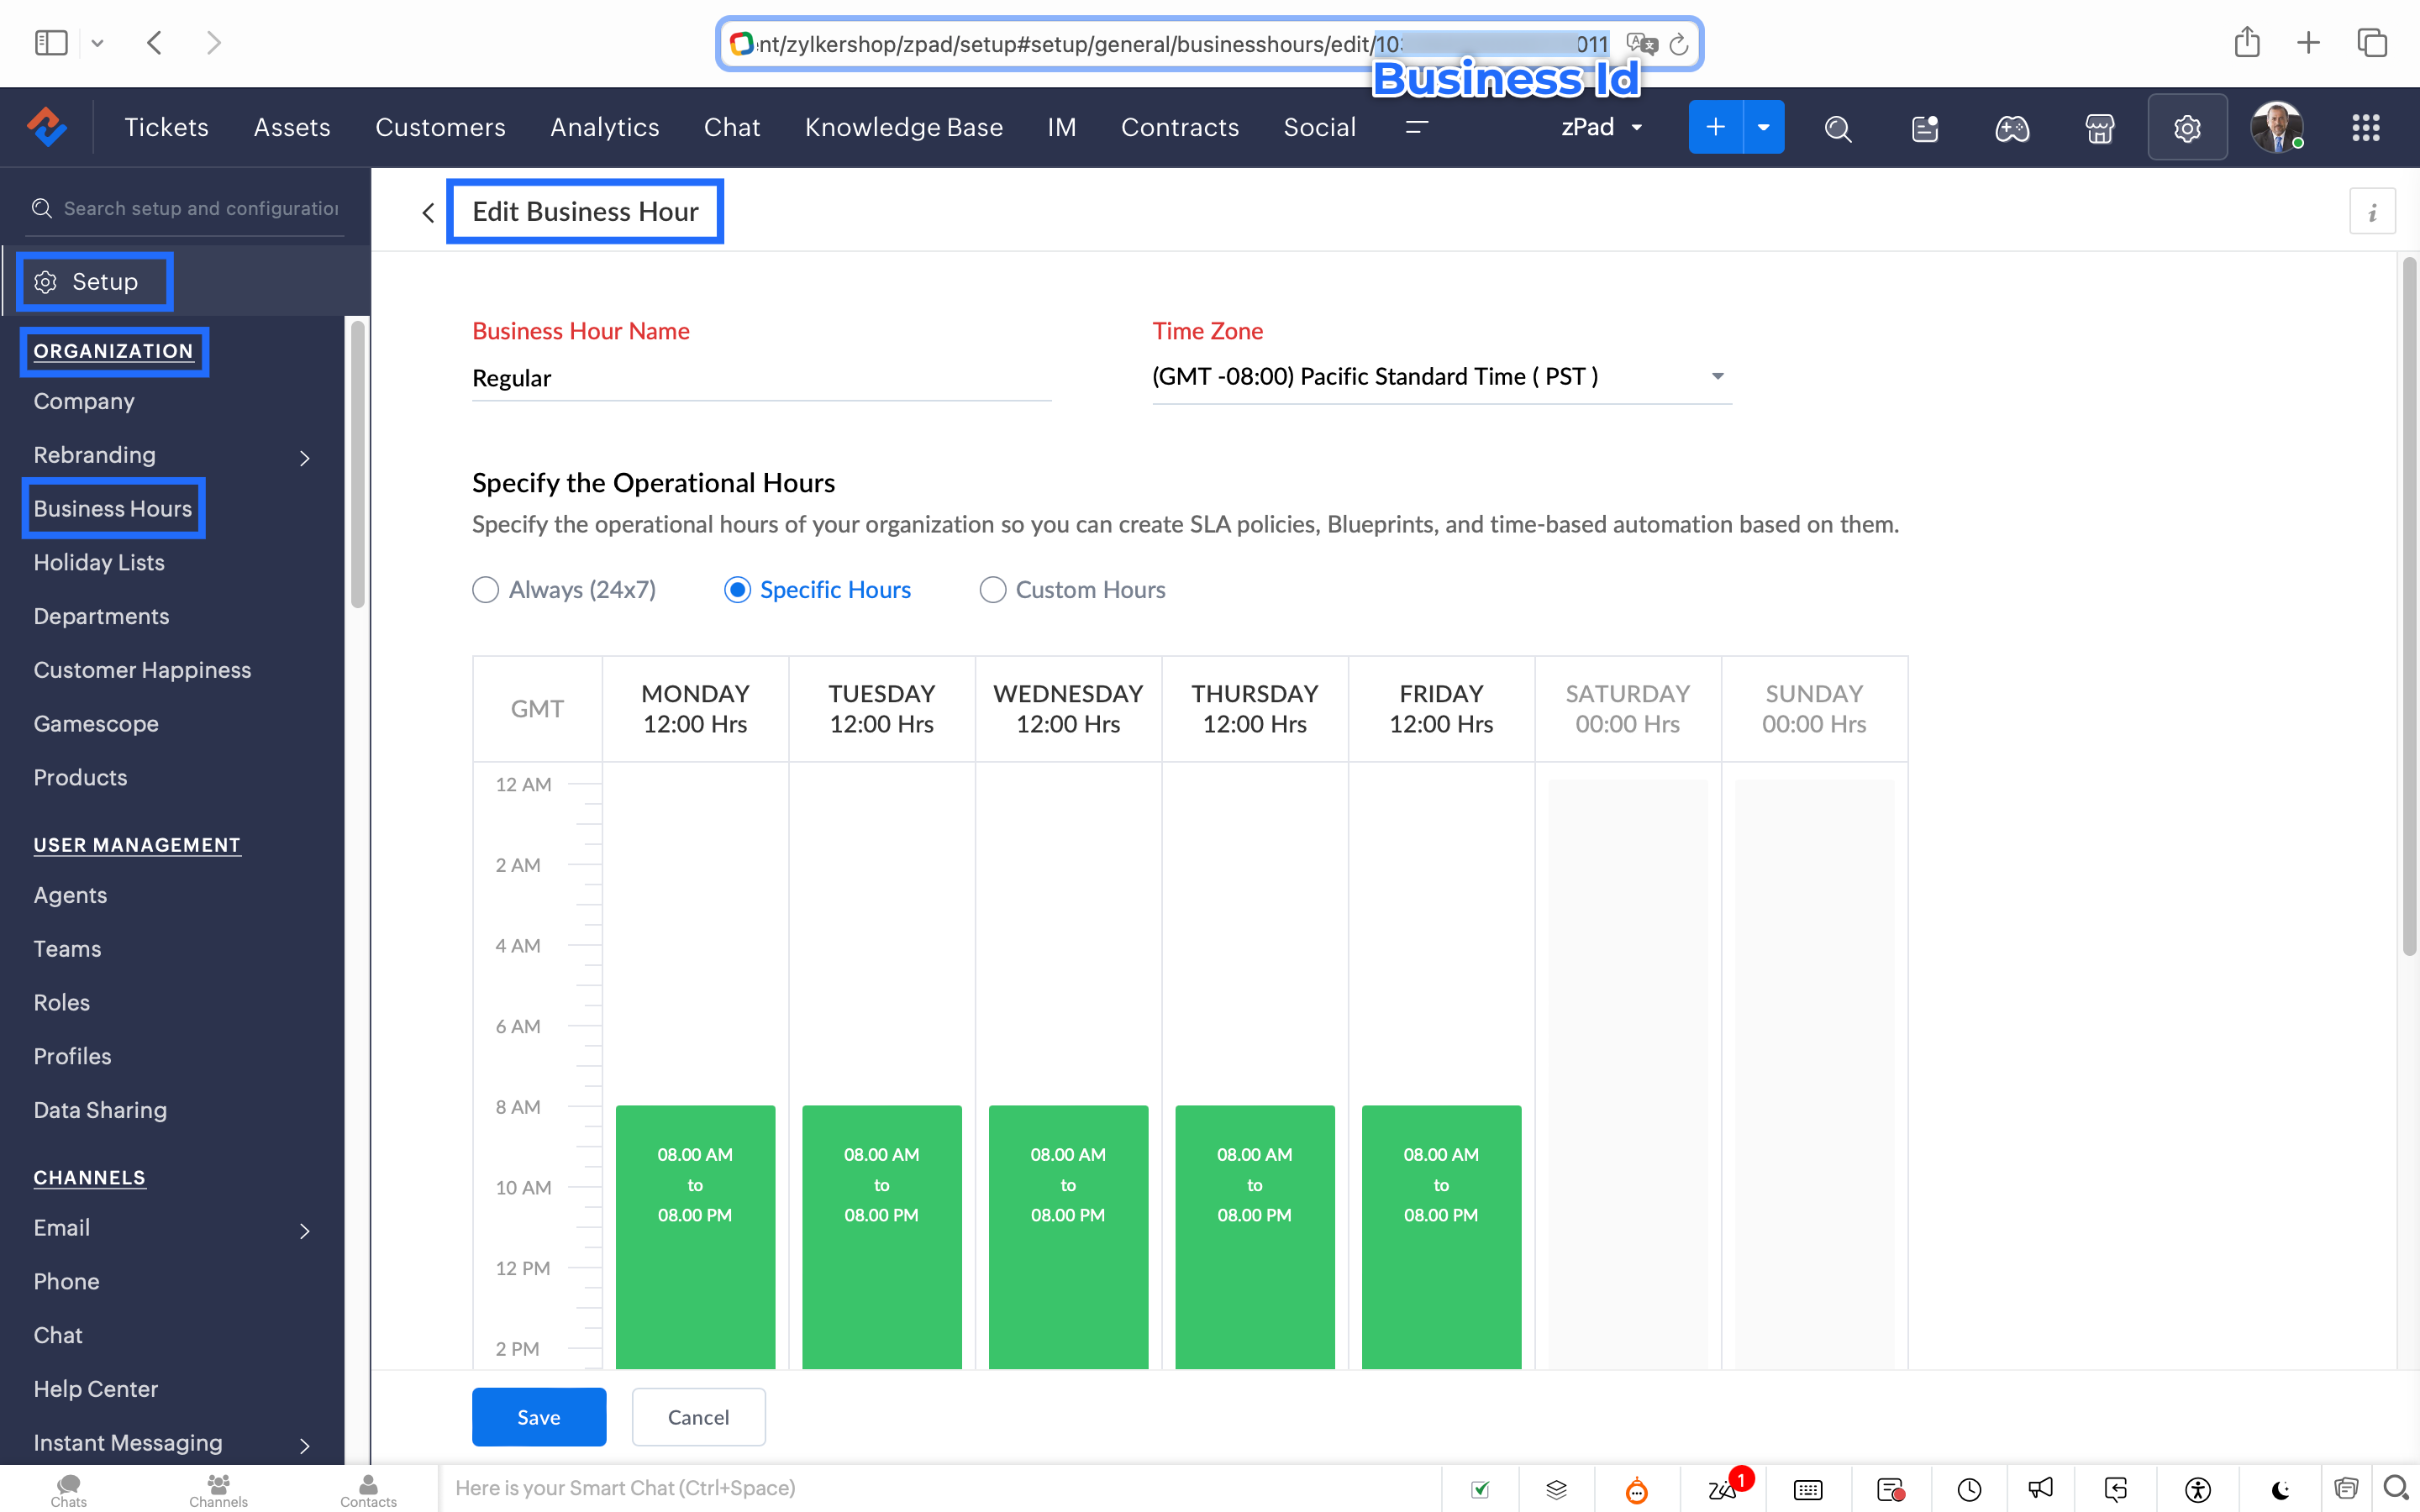
6.1 To fetch the Business Id, Go to Setup (S) >> Organization >> Business Hours.6.2 Click on the Business Hours configured within your Zoho Desk Account. Go to the URL of the specific Business Hours, and you can fetch the business Id from the URL.
7. After entering the URL, do not make changes to the Query Params and Headers.
8. Under Connections, click on Add.
To Create a connection
8.1 Click Create Connection.
8.2 Select Zoho Desk under Default Services.
8.3 Give a connection name (let's say configureBusiness Hours).
8.4 Disable the toggle for User Credentials of Login User.
8.5 Under Scope, choose the below scope values:
Desk.settings.READ
8.6 Click Create and Connect.
8.7 Click Connect and click Accept.
Connection is created successfully.

9. After creating the connection, click on Refresh and then click on the drop down arrow and select the connection (configureBusiness Hours) created.
10. Click on the gear icon in the Formatter option and paste the below code in the Deluge window:
- dayMAp = {"SUNDAY","MONDAY","TUESDAY","WEDNESDAY","THURSDAY","FRIDAY","SATURDAY"};
- businessTimes = response.get("businessTimes");
- timez = response.get("timeZone").get("id");
- response = Collection();
- createdTime = zoho.currenttime.toString("yyyy-MM-dd HH:mm:ss",timez).toDateTime();
- createdDay = createdTime.getDay();
- //get this from above created time
- createdHour = createdTime.getHour();
- //get this from above created time
- createdMinute = createdTime.getMinutes();
- //get this from above created time
- createdWeekDay = createdTime.getDayOfWeek();
- //get this from above created time
- createdWeekDay = dayMAp.get(createdWeekDay - 1);
- for each businessTime in businessTimes
- {
if(businessTime.get("day") == createdWeekDay)
{
businessTimeStartHour = businessTime.get("startTime").getPrefix(":").toLong();
businessTimeEndHour = businessTime.get("endTime").getPrefix(":").toLong();
businessTimeStartMinute = businessTime.get("startTime").getSuffix(":").toLong();
businessTimeEndMinute = businessTime.get("endTime").getSuffix(":").toLong();
if((createdHour > businessTimeStartHour || createdHour == businessTimeStartHour && createdMinute >= businessTimeStartMinute) && (createdHour < businessTimeEndHour || createdHour == businessTimeEndHour && createdMinute <= businessTimeEndMinute))
{
response.insert({"status":"true"});
}
else
{
response.insert({"status":"false"});
}
}- }
- return response.get(0).get("status");
11. Click Save after pasting the code.
12. Click on the gear icon in the Response icon.
12.1 Click on the gear icon on the Status Code.12.2 Give Status Code as 200, Flow Variables as status, Response Value as /.12.3 Let the Type be single element and the Data Type be String. Click Save. Click Save for the Response List with the updated status.
13. Disable the toggle for the Multi Path.
14. Choose a Request timeout if required. This sets a response waiting time from the server.
15. Set the Error message if required to display in case waiting time exceeds the response time.
16. Click Save.
This is the configuration for setting the business hours through a custom function.
17. After the Webhook, click on the + icon and add the Fork block under the Perform Actions.

18. Give the Block Name as Check, Enter Path list : name it as Check.
Under Criteria 1, click on the drop-down arrow, and enter choose Status under Block variables, from the drop-down menu. Choose operation: contains and give the value : True.
19. Do not add an else path.
20. Click Save.
In the Fork block, under Check, you can add the Transfer to agent block from the Zoho Desk Blocks. Under Else, you can add a text icon/ info card stating you are out of business hours.
Note: This custom function does not include the Holiday Lists configured within Zoho Desk.
You can seamlessly integrate this Guided Conversation flow into your self-service platform to ensure you never miss a customer, even during non-working hours. Keep your customer support running smoothly!
See you next week!
Regards,
Lydia | Zoho Desk