Share your workspace
You can share your workspace with your colleagues and user groups in two ways.
1. Click the share icon located on each workspace under the Workspace tab.
2. You can use the checkboxes to the left of the workspace names in the list view to multi-select and share multiple pipelines at one go.
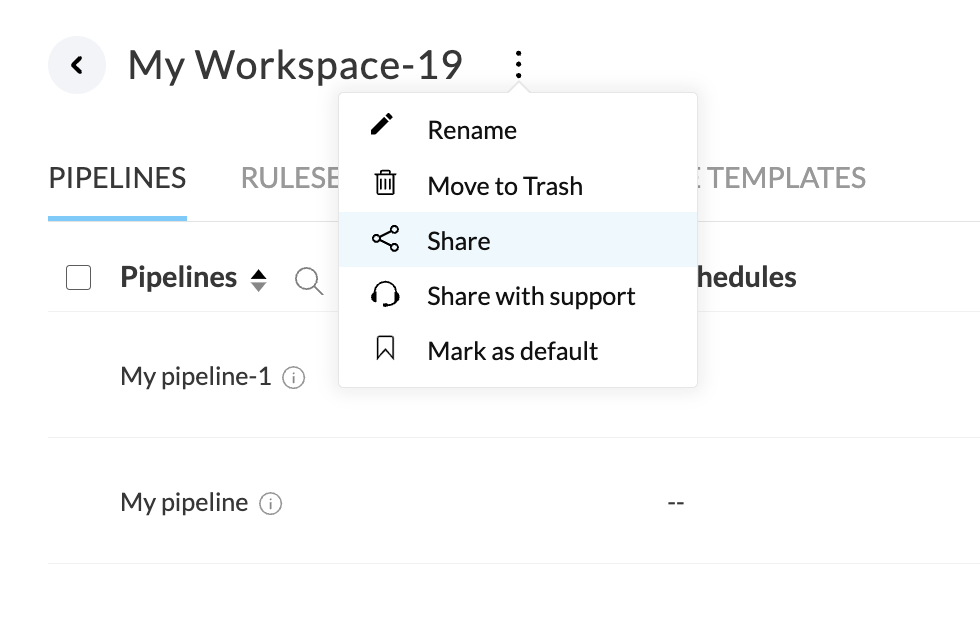
3. You can also share a workspace from the Workspace details page.
Click on the workspace that you want to share. In the Workspace details page, right-click the ellipses icon, and select the Share option.
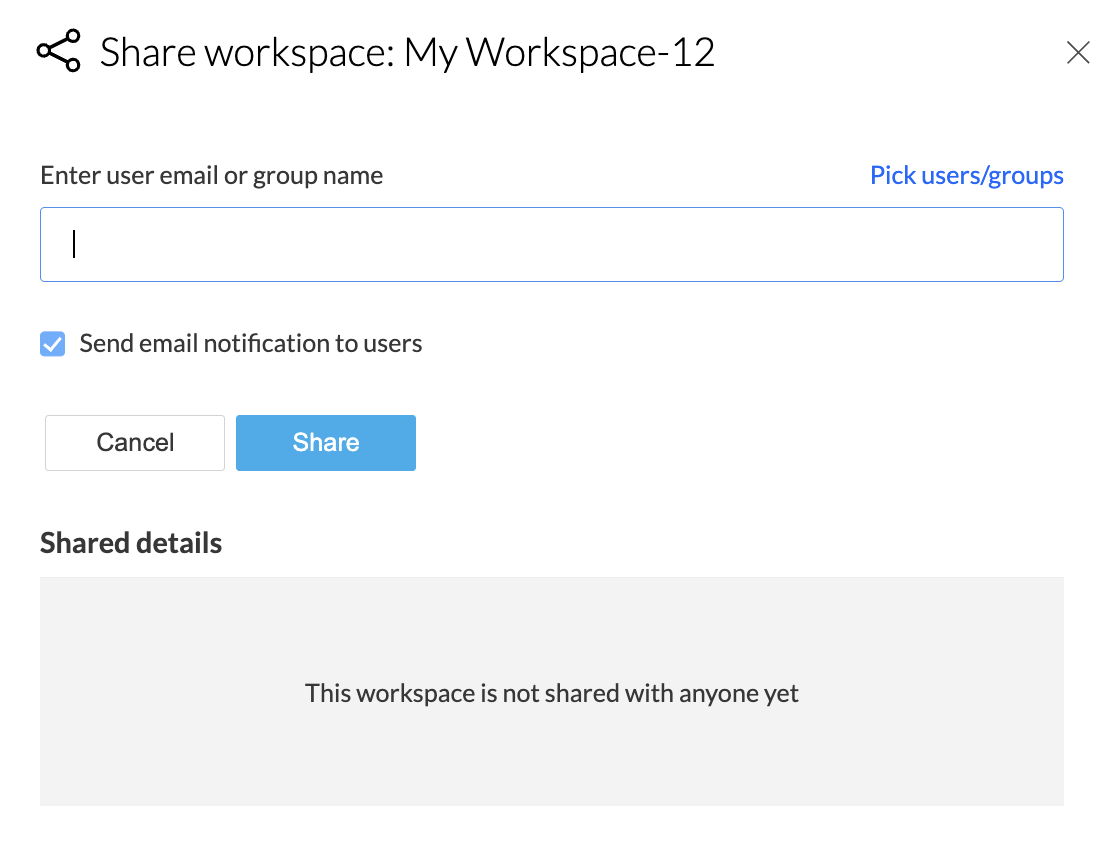
You can share your workspace with Individual users or Groups by entering the user's email or group name.
To share your pipeline with individual users and groups
1. Provide the email address(es) under the Enter the user email or group name box to share your workspace with a new user.
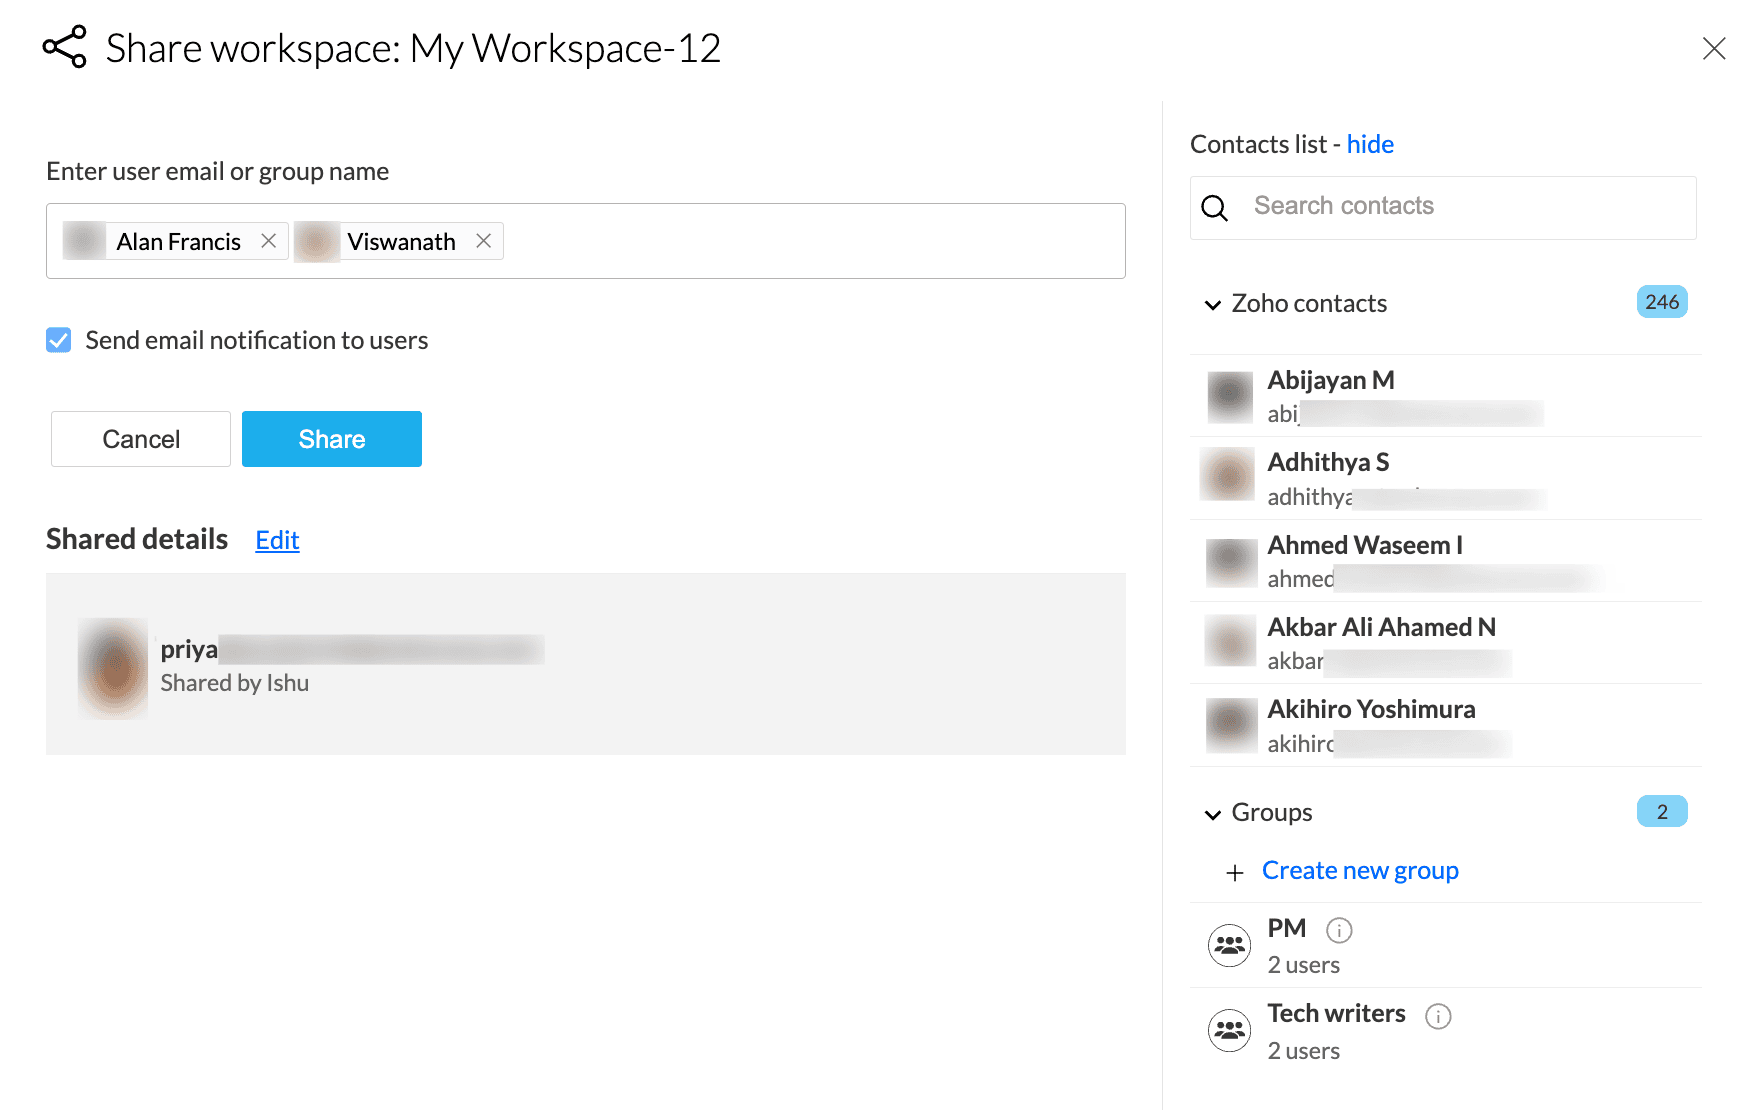
2. You can also add the existing users or groups in your contacts by clicking the Pick users/groups option from the top right corner of the sharing panel.
3. Search for the user name or group name in the contact list and click the  icon to add them.
 Note: Entering a user name or group name under the Enter the user email or group name box will show a list of matching contacts or groups for you to choose from.
4. Select the Send email notification to users checkbox to send an invitation mail when a workspace is shared with new users or groups.
5. Click Share to share your workspace with the users or groups. The workspace has been successfully shared. You can also use the Edit option under Shared details to make changes or remove a user or group from accessing the workspace when needed. However, you can manage the access to entities from the User Management tab under Settings.
 Info: Click the
Note: Click the info icon next to the group name to view the members of a group.
You can share your workspace with a new set of users by creating a group.
To create a new group
1. Click the Create new group button from within the Share workspace dialog box.
2. Enter a name for the new group.
3. Input the email address and press enter to add users to the group.
Note: You can also enter a name under the Enter user emails box and choose from the list of matching contacts.
3. Click Create to create your new group.
SEE ALSO