Fundamentals of Zoho Show UI
The goal of Show's user interface is to make working on presentations convenient and intuitive. With all the editing options readily available, you will not need to dig to find what you want. Get started with the presentation creation process, and our contextual menus will take care of you from there.
The Zoho Show web application consists of the listing page and editor screen.
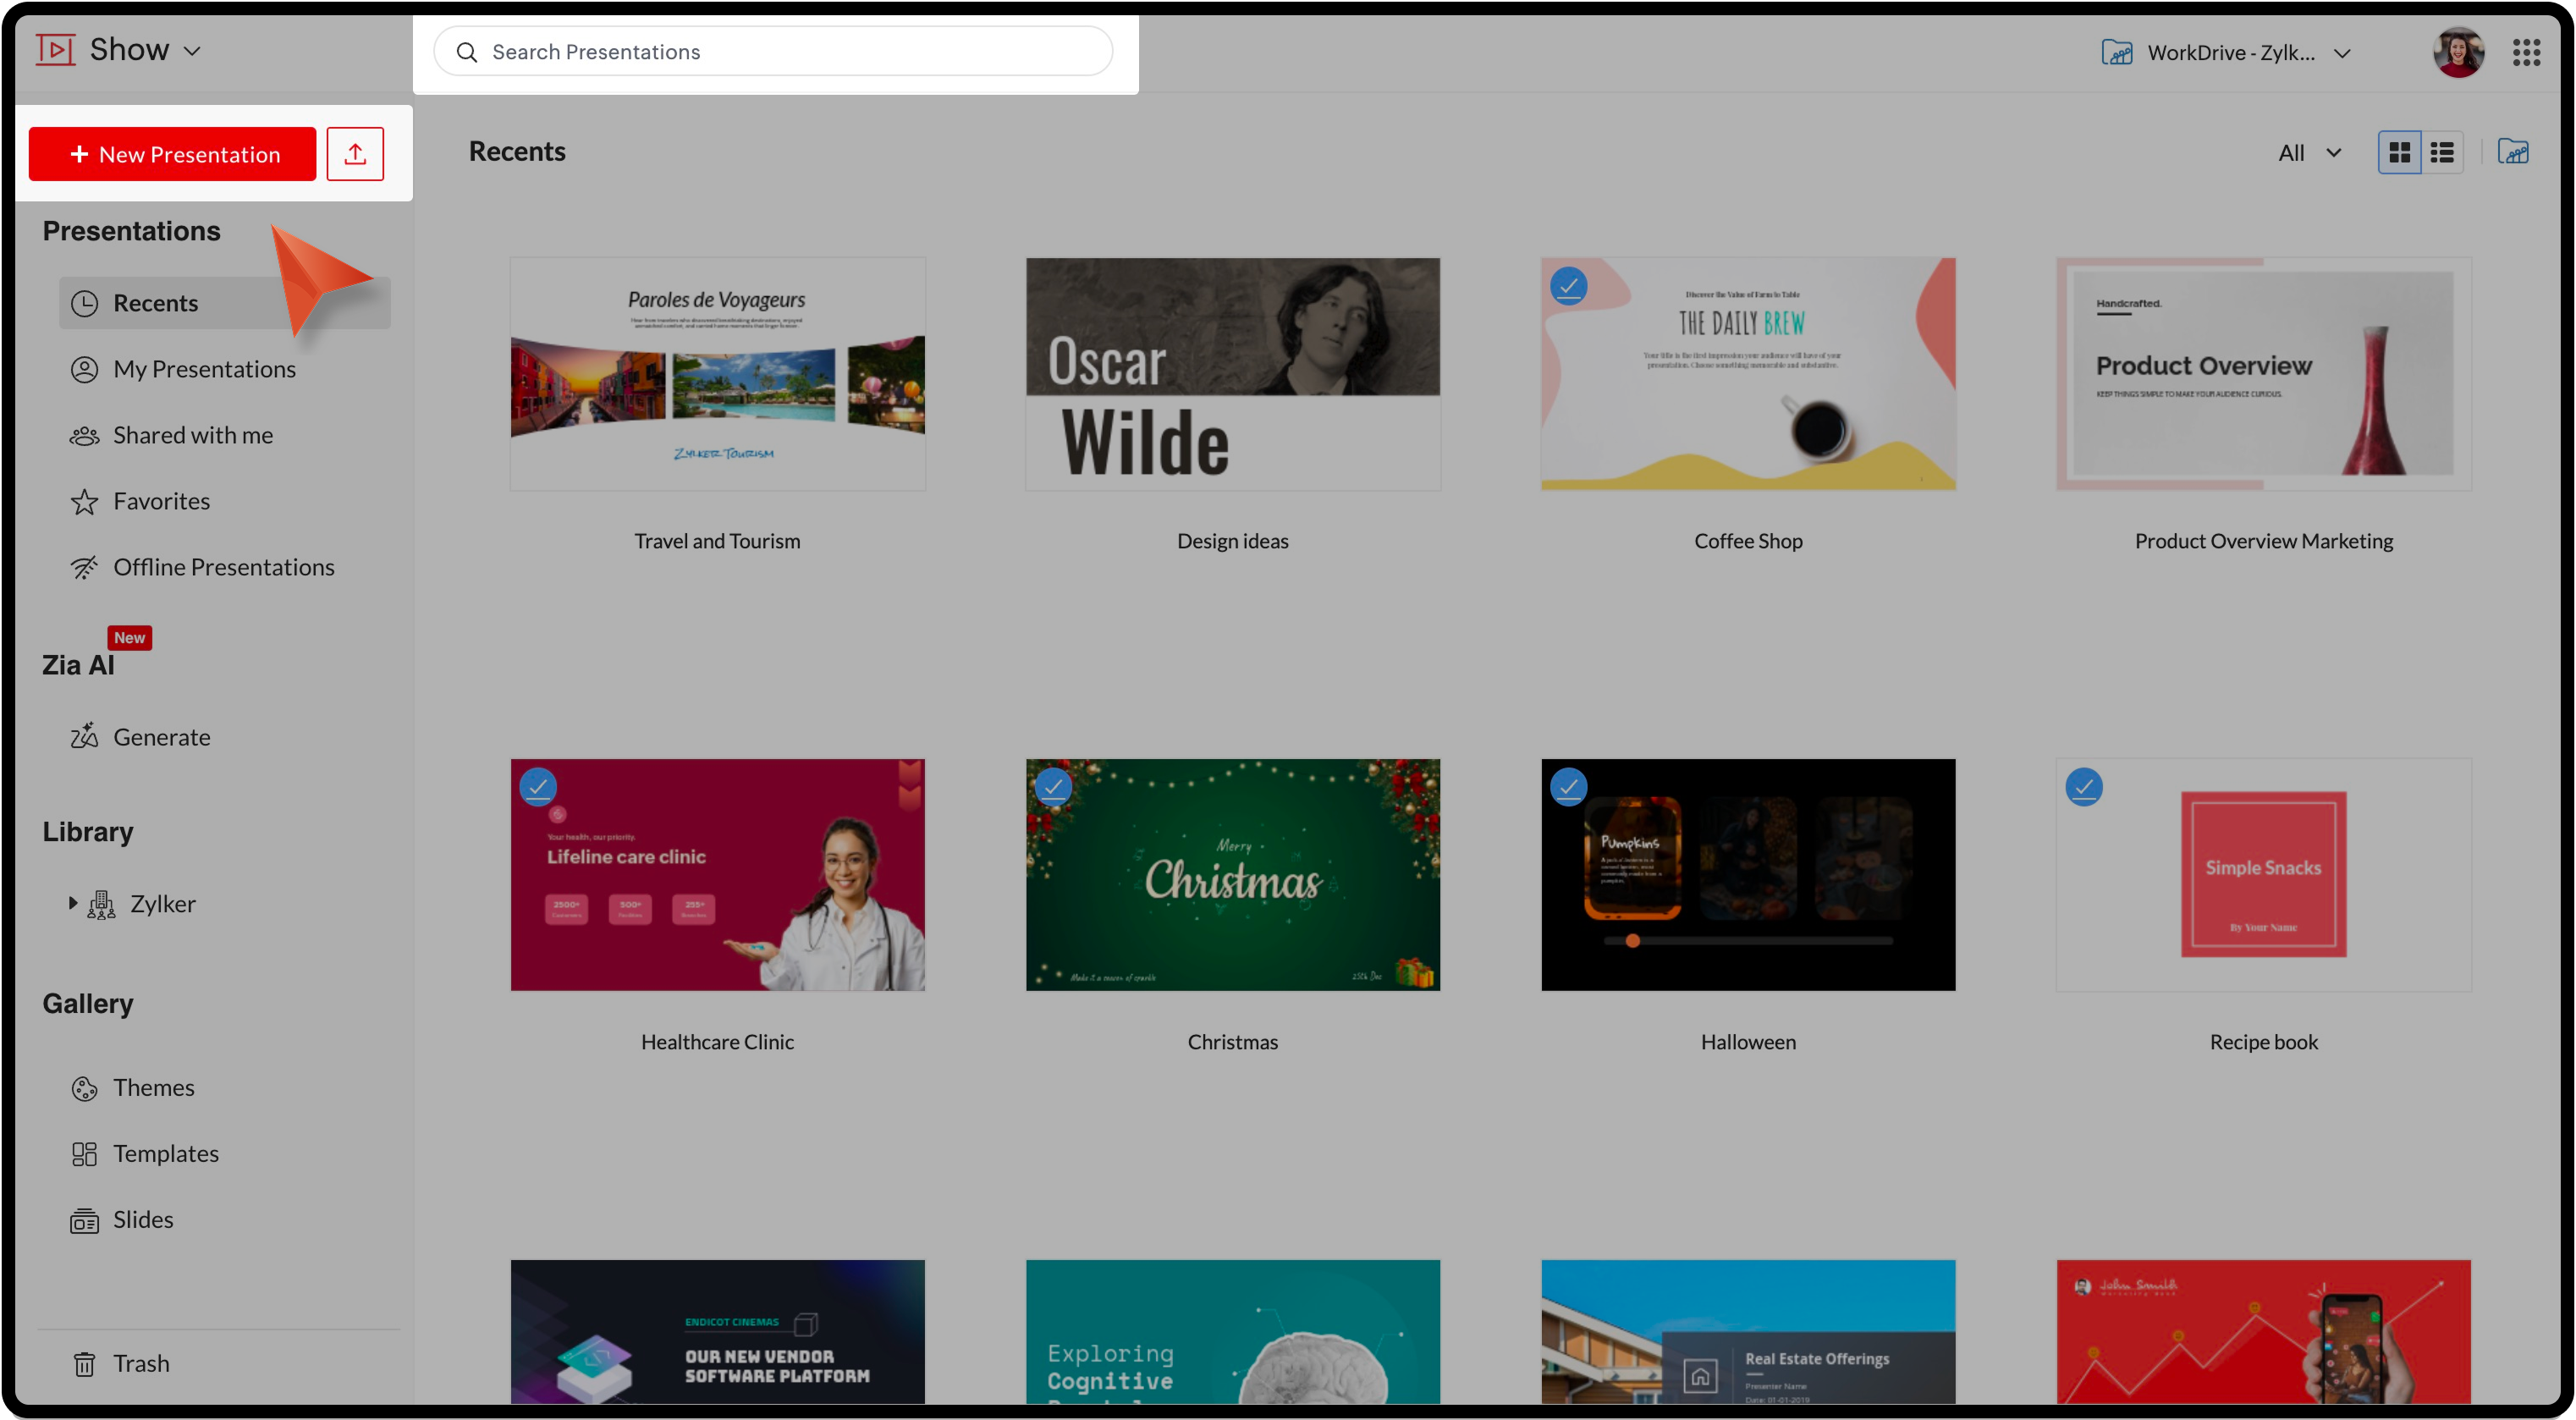
Show's listing page
As soon as you sign up or sign in to Show, the listing page will appear. Show's listing page contains the following components:
New Presentation button: Create a new presentation with the built-in themes, templates, and slide designs.
Upload icon: Import a ppt, pps, odp, sxi, pptx, ppsx, or potx presentation file into Show.
Search Presentations text field: To search for a specific presentation in the listing page.

In each of these below sections, you can search for a presentation; arrange them in Grid View or List View; sort them based on Date created, Date Opened, Date Modified or Name.
Recents section: Displays presentations recently worked on.
My Presentations section: Displays a list of all the presentations created by you.
Shared with me section: Displays a list of all the presentations shared with you.
Favorites section: Displays the list of presentations marked as favorites by you.
Offline presentations: Enable offline setup to access presentations when you are not connected to the internet. Offline setup is browser specific.
Zia AI: Generate complete presentations with AI.
Zia AI: Generate complete presentations with AI.
Library section: Lets you store and organize items under Templates, Slides, and Fonts. The pre-defined layouts and styles help your team quickly get started with the presentation.
Gallery section: Lets you create presentations using Show's in-built designs like Themes, Templates, and Slides. Select a design, enter a title for the presentation, and then click Create Presentation to open the slide deck in Show editor.
Trash: The presentations you've deleted will be moved to trash. You can restore this presentation within a period of 30 days after which it will be deleted permanently.

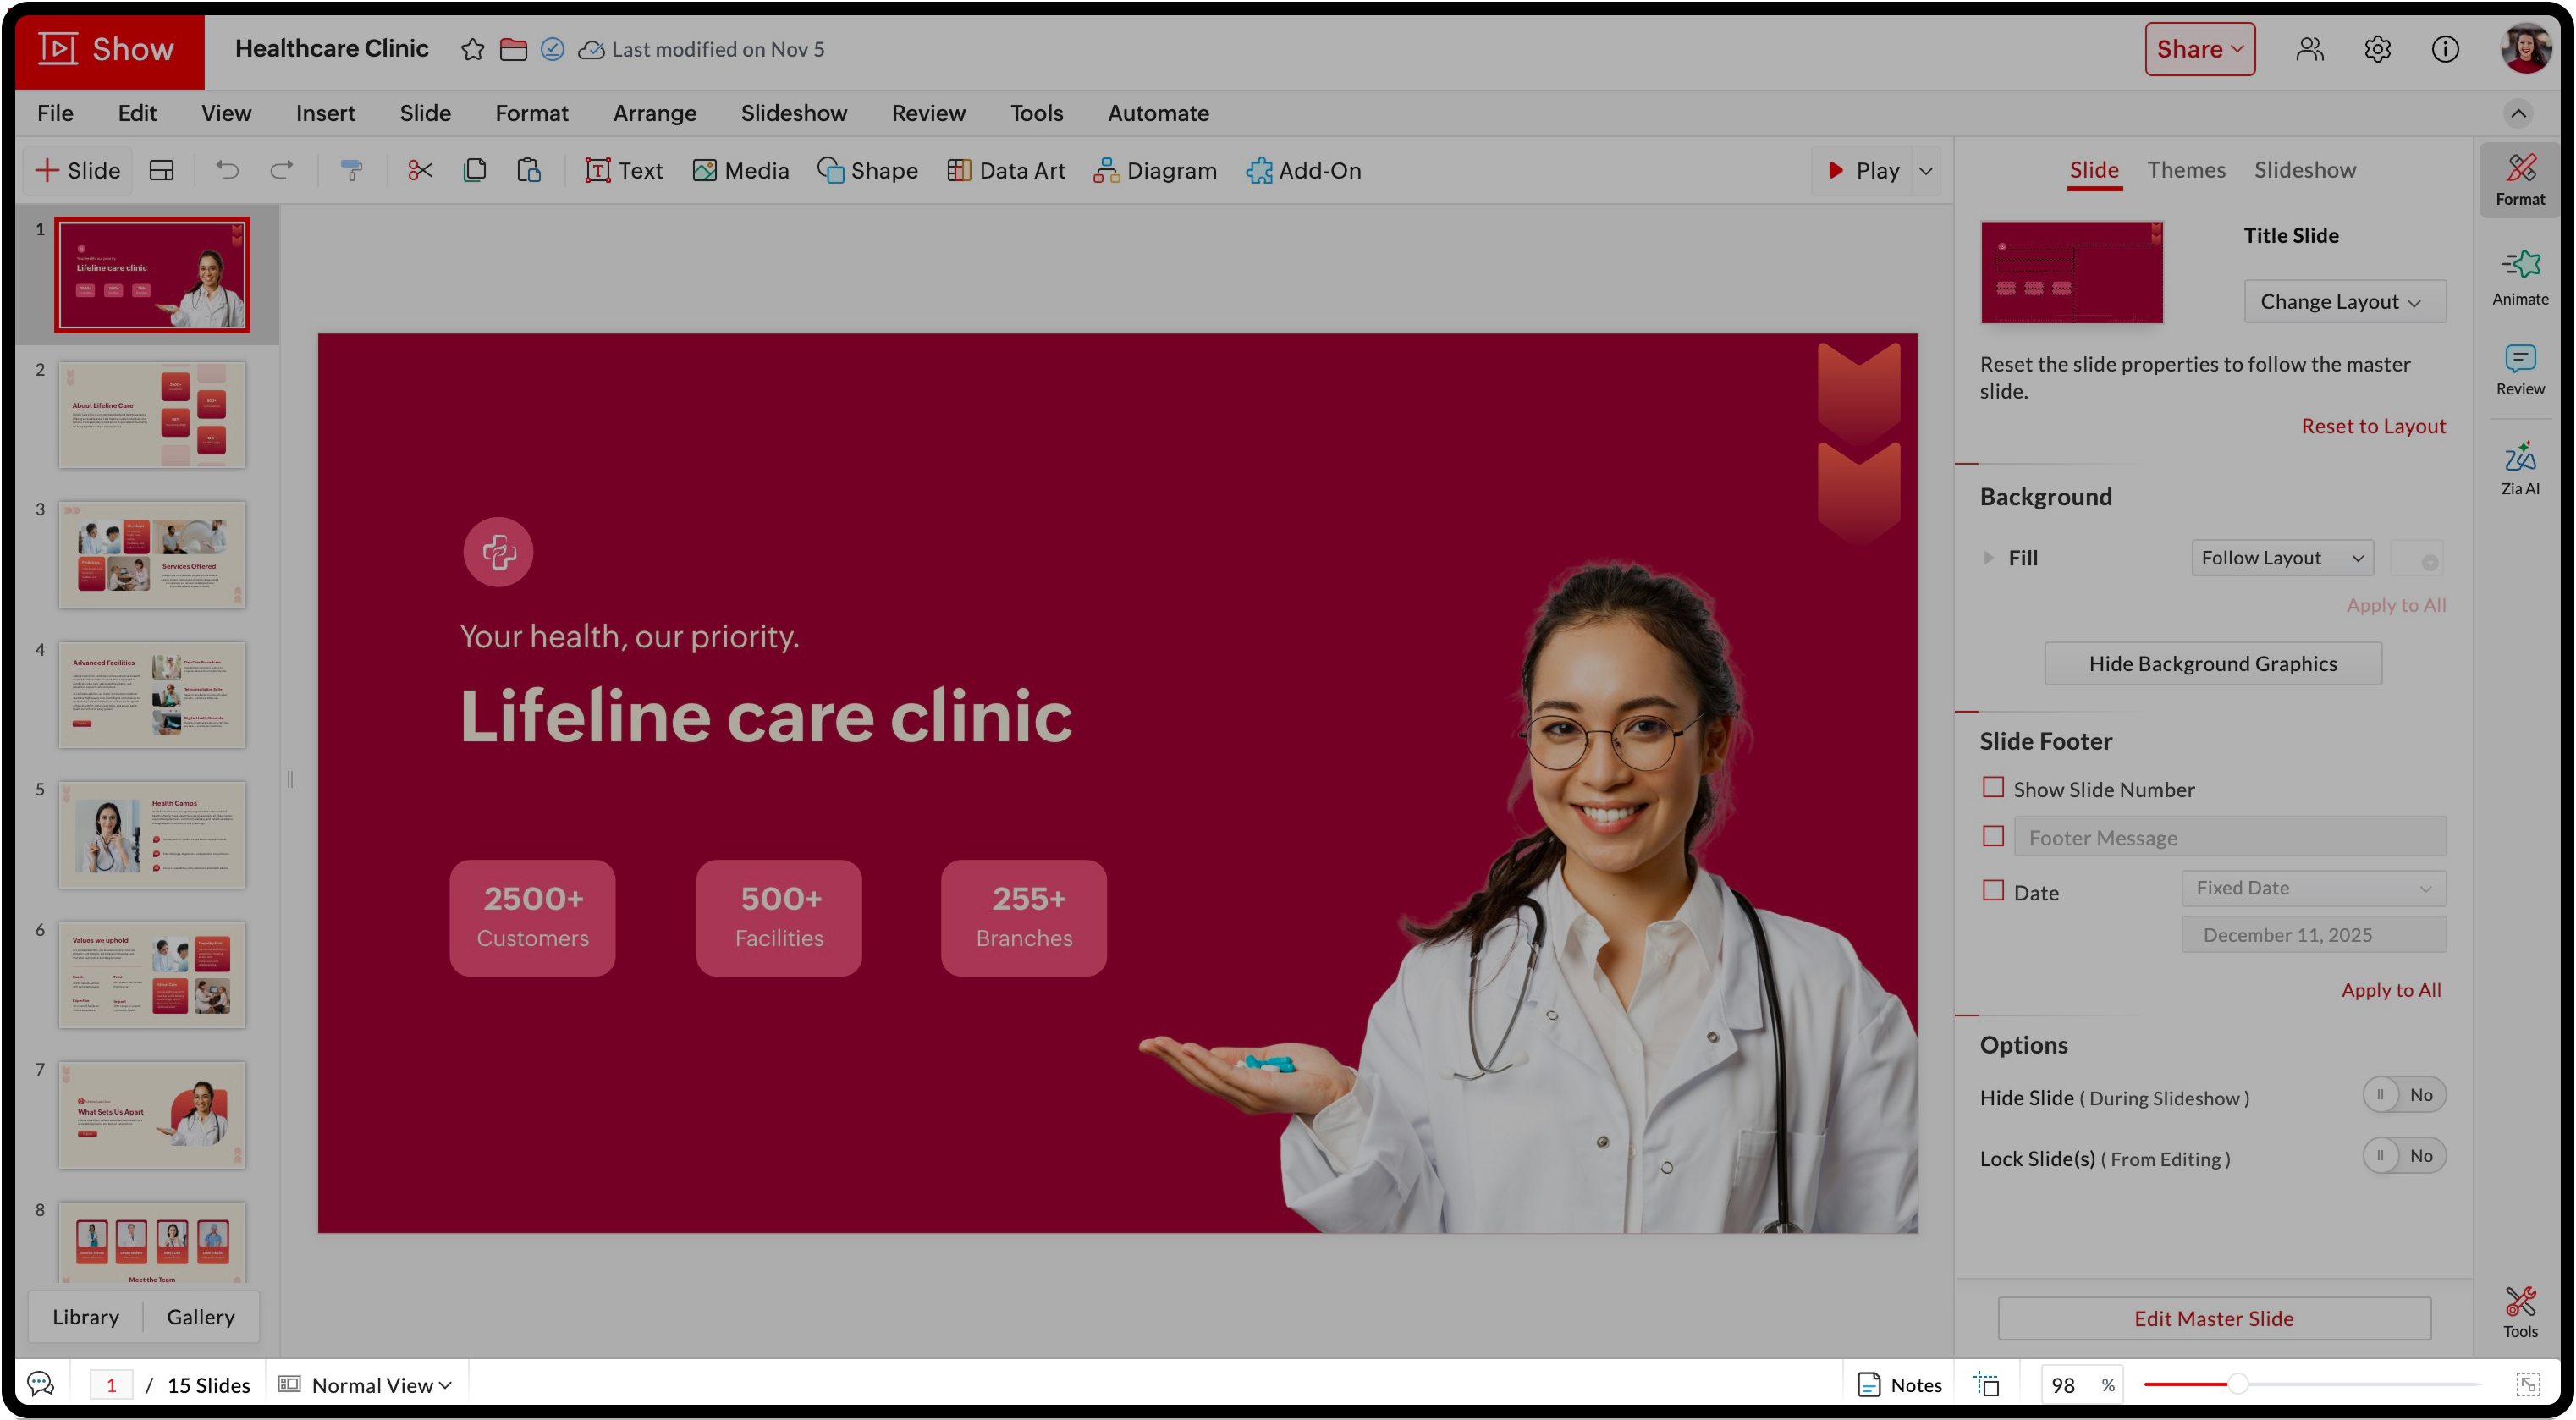
Show editor (Show's main interface)
Once you navigate to Show's main interface, you will find that it follows a minimalistic approach, and is made as clutter-free as possible to give you a seamless design experience.
The UI is divided into three sections: the thumbnail pane, the slide area containing a comprehensive toolbar, and the contextual pane, which makes the product navigation much more intuitive.
The thumbnail pane shows a preview of all the slides in the presentation. Using the Library | Gallery option in the bottom you'll be able to view the slides thumbnails and add slides to your presentation from the organization library or the Show gallery.
Menu bar
File: Open, import, copy, download, add to favorites, make the presentation available offline, share, publish, broadcast, print, access version history, manage Data Fields, and delete a presentation.
Edit: Undo, redo, cut, copy, paste, and delete the presentation.
View: Switch between Normal, Master, and Sorter views, enable rulers, and zoom in or out.
Insert: Add images, audio, video, data fields, embed, data art, and diagrams.
Slide: Add a new slide, duplicate, or delete slides. Also, hide or lock slides and download slides as an image or a pdf.
Format: Format slide elements, slide background, and theme.
Arrange: Align, flip, rotate, and arrange elements within the slide.
Slideshow: Play the presentation or open it in presenter view.
Review: Add and view comments.
Tools: Use spell check, personal dictionary, and find and replace.
Automate: Preview, merge, and manage data fields.
Insert pane
Quick tools
Inserting options:
Play options: Play the slides From Beginning or the current slide or in Presenter View.
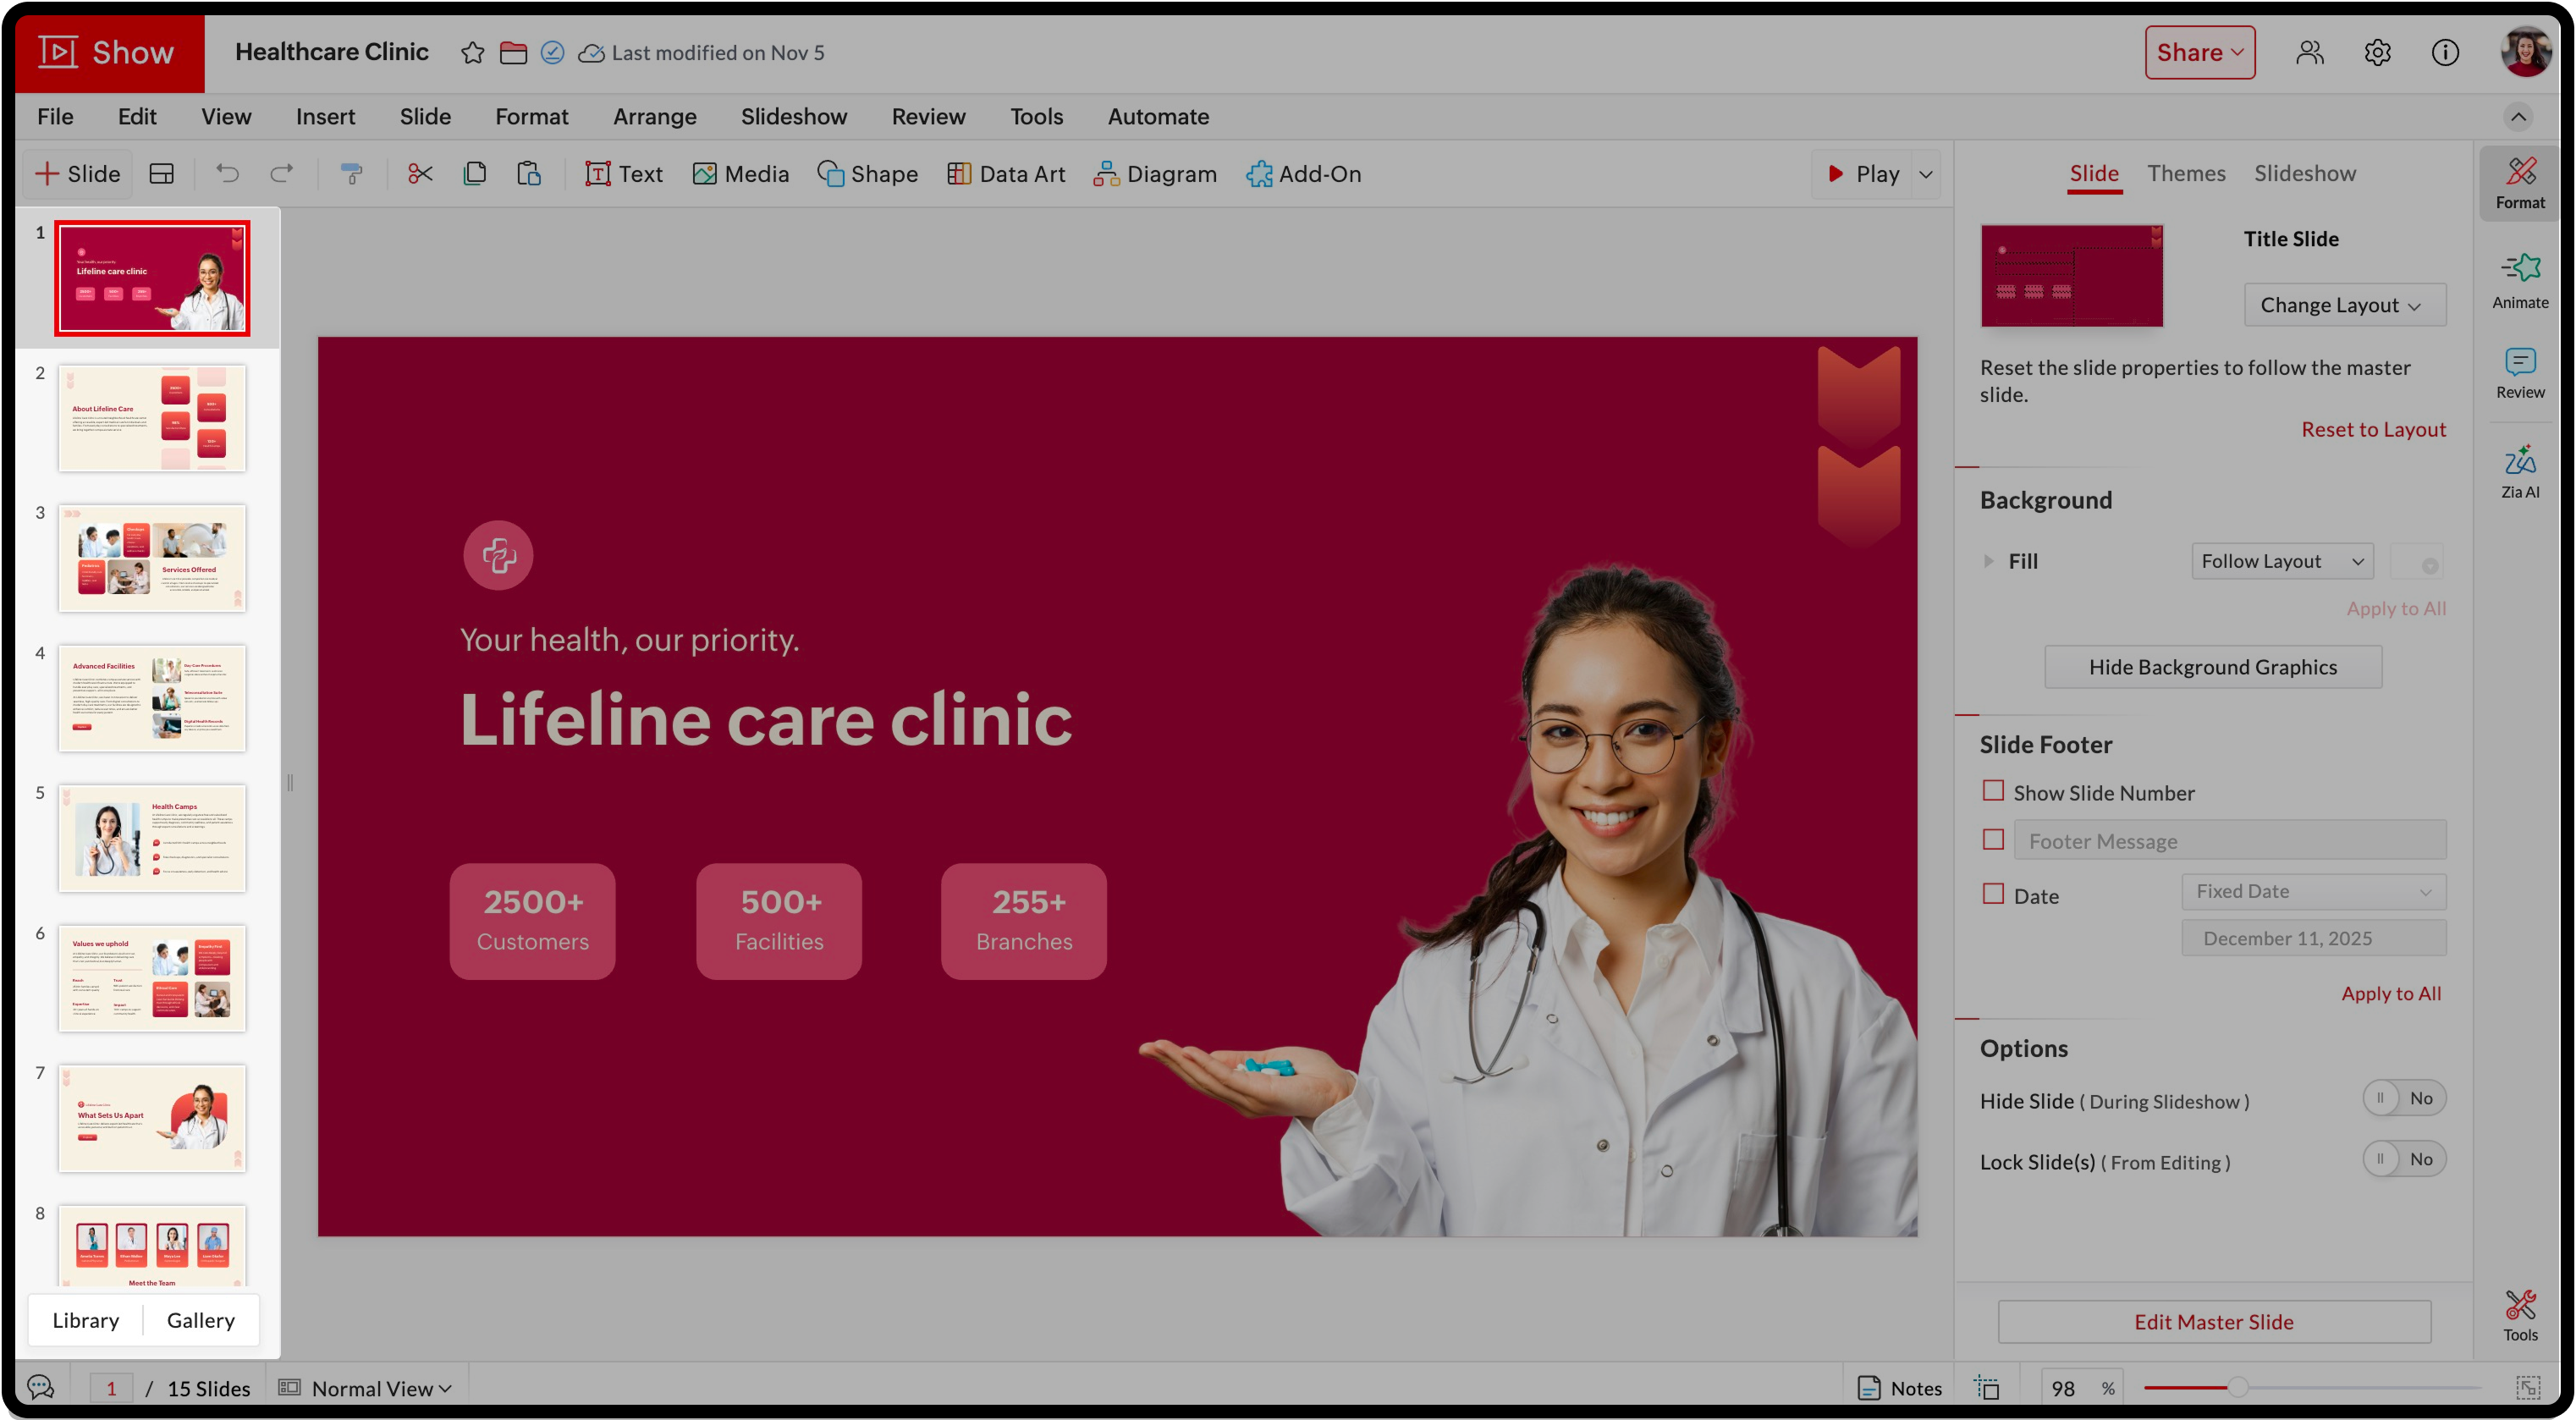
The Navigation pane
The navigation pane offers all the formatting, animation, and review options for both the slide and its objects. The grouping of design options into a separate toolbar helps you stay focused in your creation process since you do not have to search for editing tools anywhere else.
In the right pane, you'll find:
Format: Slide formatting options like Slides, Themes, and Slideshow and design element options can be viewed within Format.
Animate: Add animation effects to slides and animate different slide objects.
Review: View existing comments or add new comments..
Zia AI: Generate slides, content, and images with AI. Also enhance, shorten, summarize, or list the existing content as bullets.
Tools: Access spell check, personal dictionary, and find and replace.
Share
You'll find the below sharing options in the top-right corner.
Invite Collaborator: Share presentations with access permissions.
Publish: Publish a presentation within the organization or to the external world. Once you publish the deck, you can view its link, embed code, and other details using the Published Details button.
Get Embed Code: Copy the embed code of the published presentation.
Broadcast: Broadcast presentations to remote audience.
Mark as final: Mark the presentation as final once the slides are finalized to disable editing.
Merge Fields: Merge external data fields to create customized presentations.
At the bottom of the editor screen, you will find more components, including:
Go to slide: Displays the current slide number with respect to the total number of slides in the presentation.
Go to slide: Displays the current slide number with respect to the total number of slides in the presentation.
View drop-down: Displays the Normal View, Master View, and Sorter View.
Notes: Enter notes in the slides.
Grids and Guides: Align elements with respect to each other in the slide.
Zoom slider & Fit to screen icon: Get a closer look at your slide elements, then resize them to fit within the available display area (such as a projector or slide area), regardless of the current zoom level.