Organization's basic information

This page is applicable for Bookings 2.0 version only. To view the equivalent Bookings 1.0 version, please check this page.
1. In a nutshell
Basic Information of your organization contains all the fundamental details about your business, including the business name, contact number, and email address details. Additionally, it has timezone, time format, and currency details that are applied throughout the Bookings org. It has the Zoho Bookings Branding option, which can be enabled to remove the Powered by Zoho Bookings text on your booking pages.
2. Feature availability
- Available for all plans
- Super admins and admins can edit this information
- Workspace admins and managers can view this information
- Staff will not be able to modify the information
3. Steps to edit business information
- Click the Admin Center icon
in the top-right corner of the Bookings menu bar.
- Under Organization, select Basic Information. Here, you can edit your business details.
- Click the Edit button on the right to edit the business information.
3.1 Business Name
Enter your business name here. This will be reflected in various places, such as the booking page. It can have 2 to 50 characters.
3.2 Email
This is the business email address. This can be used as the sender email for all notification emails sent from your Zoho Bookings account.
Note:
Only users who have a Premium plan with Zoho Bookings can add a Business email address.
An email address can be used only in any ONE of the places: business, workspace, or users. If the email address is already used in the workspace or user, it cannot be added to the business. You can either use a different email or remove it from your workspace or user email.
To add business email
- Click the Edit button in Basic Information.
- Enter the email address under Email and click Verify.
- Enter the 6-digit verification code that is sent to the required email address and click Verify. The verified email address will be added as a business email.
Alert: Email authentication can be done to avoid emails being categorized as spam. Please contact our support team (support@zohobookings.com) to perform this.
3.3 Contact Number
This refers to the official contact number for your business. The contact number will be displayed on the booking page, and customers can call you on the number specified here for appointment booking, rescheduling, or cancellation.
3.4 Time Zone
The time zone specified here applies to your business timings. This will be the default time zone for all the users. Super admins and admins can change the timezone if required, and it will be applied to all the users. Zoho Bookings automatically converts the appointment times for customers who book appointments from a different time zone.
3.5 Currency
Specify the currency in which your appointments are charged. Currency is selected while setting up the account. It can be changed by admins before any payment gateway integration. Once a payment gateway is integrated, it can only be changed by the Zoho Bookings team on request.
3.6 Start of the Week
Value specified here will be considered as the first day of the week. For example, If you select Monday, Zoho Bookings will display Monday in the first column in the calendar view.
3.7 Time Format
Selected time format will be applied to all time values in Zoho Bookings. For example, when a customer is booking an appointment, all time slots will appear in the format selected here.

Time Format is set to the 12-hour format by default. Users can change this format at any point of time.
3.8 Zoho Bookings Branding
This option decides whether the branding text – "Powered by Zoho Bookings" on the booking page needs to be shown or removed.

Availability: This option is only available for Premium users.
Zoho Bookings Branding button is Enabled by default, which would display the Zoho branding text on the booking pages.
The Zoho Bookings branding text appears at the footer of the booking page when the toggle button is enabled.
To remove branding text from the bookings page, this button should be disabled.
Once the toggle button is disabled, the branding text is removed.
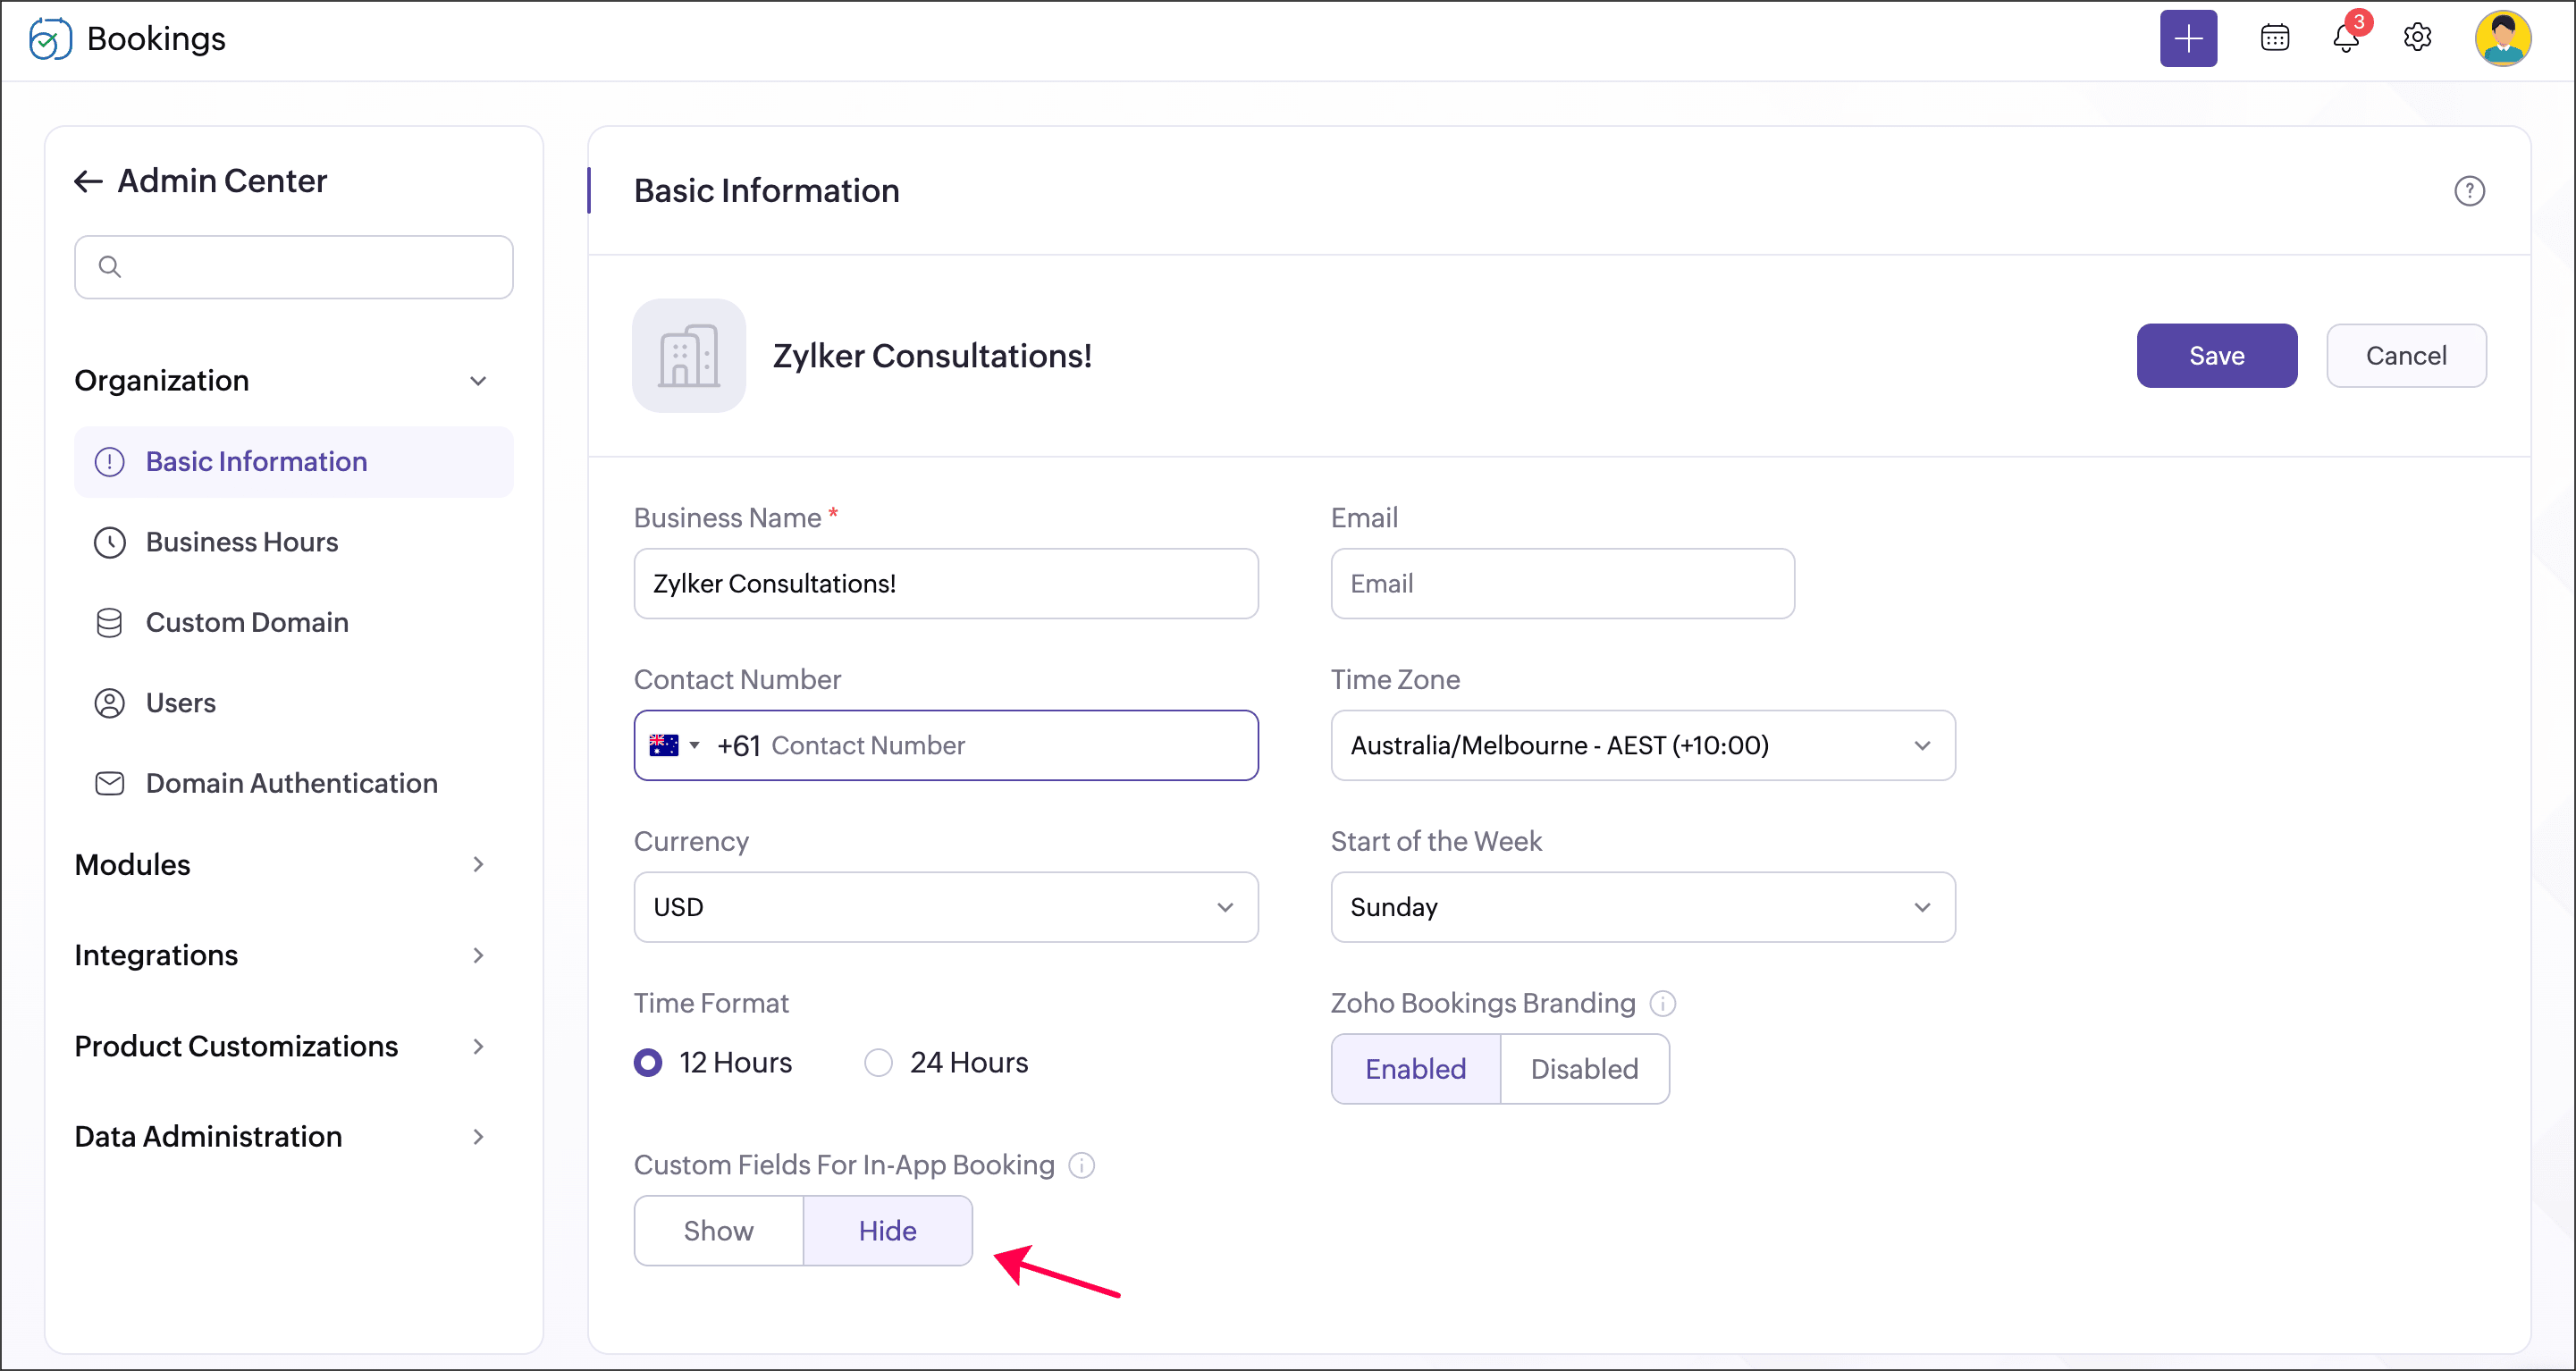
3.9 Custom Fields For In-App Booking
This option allows you to include custom fields like company name, customer id etc when adding appointments within the application for your customers.
Info : This option will be shown by default, which would display the custom fields while adding appointments within the app.

Note: Custom fields configured under each event type will appear in the in-app booking form when appointments are added by users inside the application.
In-app custom fields ensure that manual bookings within the app maintain the same level of data collection as customer-facing bookings through the booking page.
To hide custom fields while adding appointments within the app, you can enable the hide option to remove them from the in-app booking form.
3.10 Address
Specify the official business address that will be displayed on your booking page, helping customers easily view and locate your business. Super admin and admins can update the business address at any time. The address field allows users to enter complete location details, including Address Line 1, Address Line 2, City/District, State/Province, Postal Code, and Country.
3.11 Centralized Customer Form
This option determines whether a common booking form is used across all event types. When enabled, a single centralized booking form is applied across all event types, ensuring consistent customer information is collected. When disabled, each event type can have its own booking form with fields configured separately. By default, this option is enabled, so all event types use the centralised booking form.
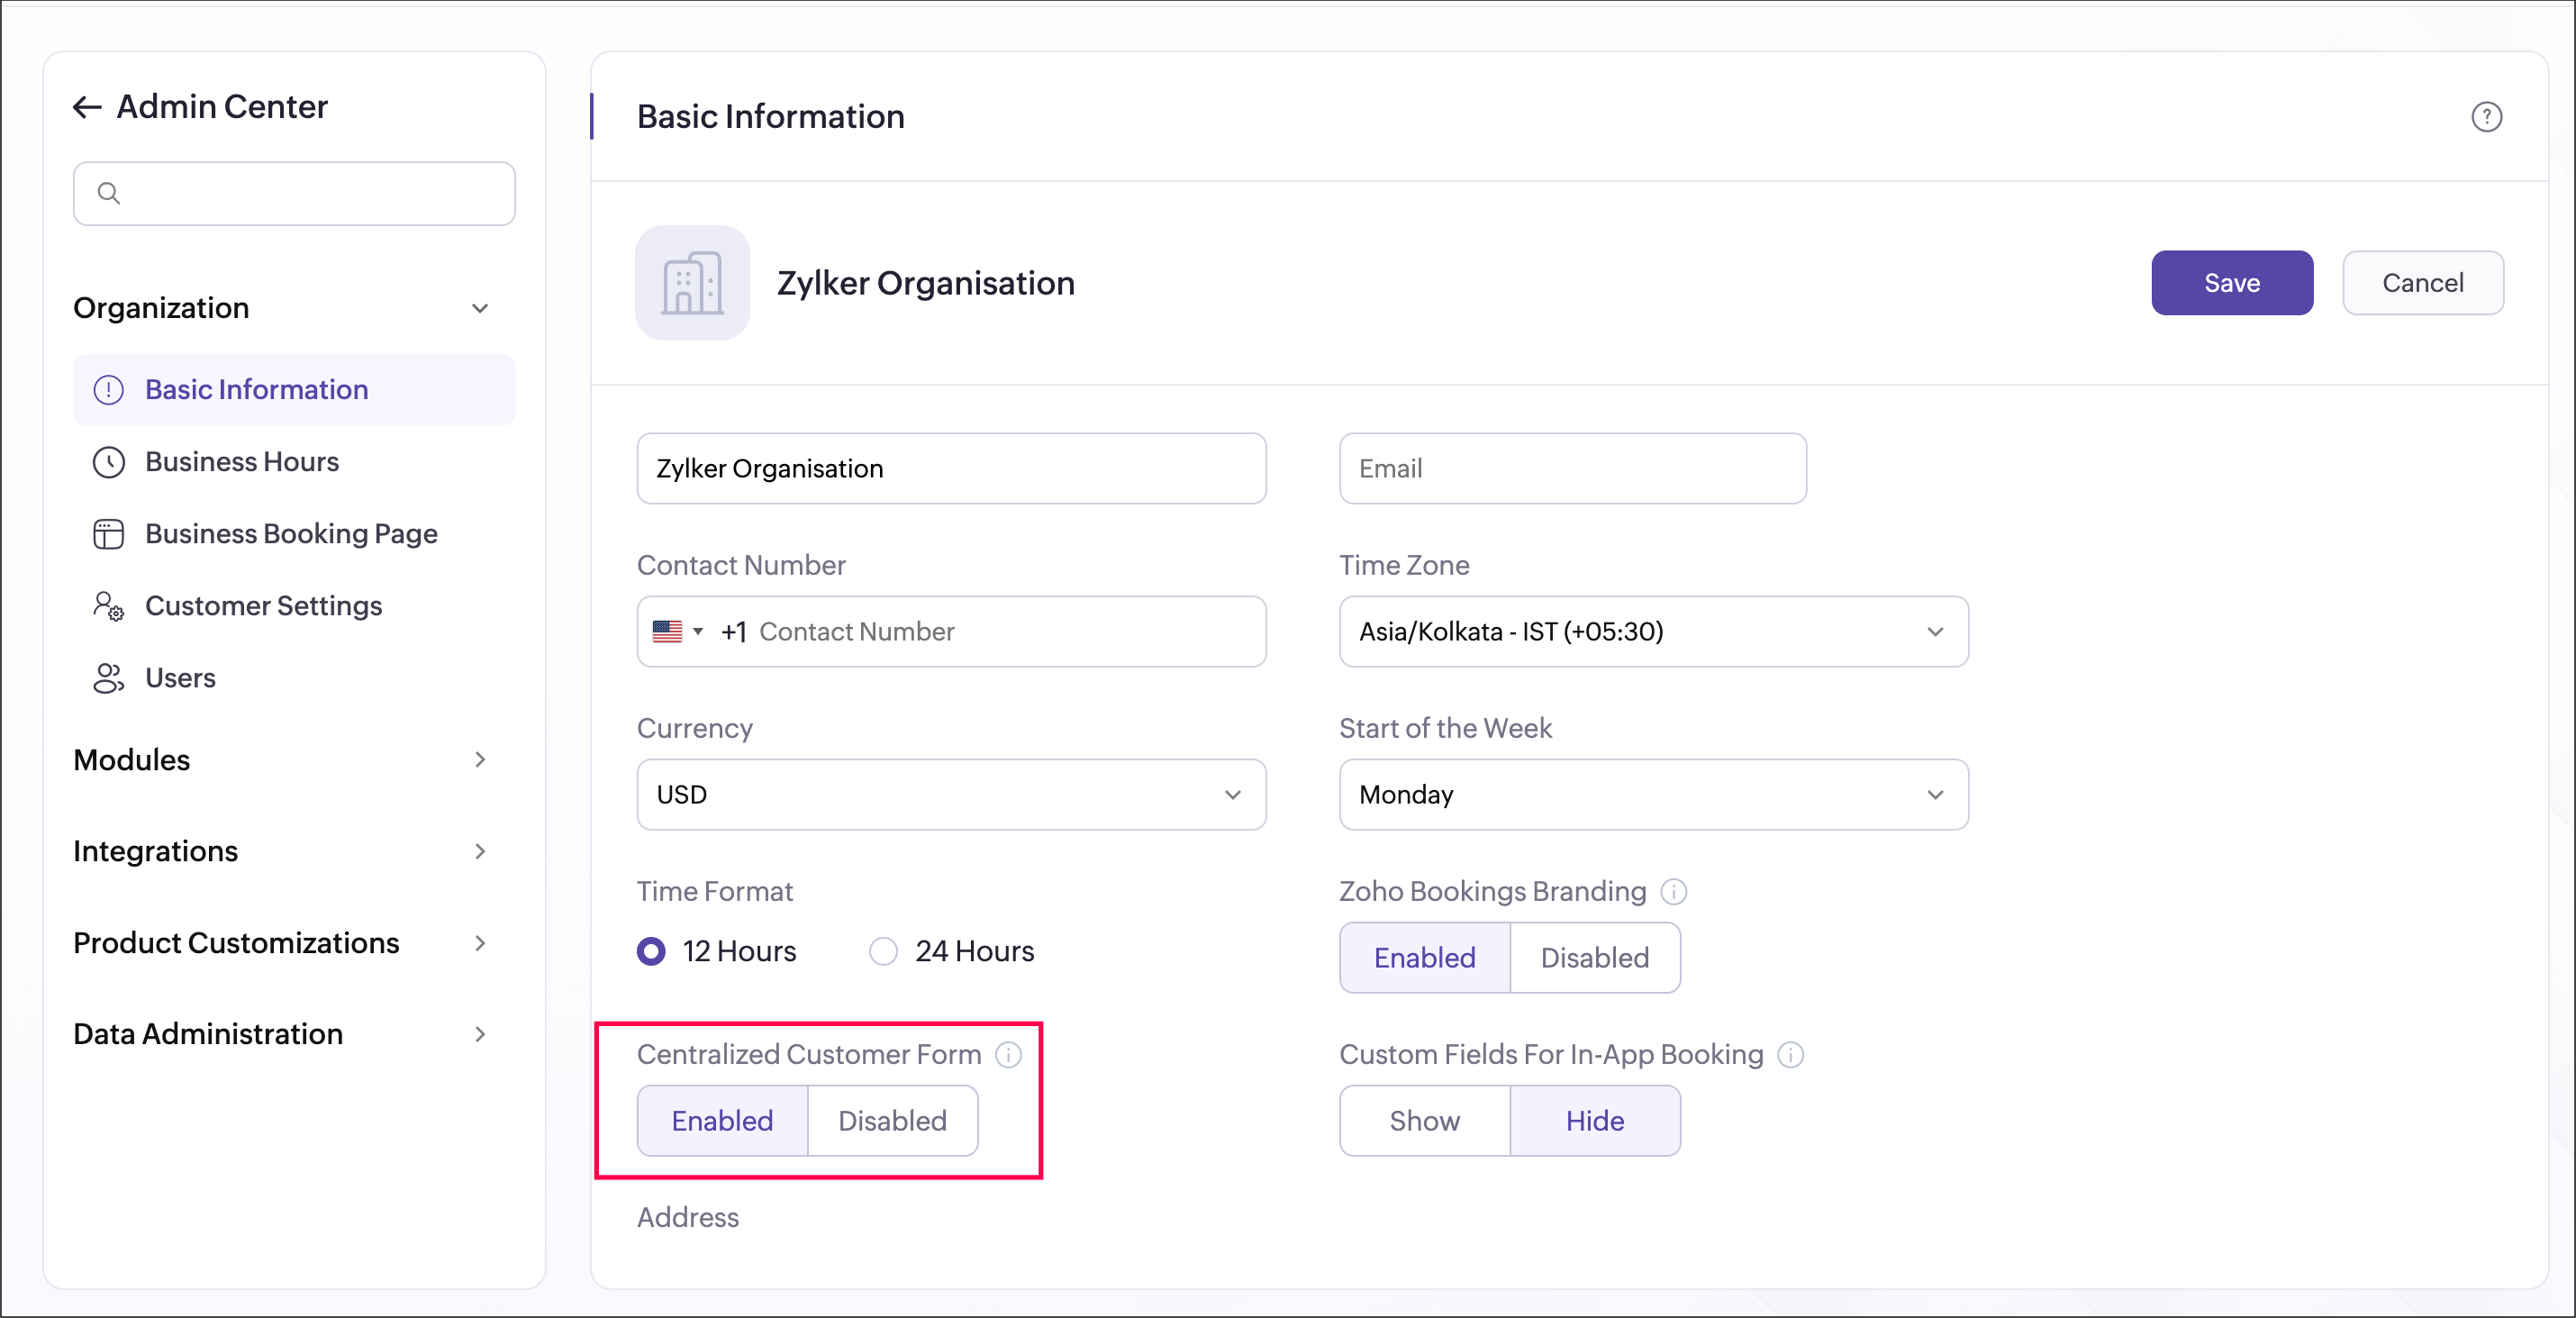
You can add and manage the fields used in this centralized form under Customer Settings in the Admin Center . To stop using a common booking form across event types, you can disable this option. Once the toggle is disabled, each event type will have its own booking form instead of using a centralized one.