Zoho Bookings browser extension
1. In a nutshell
You can install Zoho Bookings extension on your browser and manage your appointments effortlessly without switching browser tabs.
2. Feature availability
3. Overview
Zoho Bookings browser extension brings the convenience of managing the appointments directly from any tab, thereby boosting your productivity.
With this extension, you can:
- View and add appointments right from any tab of your browser
- Get instantly notified about your bookings
- Add break time, time off, and special working hours
- Share booking page links
- Mark frequently-used booking page links as favorite for quick access
- Copy time slots and paste them in an email and send them to your clients
- Access Bookings and share links directly from Gmail and LinkedIn.
4. Steps to install the browser extension
To install the browser extension, follow the below steps.
- Install the Bookings browser extension and click Add to Chrome. This adds the extension to your browser.
- We recommend that you pin the Bookings extension for a fast scheduling experience. You can do so by clicking the extension icon to the right of your address bar, then pinning the icon next to Zoho Bookings.
5. What you can do with this extension?
5.1 Share booking page links
You can view and share the booking page links/URLs of workspaces, event types, users, and resources under the Booking Page tab. Use the drop-down to choose the link type.
- The Booking page link can be copied by clicking the copy
icon.
- The respective booking page can be accessed by clicking the Book button.
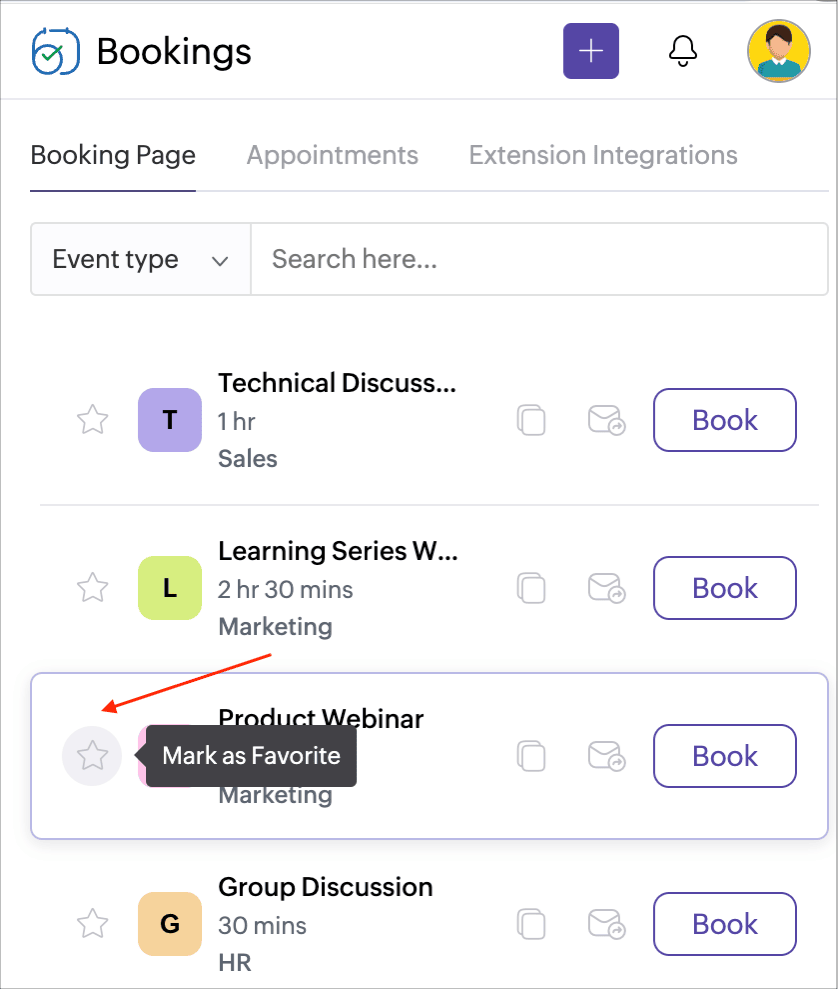
5.2 Mark as favorite
You can mark the frequently-used booking pages as favorite by clicking the star  (Mark as Favorite) icon. This brings those booking pages to the top of the list for easy access.
5.3 View appointments
You can view the appointments by selecting the date (either use the arrow or click on the date). The colors denote the status of the appointment.
To view only your appointments, click the Show my appointments only checkbox at the bottom.
5.4 Quick links to add appointments and more
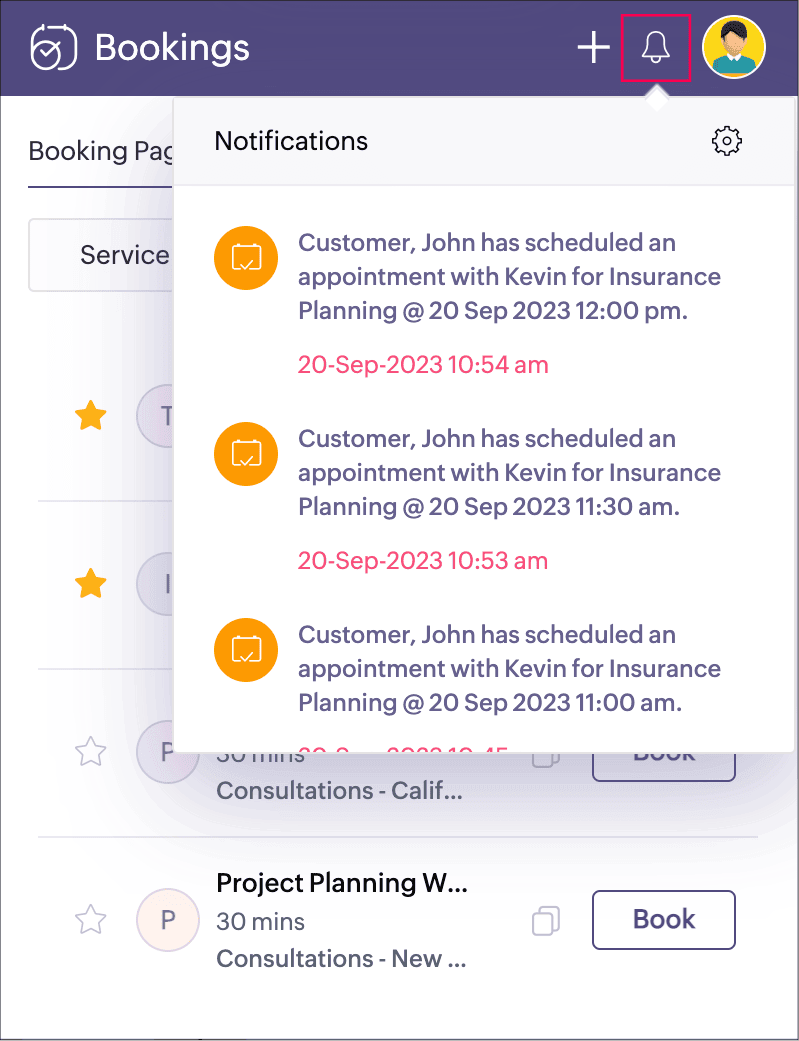
5.5 View notifications
Click the notification  icon to view your notifications. To check if you have any notifications, click the browser extension
  icon. This shows the number of unread notifications.
5.6 Copy time slots to email
From the Bookings browser extension, you can choose time slots and add them to your email. This allows you to offer the customer multiple options so they can select one that is most suitable for their schedule.
To copy time slots:
- Open the Bookings browser extension. In the Booking Page tab, click the Copy Time Slots icon
as shown below.
- Select the date and time slots. You can select up to 10 slots in 3 days. Click Copy Slots.
Note: The time slots shown indicate overall event type availability, and not the availability of individual users. - Then paste the copied slots into your email and send them to your customers.
The customer can choose from the provided slots and make the booking.- Time slots can be copied only for Event Type booking pages.
- When a customer selects a time slot that has already been booked, they will be redirected to the booking page to choose another time.
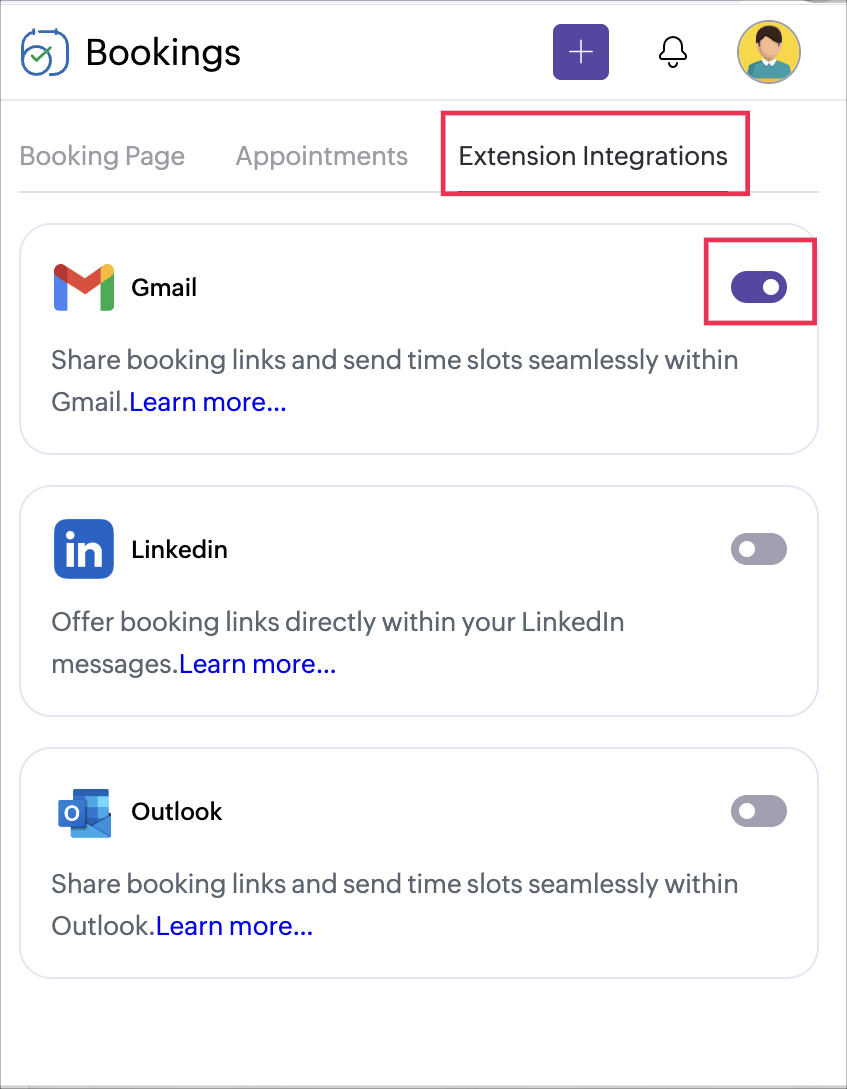
5.7 Gmail integration
You can seamlessly access your Bookings browser extension right from your Gmail. This allows you to share your booking page links and send time slots quicker than ever. To enable the integration, click the Extension Integrations tab in the extension and turn on the Gmail toggle.
Once the Gmail integration is enabled, the Bookings icon will appear in your Gmail. This lets you share the booking page links and send time slots via email.
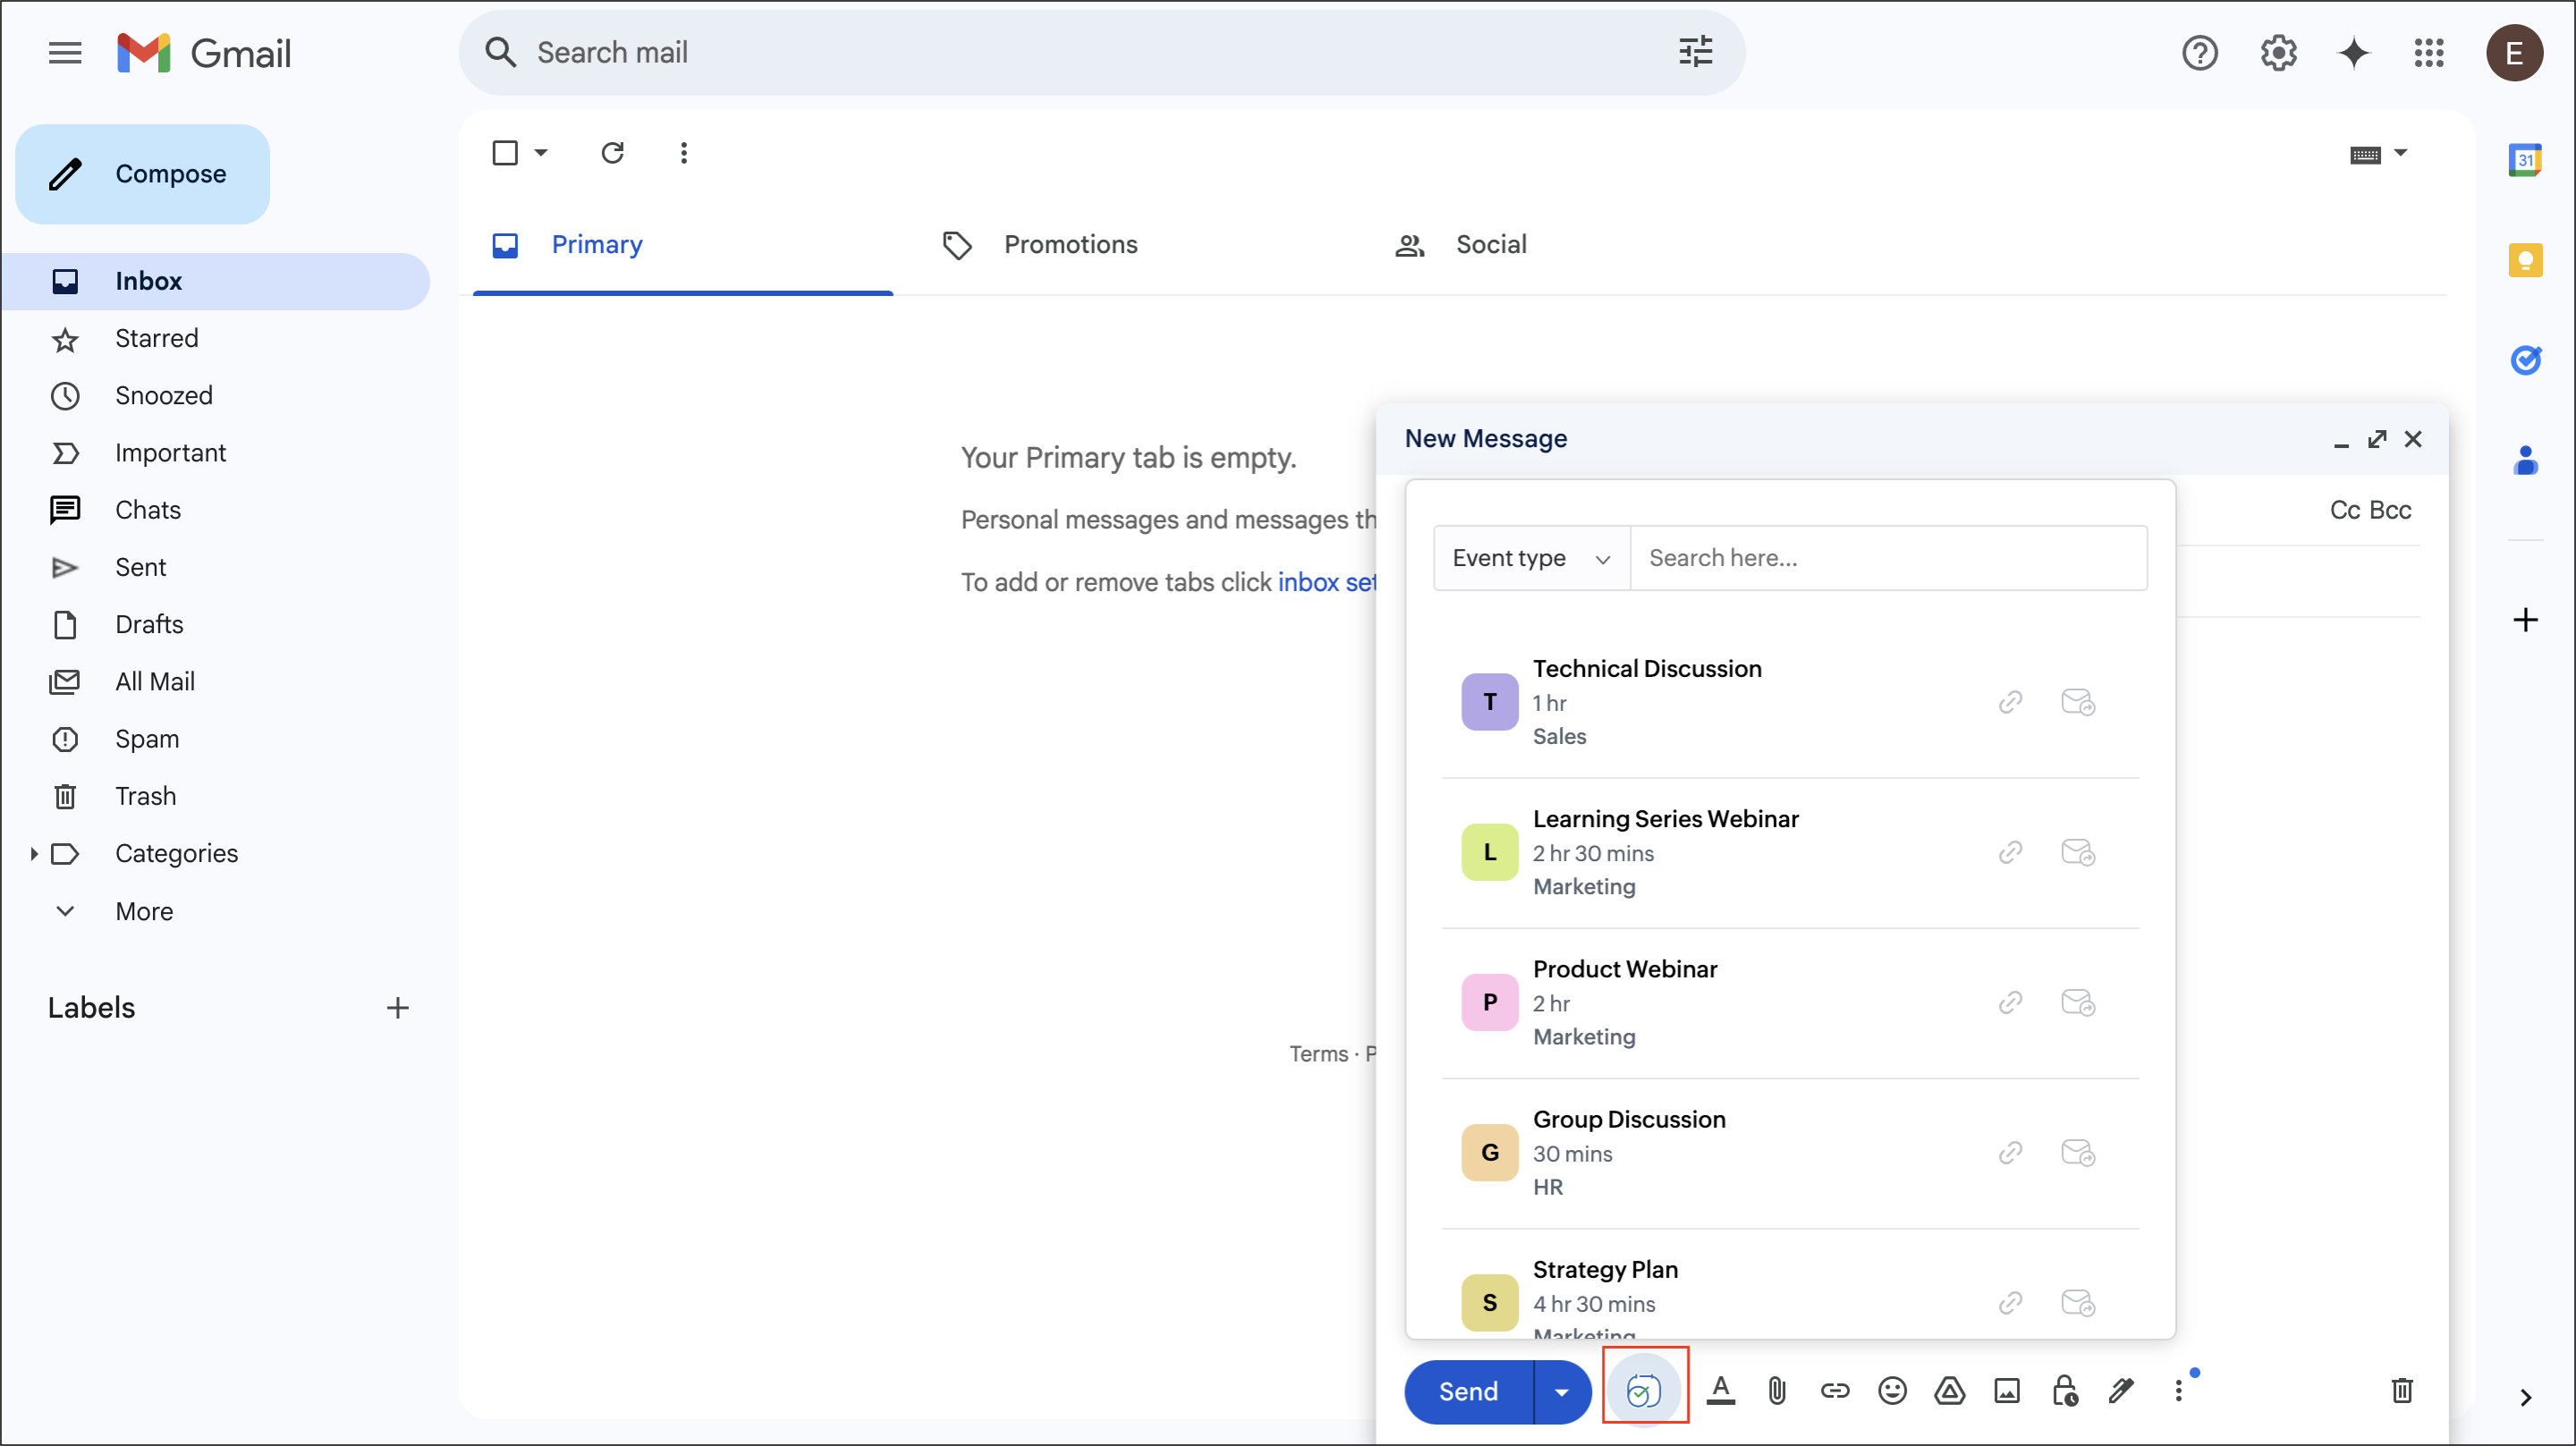
Once the Gmail integration is enabled, the Bookings icon
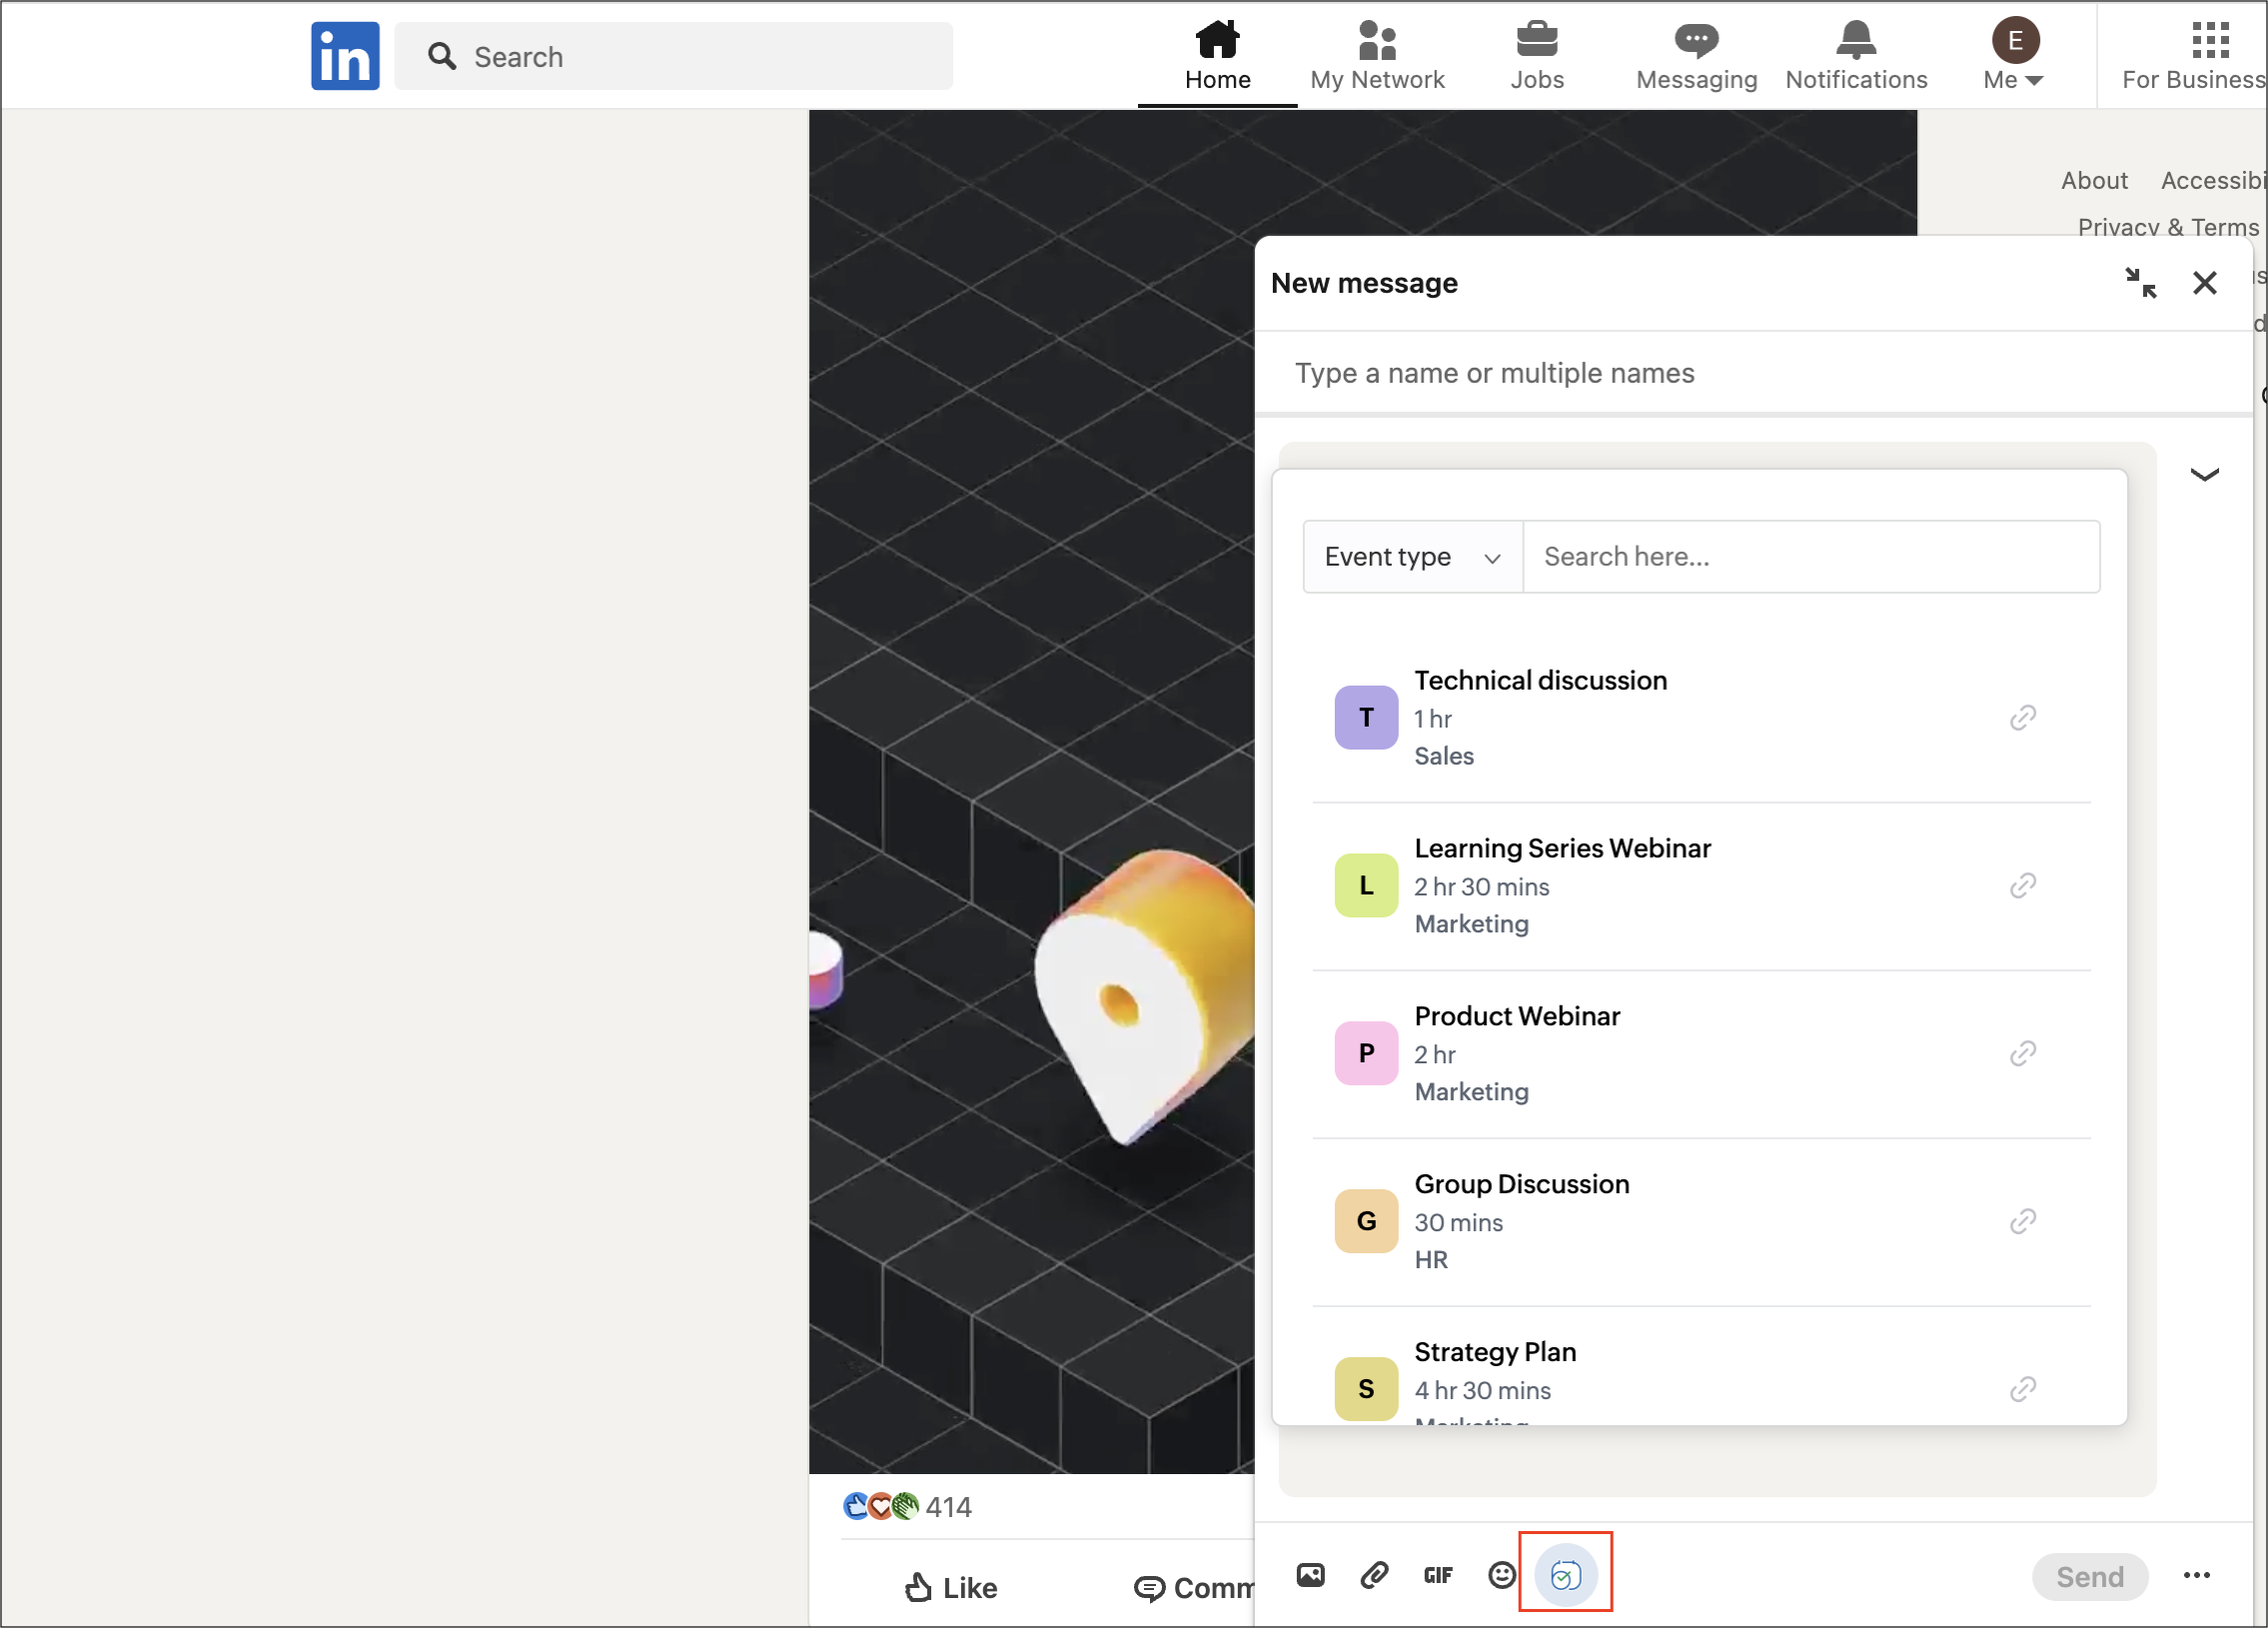
5.8 LinkedIn integration
Access the Bookings browser extension directly from your LinkedIn messaging window to quickly share your booking page links without switching tabs. To enable this integration, click the Extension Integrations tab in the extension and enable the Linkedin Messaging toggle.
Once the LinkedIn integration is enabled, the Bookings icon appears in your LinkedIn messaging window. Upon clicking it, you can choose the required booking page links and paste them directly in your LinkedIn messages.
5.9 Outlook integration
You can quickly access the Bookings browser extension within your Outlook inbox, making it easier to share your booking page links and available time slots while composing emails. To enable the integration, click the Extension Integrations tab in the browser extension and turn on the Outlook toggle.
Once the outlook integration is enabled, you’ll see the Bookings icon
Please note that Gmail, LinkedIn and Outlook accounts do not need to be added in your browser extension. Once the integration is enabled, it automatically works on the Gmail, LinkedIn or Outlook profile that has been logged in on the current browser tab.