Zoho Assist Integration

Super admins and admins can configure, view and modify the Zoho Assist integration. Managers & Staff will not have access to this information.
Zoho Bookings allows support, sales and other customer-facing teams to offer remote consultations through appointments by integrating with Zoho Assist. Zoho Assist is our in-house cloud-based remote assistance software. With this integration in place, businesses can help their customers schedule screen sharing sessions or remote support sessions with them.

This integration requires that you have a suitable plan to schedule remote support and screen sharing sessions.
The Flow
Watch how it's done
Setting up Zoho Assist
Creating a session with Zoho Assist involves the steps below:
I. Enable the integration
1. Click Integration on the top right corner and then click Others on the left side panel. You will see Zoho Assist listed under the Connections Available section.
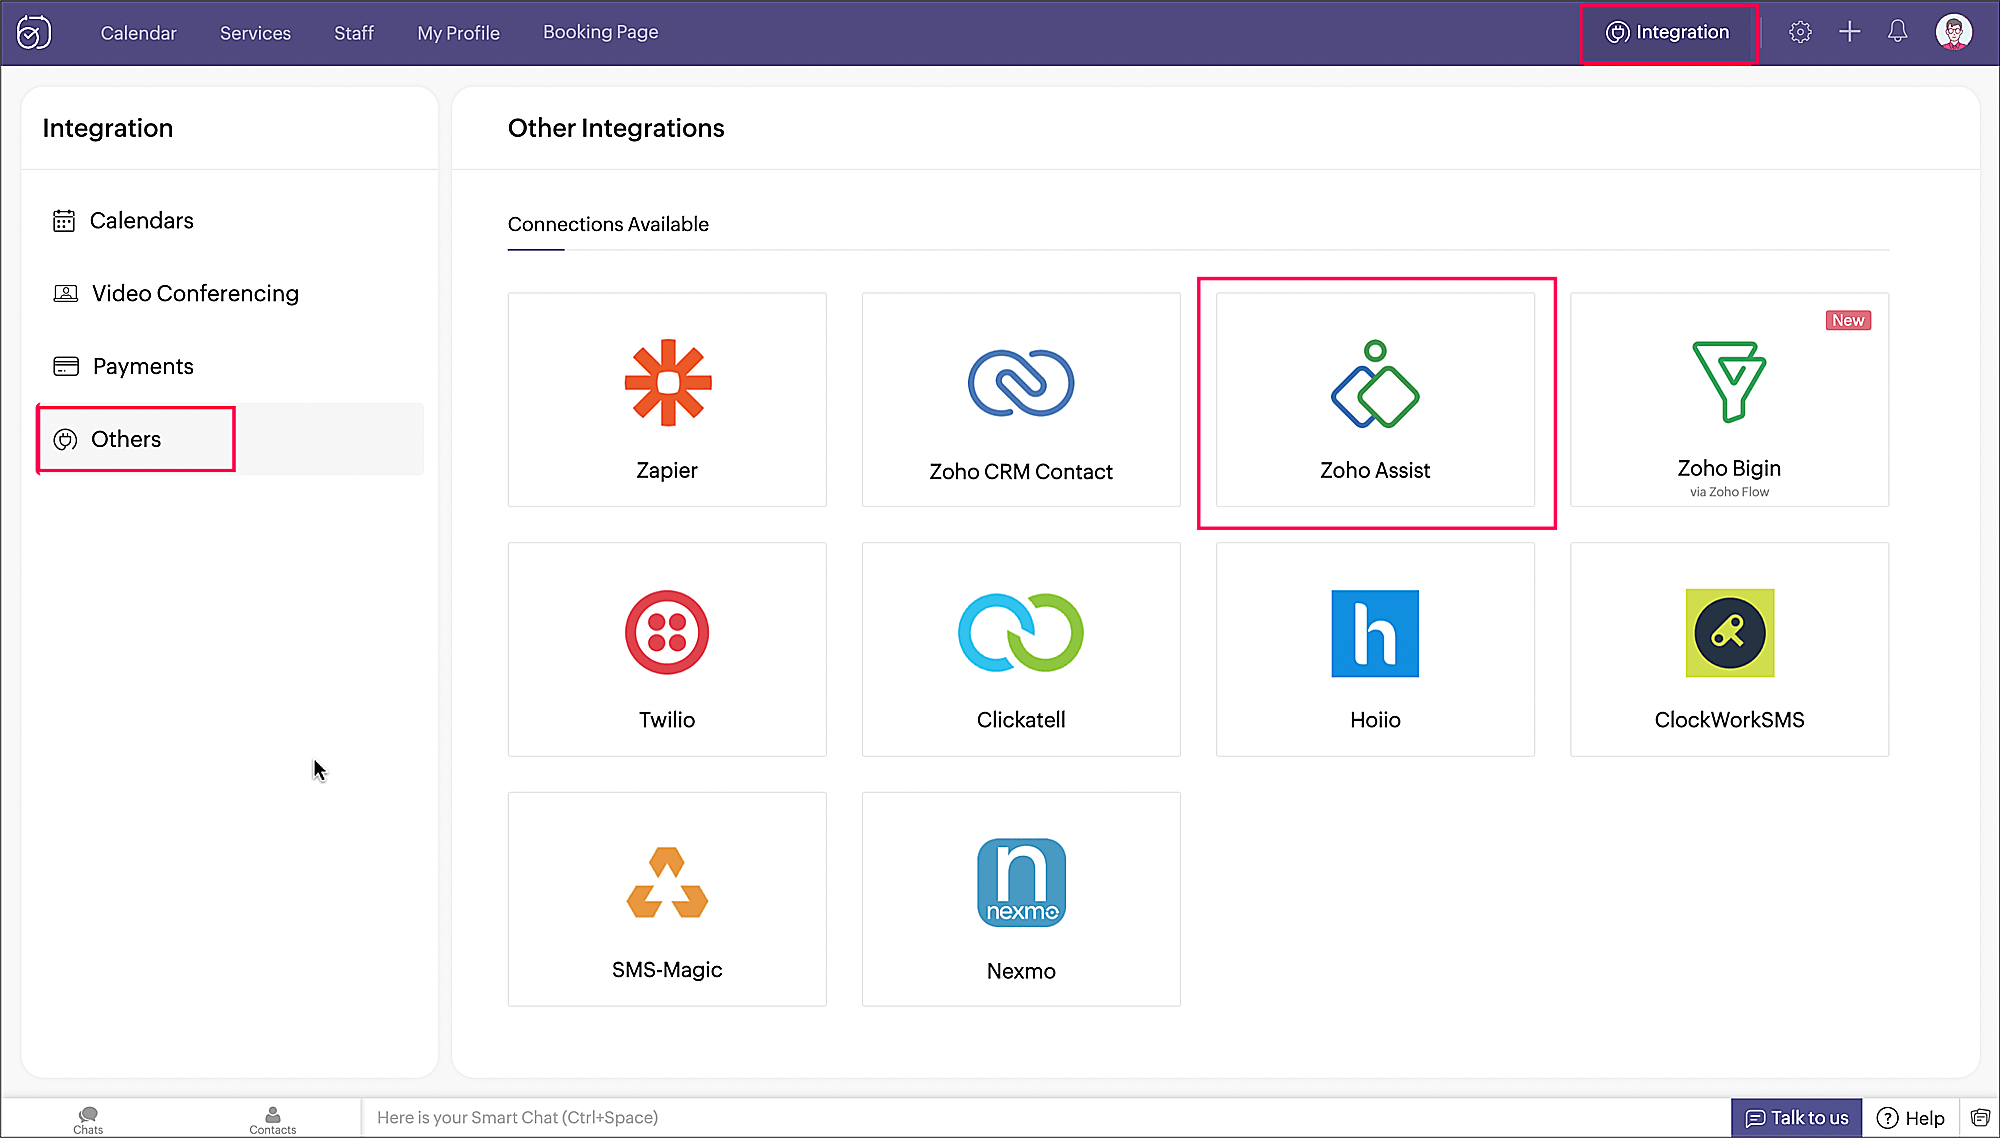
2. Hover over Zoho Assist and click the card.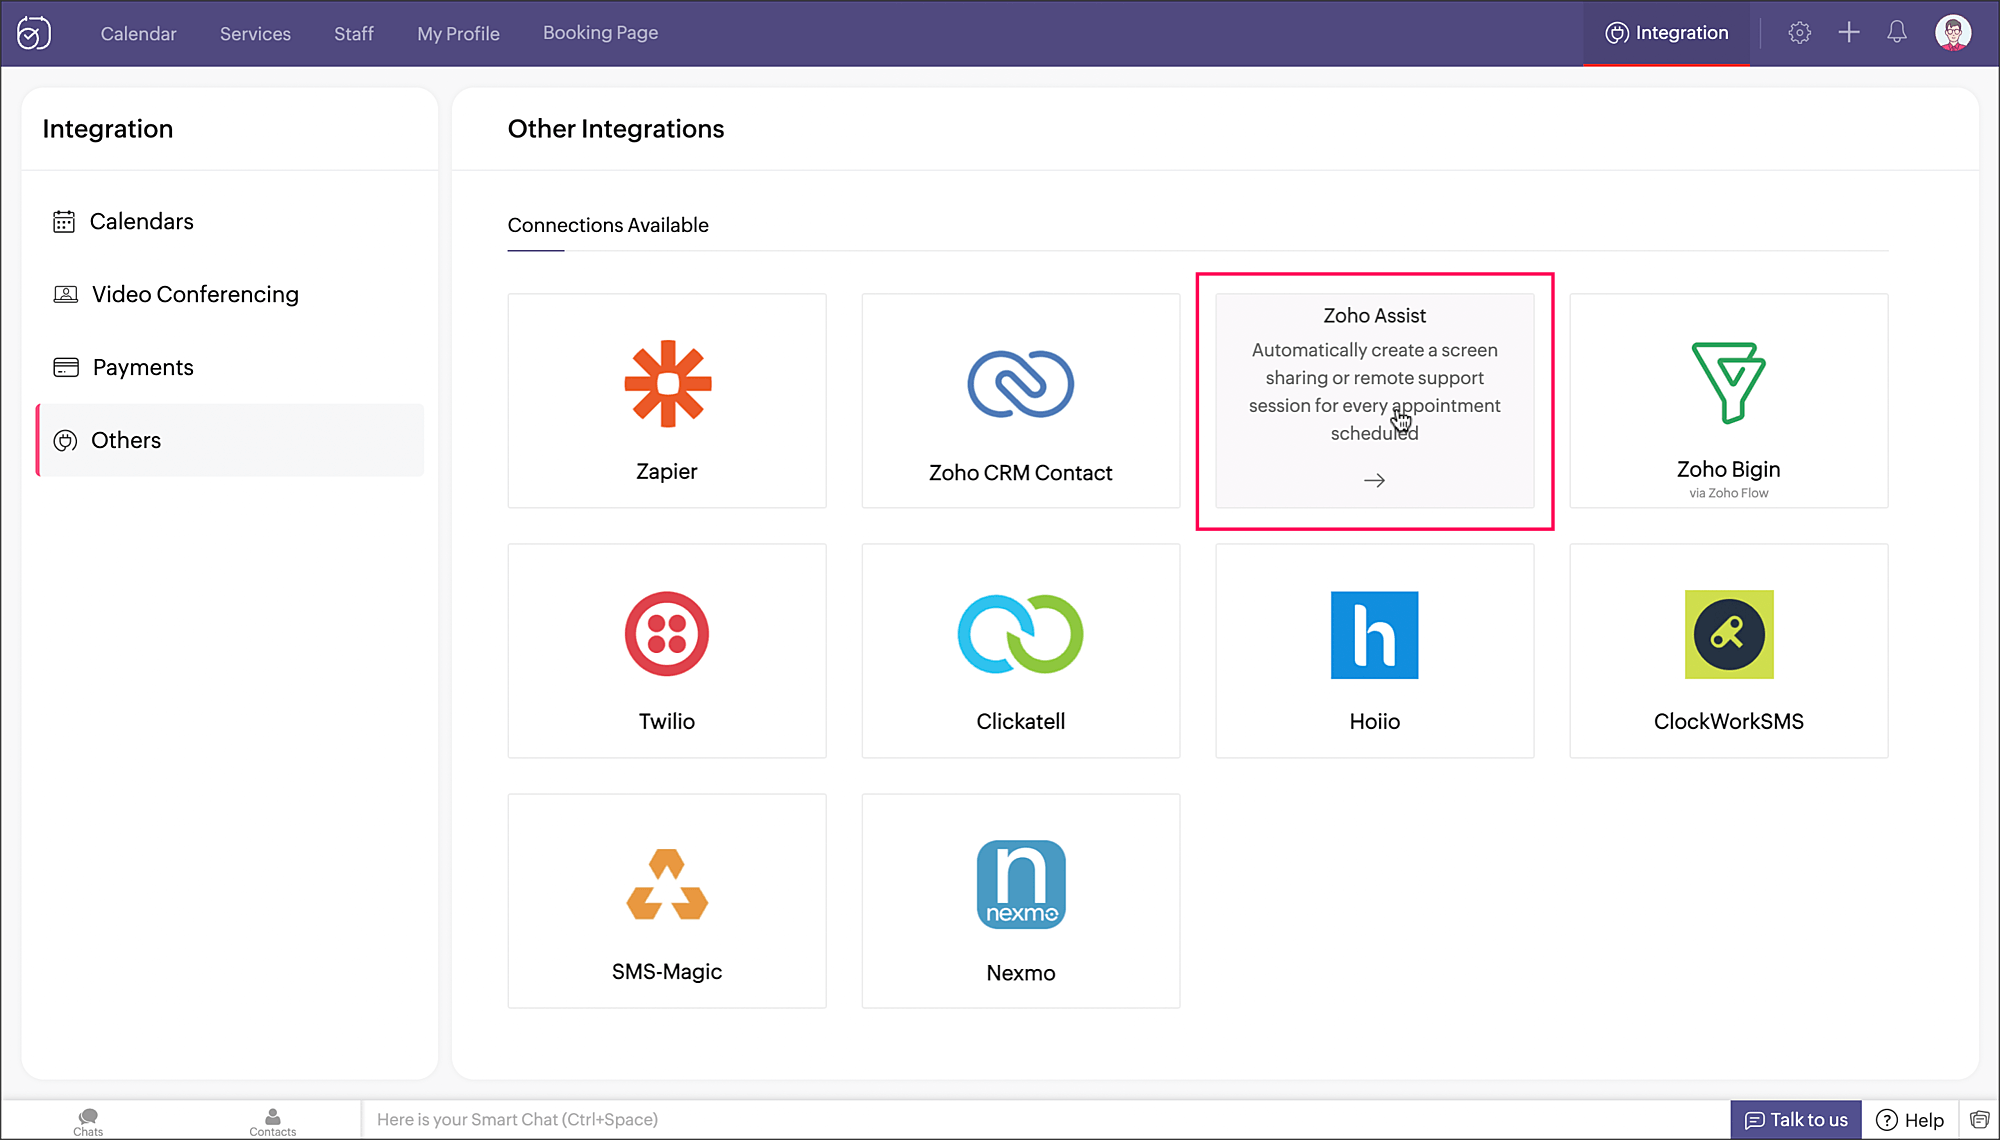
3. The Overview tab opens up with details about the integration and its requirements. Click the Connect Zoho Assist button.
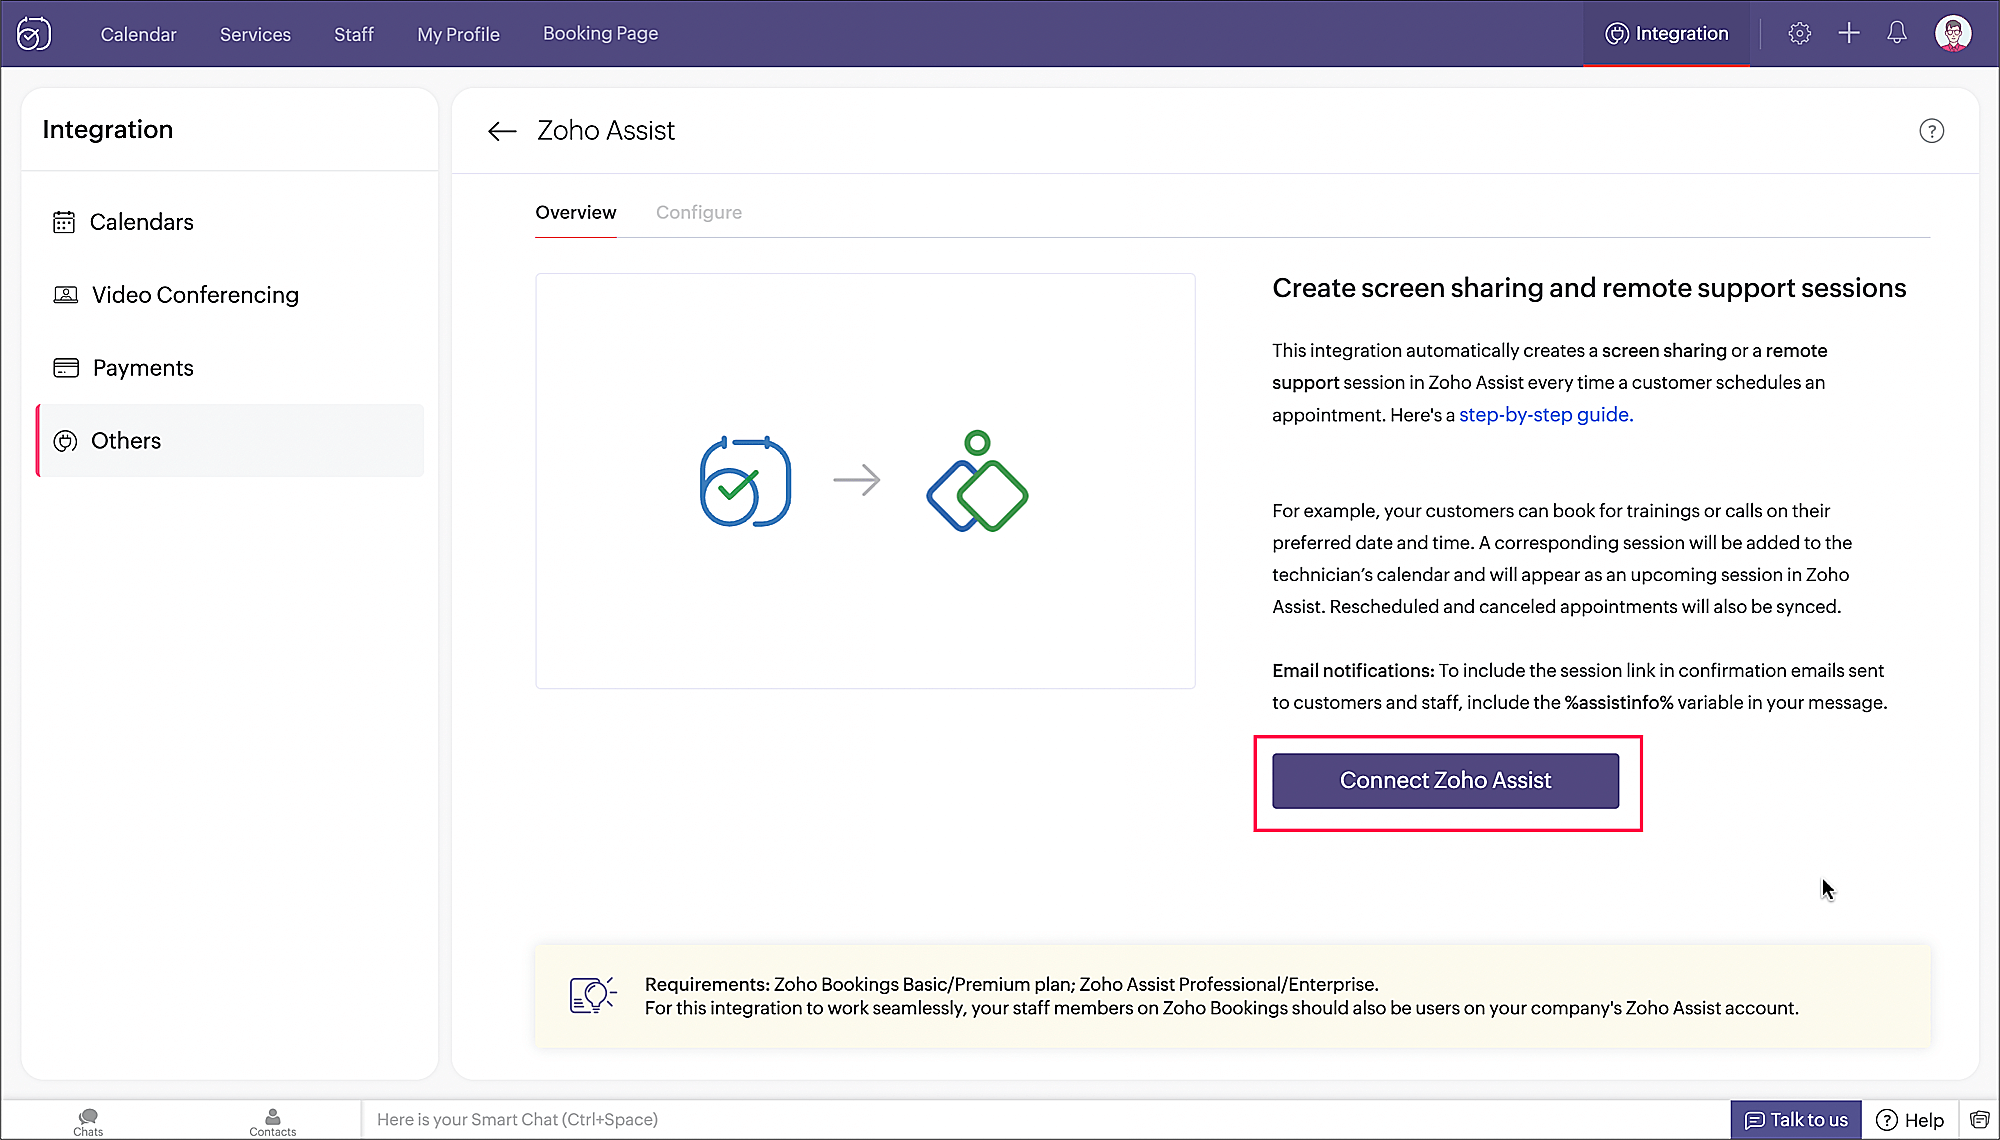
4. A pop up appears asking for acceptance. Click Accept.
5. Once you authorize Zoho Assist, the Configure tab opens up with the list of all the available one-on-one services created.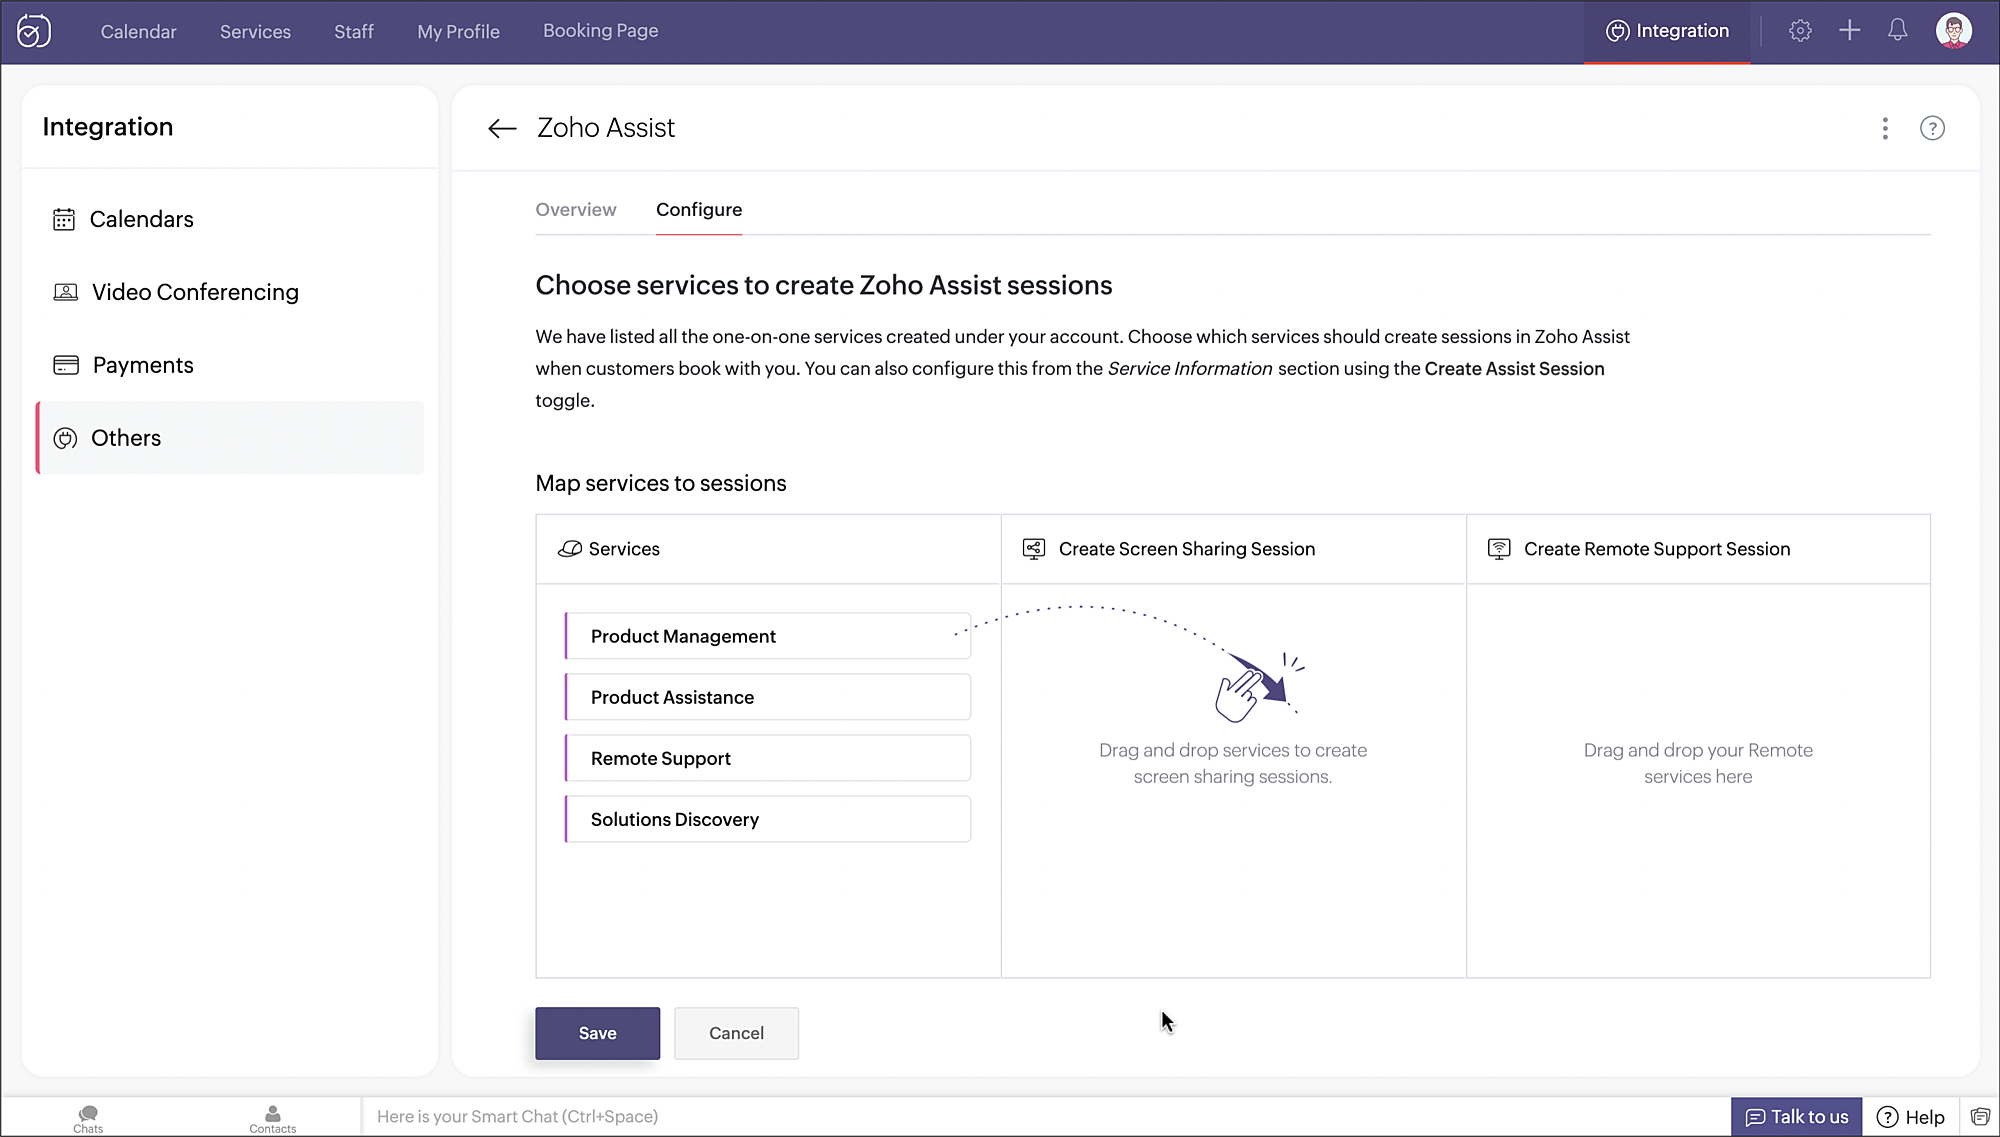
II. Map sessions to services
You can map a one-on-one service to either a screen sharing session or a remote support session.
-
Drag and drop one or more services against the respective Zoho Assist sessions and click the Save button .
Note: When an appointment is booked for a service, say "Product Demo", a corresponding screen sharing session will be made available in Zoho Assist.
-
Click the Edit button to make changes to the mapping.
-
You can drag and drop or remove already added services against a session. You can also map additional services.
-
Click the Save button once you are done making the changes. The changes are saved.
-
The Create Assist Session toggle is "Enabled" for the services which are mapped against a Zoho Assist session.
Enable sessions on creating services
You can enable creating a Zoho Assist session while creating a one-on-one service.
-
Add a new one-on-one service. The toggle for creating assist sessions is set to 'No' by default.
Note: The Create Assist Session toggle will appear only when the integration is enabled.
-
Turn the Create Assist Session toggle to 'Yes'. A dropdown appears below asking you to map the created service with a Zoho Assist session.
-
Choose a session type and click the Save button.
III. Add users to Zoho Assist
Let's see how to add a Zoho Bookings staff (shown below) as a technician in Zoho Assist to be able to offer remote support.
Note: Zoho Assist sessions will be created only for technicians in the default department. Make sure to add technicians to your default department. -
Navigate to Organization > Manage Technicians > Settings > Users. Click the INVITE TECHNICIAN button.
-
A pop-up shows up. Enter the email address of the Zoho Bookings staff you want to add to Zoho Assist. Choose the required role, department and click the INVITE TECHNICIAN button.
-
The user invite is shown under the Pending section.
-
An email is sent to the technician to join the Zoho Assist organization. Click ACCEPT.
-
Once the technician accepts the invite, they are added as an "Accepted" user. They can then provide remote support when appointments are booked with them in Zoho Bookings.
Note: If the staff already has an account with Zoho, they will have to sign in. If they do not have an account yet, they will have to sign up.
IV. Book an appointment
Customers book an appointment with the service configured to create remote sessions (screen share or remote assist) as a guest user or customer portal user.
V. Connect through support link
The appointment summary page displays the meeting details along with the screen sharing link.
Once an appointment is booked, the session(s) will be created in the respective technician's account. The session (Screen Share in this case) for the booked appointment appears under the Sessions section in Zoho Assist.
The technician can click the START button to initiate the screen share session.
Once the appointment is booked, email notifications can be sent to both the staff and/or the customer on booking, rescheduling and cancelation of appointments.
Support link in notification emails
The support link can be included in notification emails using Assist Info from the Variables list. The variable %assistinfo% populates the remote support link.
Email notification for Staff
Email notification for Customer
The configured staff can conduct the session. The customer(s) can join the session and start collaborating.
Plans supporting this feature
| Product/Service |
Applicable Plans |
|
Zoho Bookings |
Basic/Premium |
| Zoho Assist |
Professional/Enterprise |
Note: You can view all the pricing plans for Zoho Bookings here.