Edit Form Responses
Overview
Benefits of letting respondents edit their form responses
- Respondents have the flexibility to make changes or corrections to their entries, accommodating unforeseen circumstances or changing preferences.
- You can ensure that the information collected is as accurate and up-to-date as possible, leading to better planning and organization.
- It reduces the need for manual intervention by organizers to handle individual change requests, saving time and effort.
How to allow respondents to make changes to their entries
-
Include a link to edit responses in the email notification triggered after form submission
Read more on each of these ways below.
Including edit link in Thank you Page
-
In your form builder, navigate to
Settings
> Submissions & Storage
>
Edit Response.
-
Select
Yes
to
Allow Respondents to Edit Their Response.
-
Select
Include a link in the Thank you page. A link to edit form response will now be provided in the Thank You page.
-
You can also choose to include a link to download the PDF of the edited response in the Thank You page by selecting the option to do so.
Set expiration for edit link
Once you enable the option to
Allow Respondents to Edit Their Response, you can choose to set the duration for which the edit link should remain active.
To do this,
-
Select
Set expiration for edit link.
-
You can choose to set the link expiration based on:
- Fixed date & time
- Date & time of submission
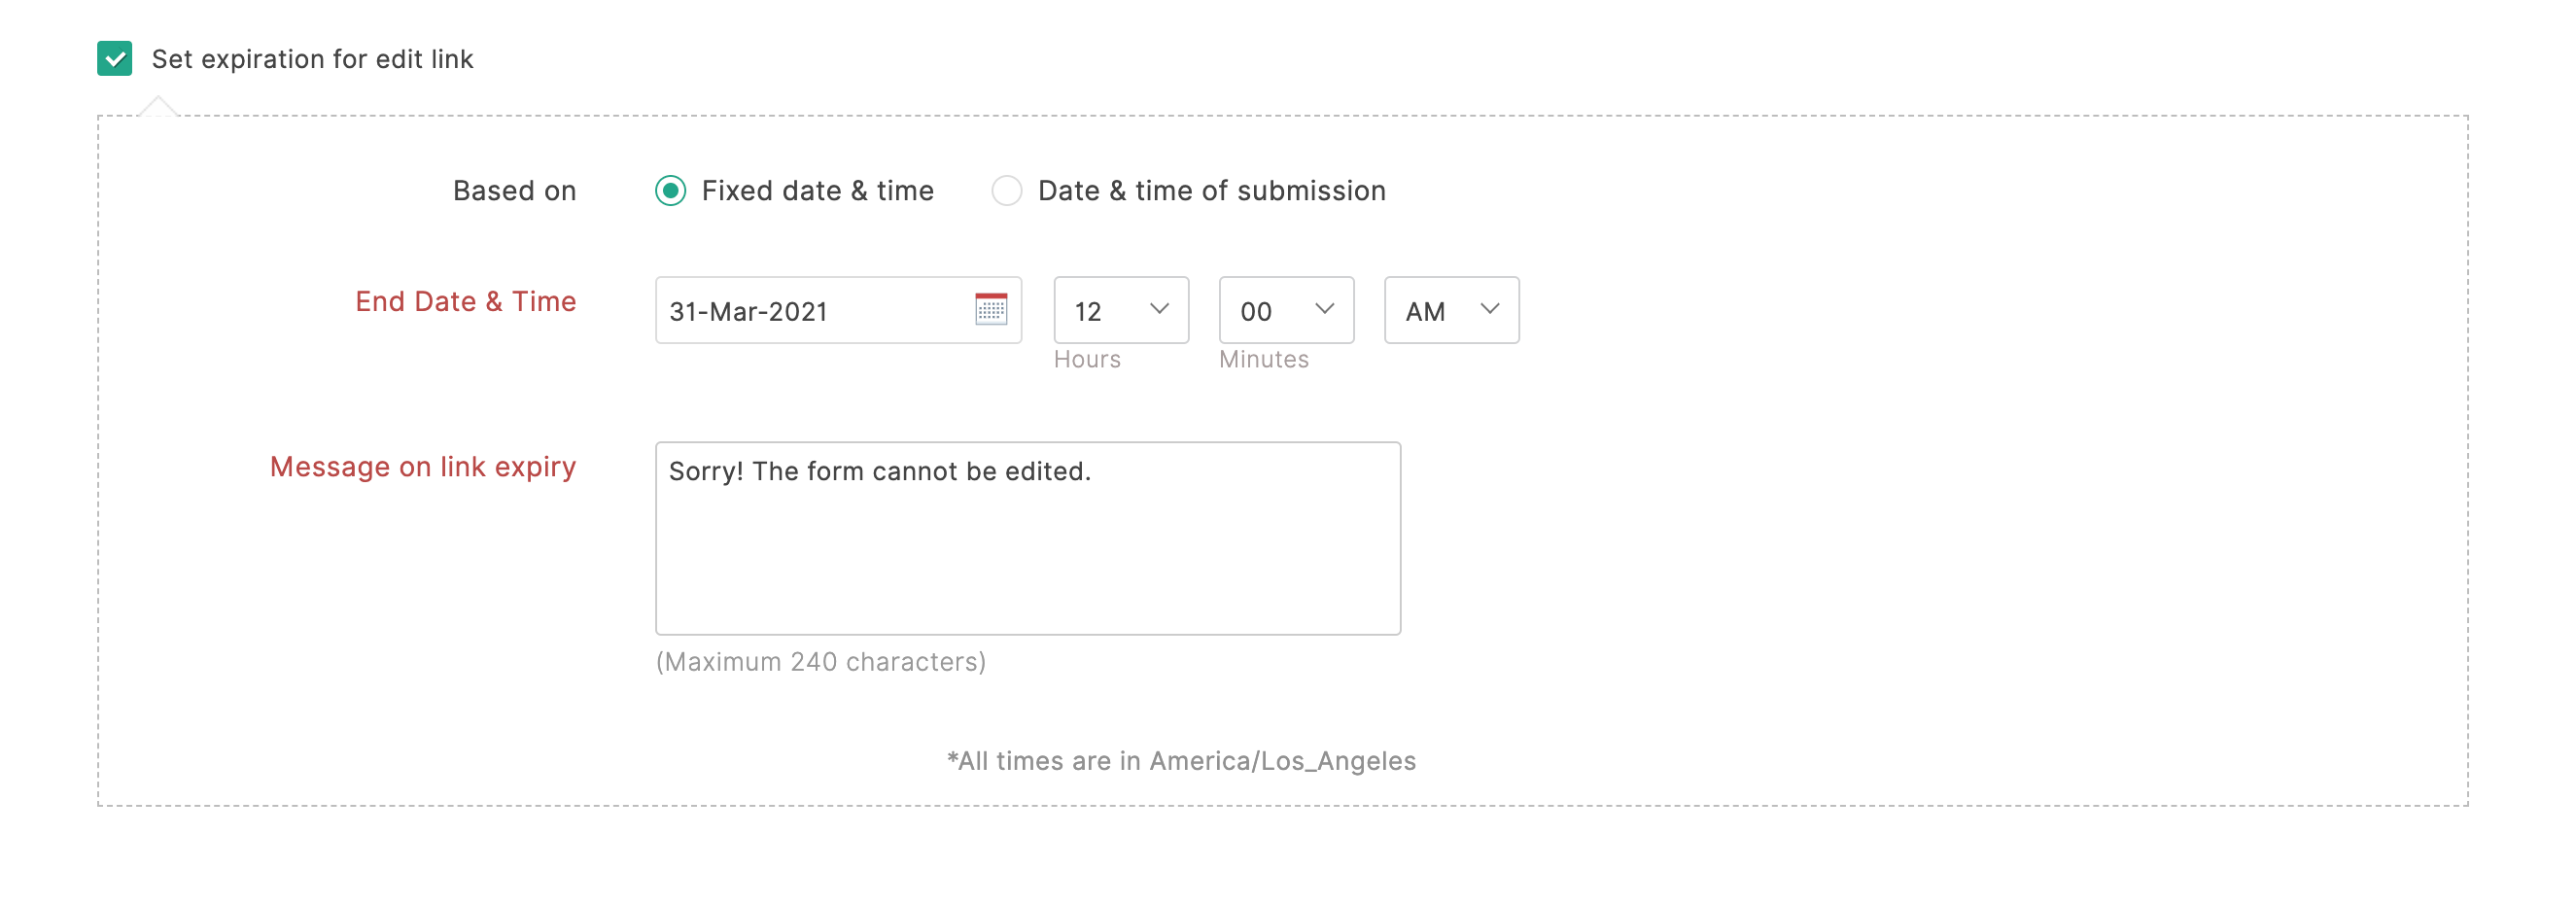
Fixed date & time
- In End Date & Time, select the date and time for the edit link expiry.
- In Message on link expiry, enter the message to be displayed to the respondents upon the expiration of the link.
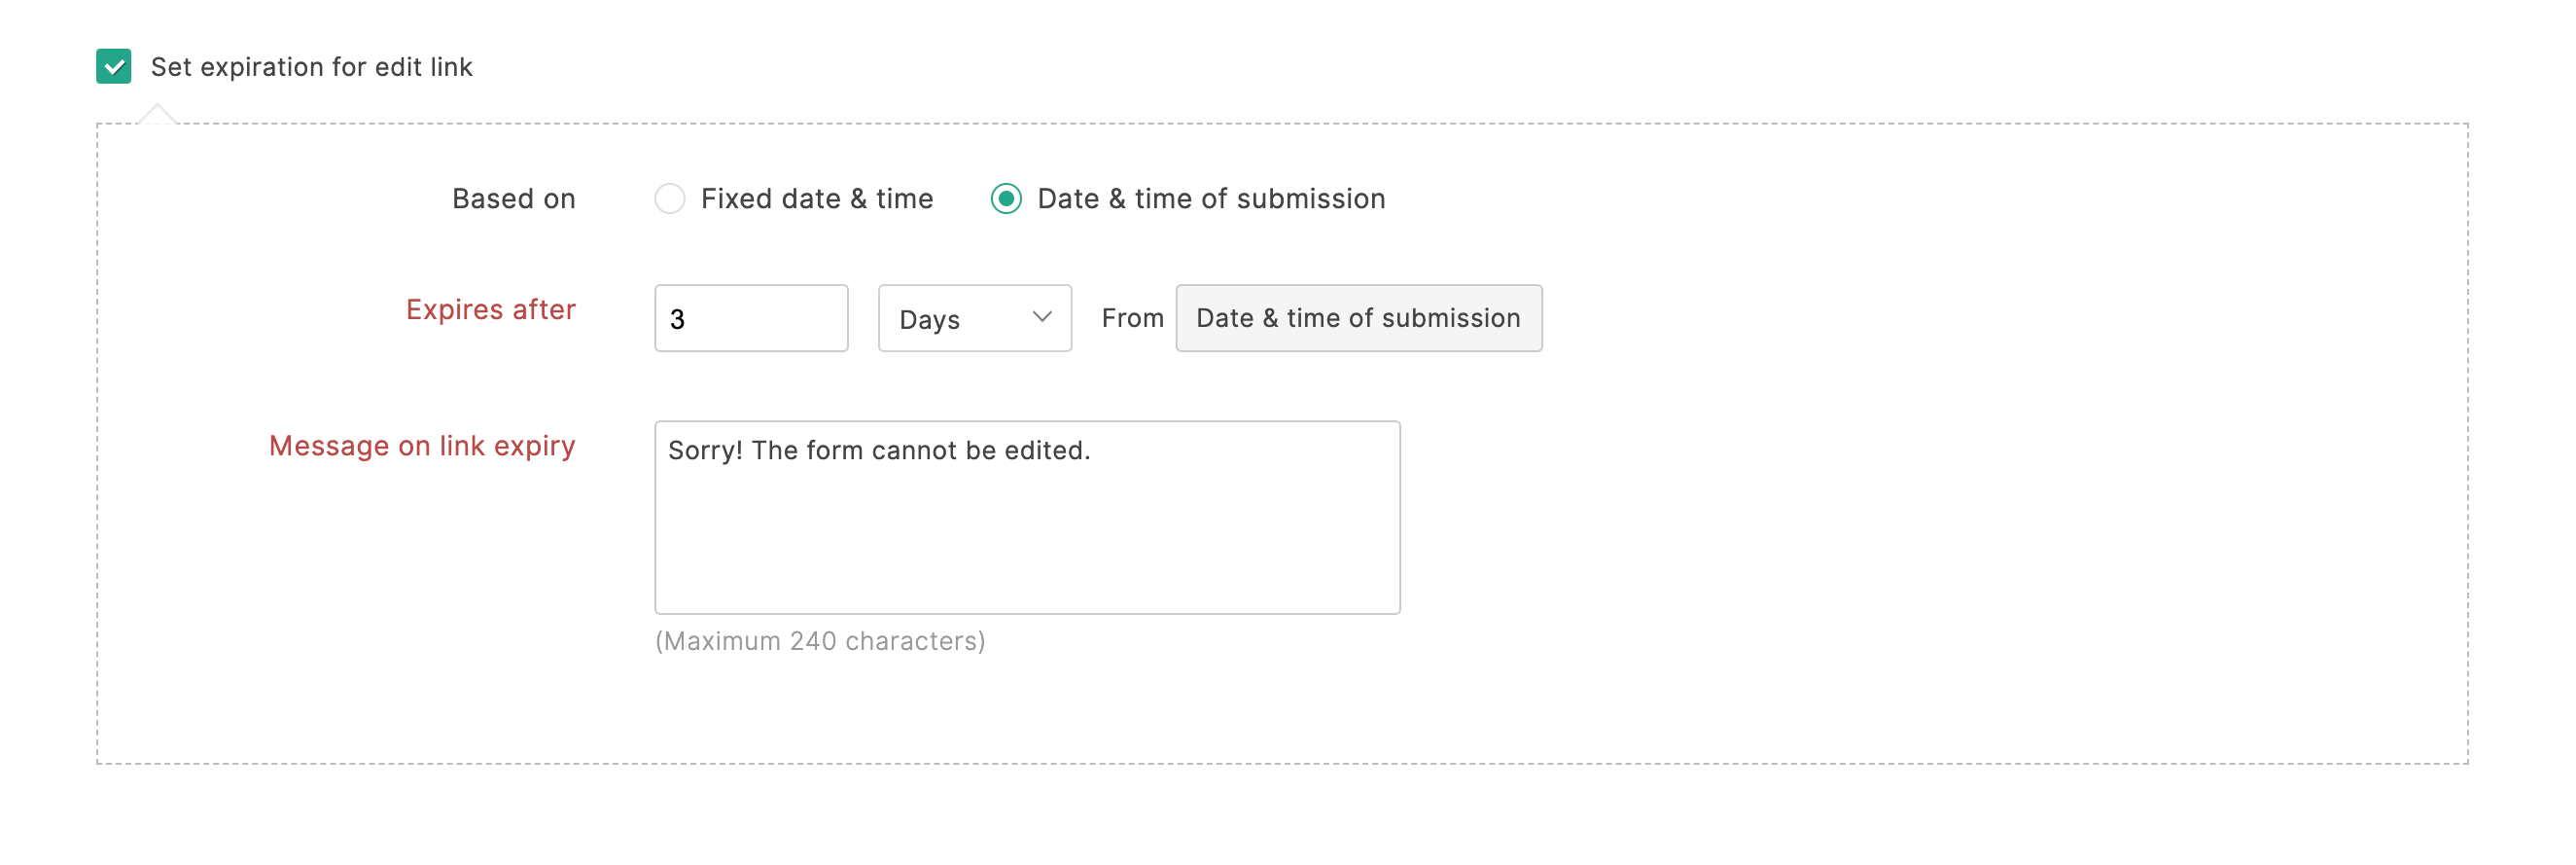
Date & time of submission
- In Expires after, provide the time span from the Date & time of submission. You can choose the unit of time span as Minutes, Hours, or Days from the dropdown.
-
In Message on link expiry, enter the message to be displayed to the respondents upon the expiration of the link.

Workflow Execution
-
In your form builder, navigate to
Settings
>
Response Settings.
-
Select Yes
to
Allow Respondents to Edit Their Response.
-
Go to Email Notifications
under
Settings
and compose the email.
Learn more
about Email Notifications.
- Select Include a link to allow respondents to edit their response.
Alternatively, you can choose to include the edit response link inside the email notification anywhere within the email message
To do so,
-
While configuring your email notification template, click the
icon in the Message section and select the Edit response option in the pop-up.
-
Enter the text to be displayed as a link in the email.
-
1. The option to include a link to allow respondents to edit their responses in the email notifications will be enabled only when you select Yes to Allow Respondents to Edit Their Response under Response Settings.
2. The form admin can view all Edit Response Links anytime by navigating to the All Entries section. Click on Additional Fields and enable the Edit Response URL column to display them. Learn More