How to create, edit, and format tables in Zoho Writer
Overview
Tables allow you to present structured information clearly within your document. In Zoho Writer you can insert new tables, convert text or spreadsheets into tables, and apply layout, design and utility operations (such as sorting, formulas, transposing). These tools help you organize data, improve readability and enhance your document’s impact.
Prerequisites
- If pasting data from Zoho Sheet, you’ll need access to the source sheet for linking.
How-tos
1. Insert a new table
- Go to the Insert tab > Table, and pick the number of rows and columns.
- Alternatively: type =table(m,n) (for example =table(3,4) for 3 rows × 4 columns) and press Enter.
2. Insert a spreadsheet
- To insert a spreadsheet as a table: Go to the Insert tab> Table > Insert a new spreadsheet.
- To paste a Zoho Sheet data range and link it: Click the paste icon in the inserted table and choose Link data with the source.
- Click the
icon near the table to update the table data, to unlink the table from Sheet, or to open the source sheet right away. You can also change the cell range, as required.
- Update the table data by clicking on the Update option. Any changes made to sheet data will be updated in the table every time you click on the Update option.
3. Convert text to table
- Separate text by lines (for rows) and by tabs/commas/dashes (for columns).
- Go to the Tools tab > Text to Table.
- In the Convert text to table dialog that pops up, configure the desired settings, and click OK.
4. Add/delete rows or columns
- Click the table, and open the Table Options panel by clicking the gear icon.
- Under Layout > Rows and Columns, choose to add or delete rows/columns.
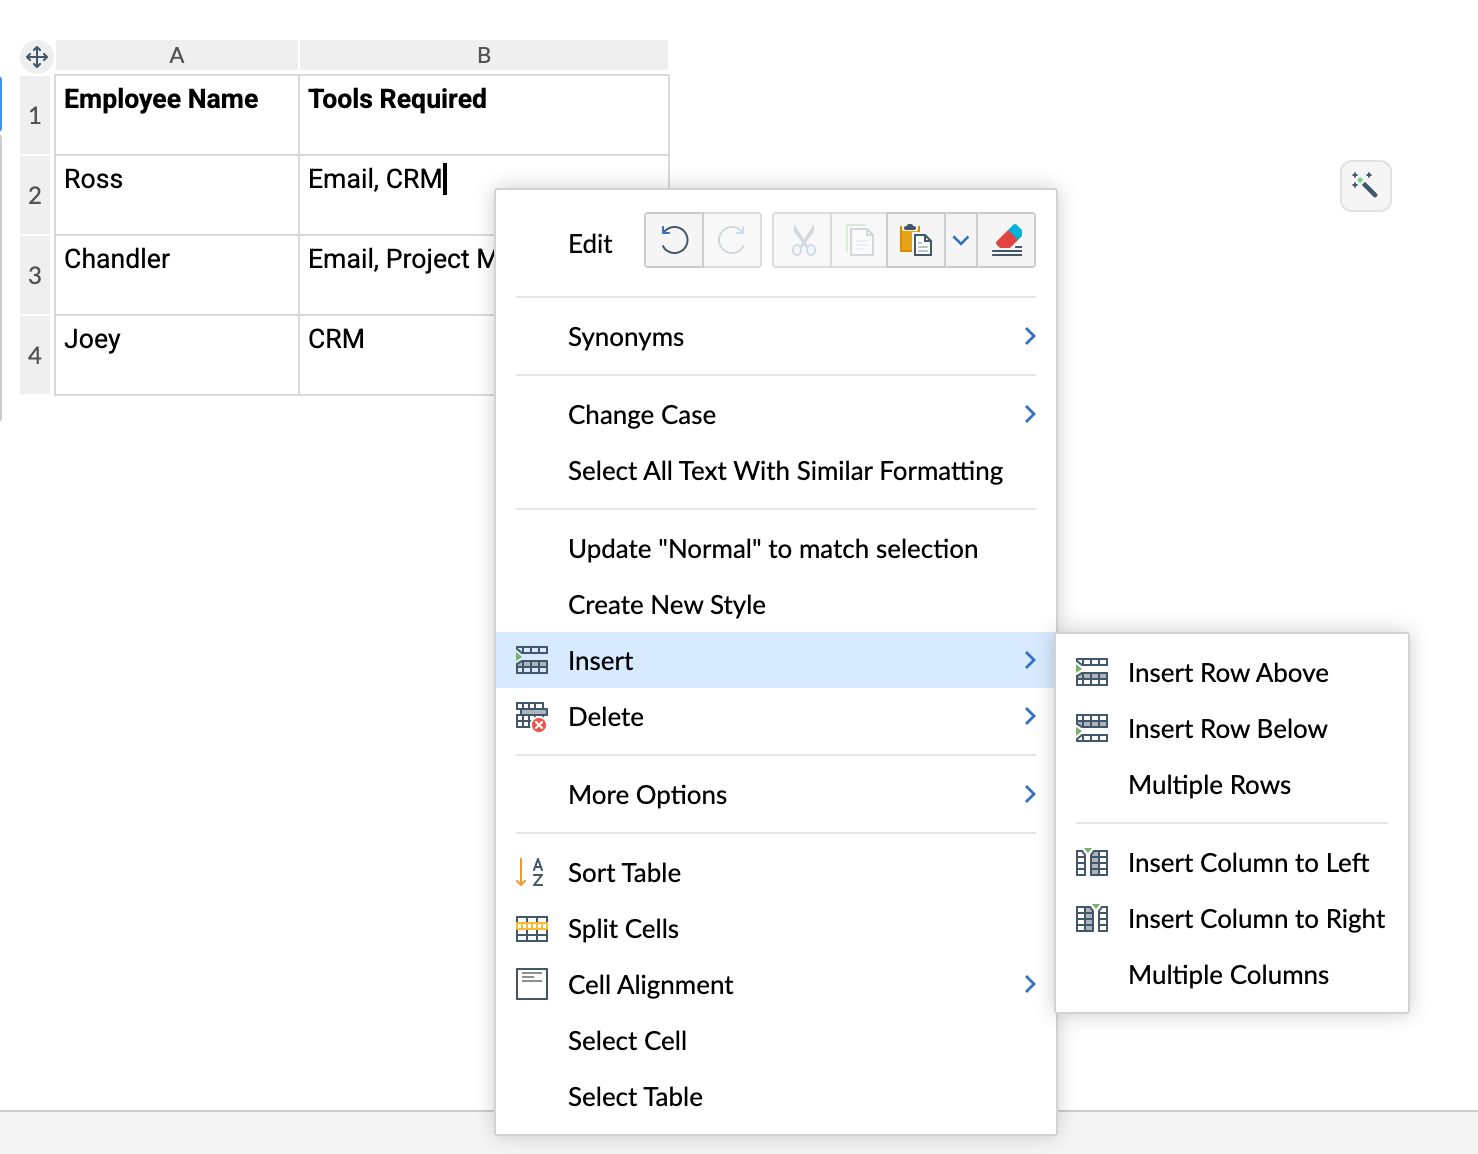
- You can also add or delete rows from the right click menu.
5. Merge or split cells
- To merge: select the cells > gear icon > Layout > Merge Cells.
- To split: click a cell > gear icon > Layout > Split Cells.
6. Adjust layout (row height / column width / margins)
- Gear icon > Layout: modify row height or column width.
- For equal distribution: gear icon > Layout > Distribute Rows / Columns.
- To change cell margins: gear icon > Cell Properties > Custom Margins.
7. To vertically align text inside a table cell
- Select the text inside the desired table cell.
- Click the gear icon (⚙️) to open Table Options.
- Go to Cell Properties > Text Align.
- Choose your preferred vertical and horizontal alignment option.
8. Set header row(s) & control page breaks
- To repeat header row on new pages: gear icon > enable Use first row as header.
- To mark multiple header rows: gear icon > Mark first (number) row(s) as header. Alternatively, select the rows you want to set as headers and Set header up to this row from the visual cue.
- To prevent rows or tables from breaking across pages: gear icon > disable Allow row to break across pages, or Allow table to break across pages respectively.
9. Table utilities
- Split table: select table > right-click > More options > Split table.
- Transpose table (swap rows ↔ columns): select table > right-click > More options > Transpose table.
- Convert table to text: right-click table > More options > Convert Table to Text. Choose separator format (tabs, commas, paragraphs).
- Convert table to chart: select table > right-click > More options > Convert table to chart.
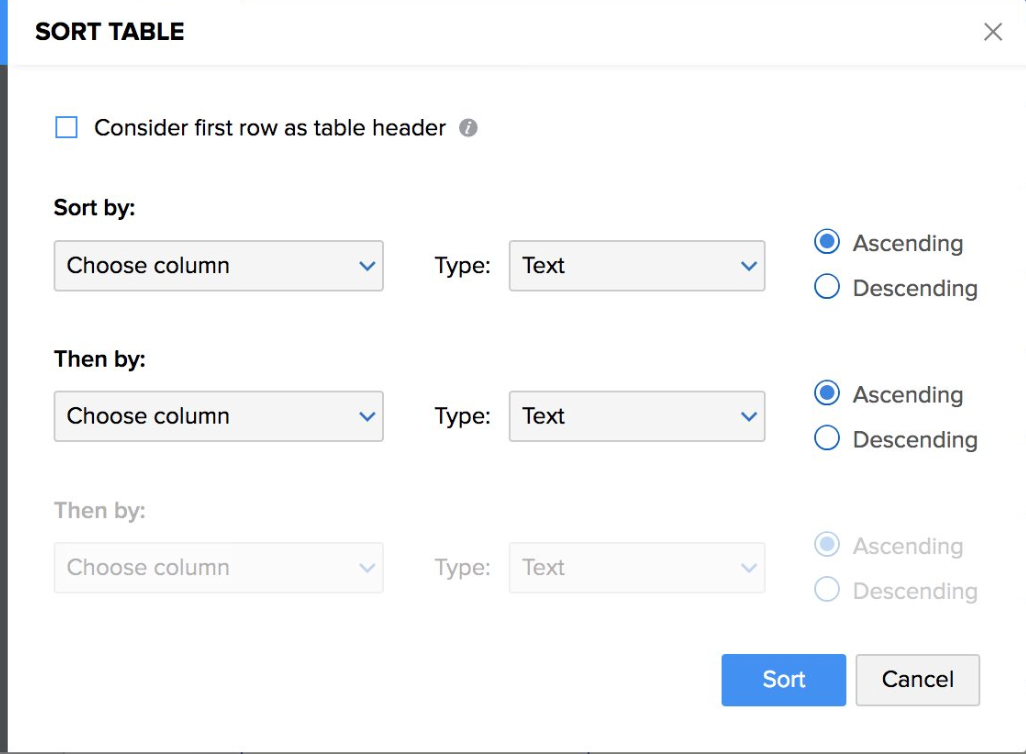
10. Sort table data
- Select table > gear icon > Sort Table under Rows and Columns.
- Choose ascending or descending based on a column; if header row exists, enable Consider first row as table header.
11. Design table (themes, borders, shading)
- Select table > click Table icon > Table Themes panel; pick a preset or custom color.
- To customize borders and background: gear icon > Borders and Shadings. Options include sides, color, width (up to 10px), style, remove border, cell background color or image.
12. Use formulas in table cells
- Click the cell > Formula icon (or gear icon > Formula).
- Enter a formula or pick one from list (e.g., SUM, AVERAGE, IF, COUNT, MAX, MIN, PRODUCT, etc.). Use cell references or keywords like LEFT, ABOVE.
- Choose number format if needed; press OK, then refresh/press F9 for results.
- Formulas work with Mail Merge and are preserved when importing/exporting MS Word.
13. Delete a table
- Right-click on the table > Delete Table.
Troubleshooting
Error / Symptom: Cell alignment options for text inside table don’t work as expected. Regardless of the selected alignment (e.g., bottom-right, center-left), the text always aligns to the top of the cell.
Possible Cause: Paragraph spacing before or after the text is not set to 0 pt, or there’s an extra paragraph break below the selected text. These cause the cell to retain top alignment even when another option is selected.
Recommended Solution:
- Enable (¶) in the Format pane to check for hidden paragraph breaks.
- Delete any additional paragraph breaks below the text inside the cell.
- Set both Before and After paragraph spacing to 0 pt from Format > More under Paragraph.
- Reapply the desired vertical and horizontal alignment or reload the document, all options should now work as expected.