Managing applications in the environments
What does this page cover
Learn how to edit, access, view logs, and configure settings like demo users, notifications, schedules, and variables across environments. Before proceeding, make sure you have a comprehensive understanding of the environments and how to add applications to them.
Availability
- Only available on Creator 6
- Can only be accessed by super admins, admins and developers with environment permissions assigned by admins.
1. Managing applications in the environment
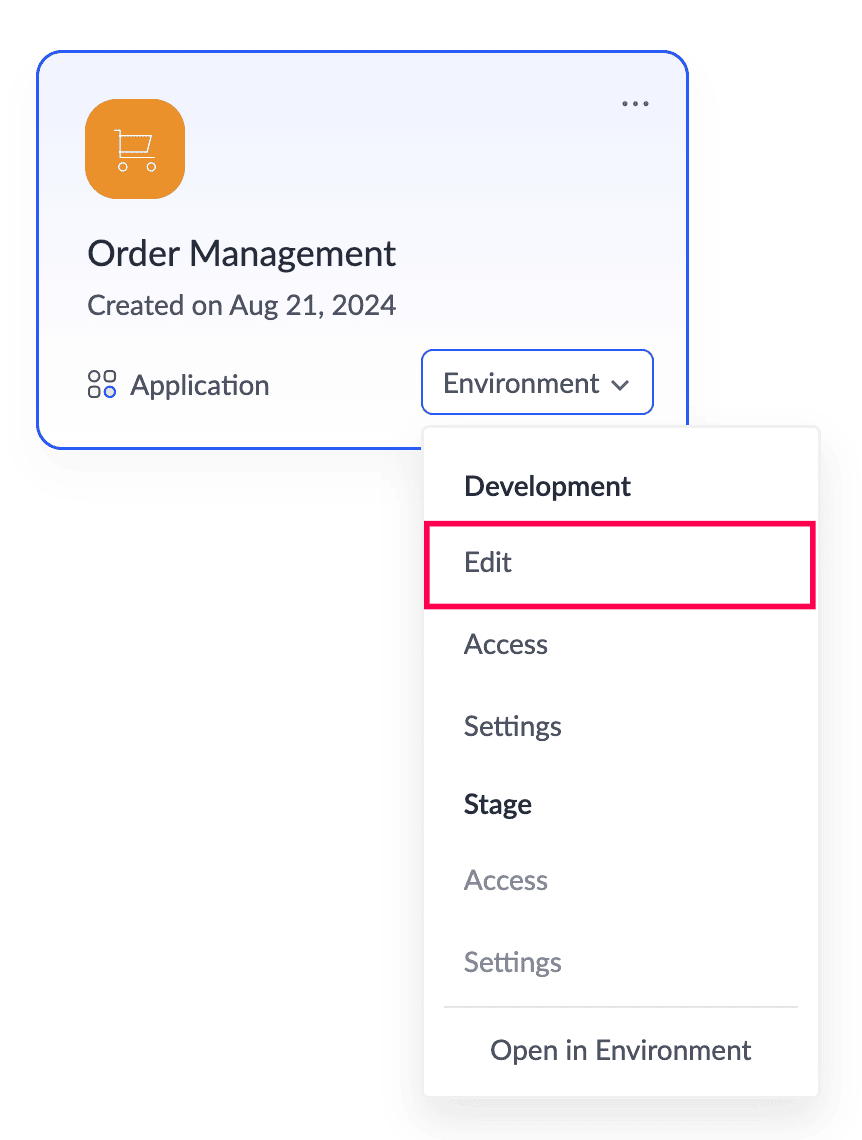
The following actions are available for the applications in environments by clicking the horizontal ellipsis of the preferred application.
- Edit: Allows editing and making changes to the application. This option is only available for the development environment, as the application can only be modified in that environment.
- Access: Access the application in the preferred environment.
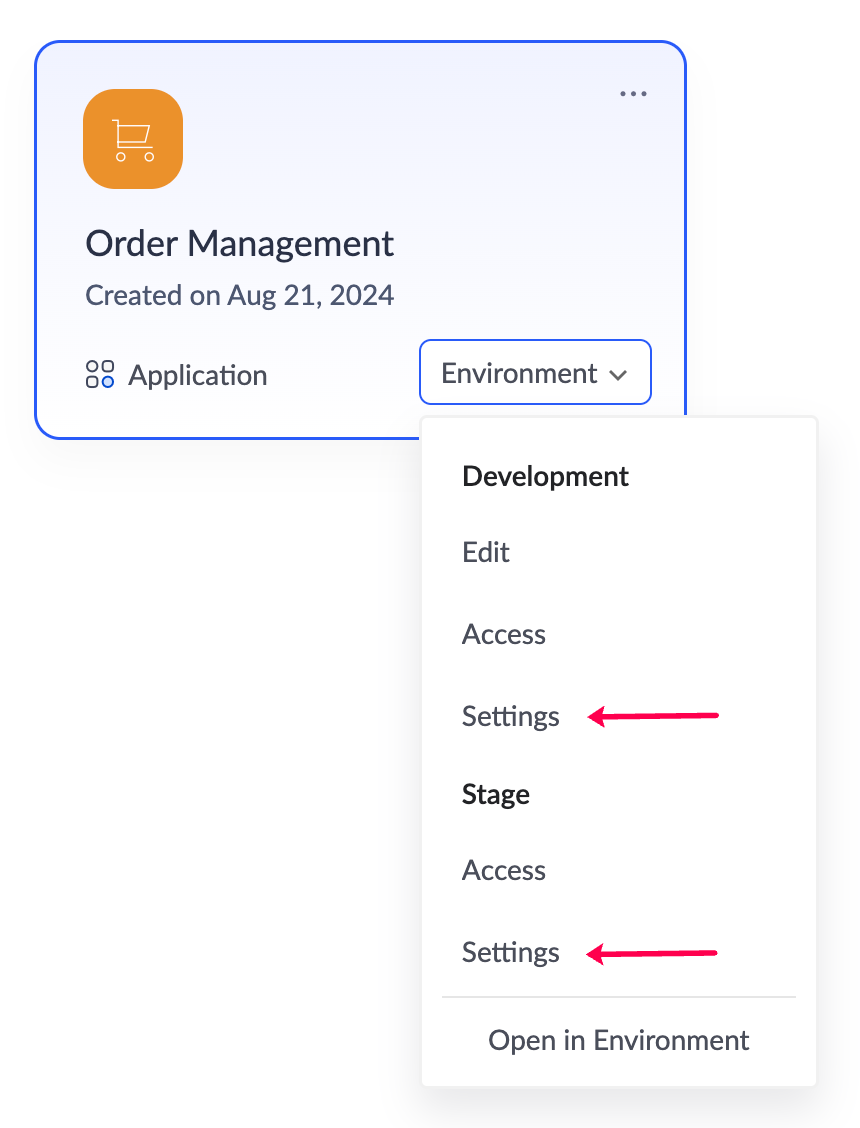
- Settings: Configure features like demo users, notifications, variables, and schedules. In the production environment, only variables can be configured.
- Logs: Tracks form actions, schedules, emails, and integrations with timestamps in the respective environment.
1.1. Edit

Note: This option is only available in the Development environment, as applications can only be modified within this environment.
- Navigate to the Environments section, click the ellipsis icon near the preferred application, and select Edit.
- You will be directed to the edit mode of the application. The required changes can be made to the application here.
Alternatively, you can edit the preferred application from the Solutions page by clicking the Environment dropdown on the application card and selecting Edit.
1.2. Access
Access the live application in the preferred environment (development, stage, or production) and test how the application functions when accessed in that environment. The records added here are kept isolated and cannot be transferred between environments.
- Navigate to the Environments section, click the ellipsis icon near the preferred application, and select Access listed under the preferred environment.
Alternative ways to access the application in the preferred environment:
- From the Solutions section: Navigate to the Solutions page, click the Environment dropdown on the preferred application card, and select Access under the preferred environment to open the live mode of the chosen environment.
- From the Edit mode of the application: While in Edit mode, click Access Development Live at the top-right corner to access the development environment. To access other environments, click the drop-down icon next to Access Development Live and select the preferred environment.
The environment that you are currently accessing can be identified using the label displayed in the top-left corner in the live mode of the application.
1.3. Settings
You can configure demo users, enable/disable features like notifications and schedules in the selected application, and view variable information across all environments. Follow the steps given below to navigate to the Settings section of the application in the environment.
Navigate to the Environments section, click the ellipsis icon near the preferred application, and select Settings under the preferred environment.
Alternatively, you can navigate to settings of the preferred application in the environments from the Solutions page by clicking the Environment dropdown on the application card and selecting Settings.
The settings pane consists of the following sections:
Note: In the production environment, the Settings option includes only Variables, as other sections are used solely for testing, which is conducted in the development and stage environments.
1.3.1. Demo Users
You can define user permissions in your application to restrict access to specific data and components to the application users. To test this, you can add predefined demo users in the development and stage environments. Select from the available demo users, assign permissions, and evaluate how each user views and interacts with the application in the current environment in the live application. Follow the steps below to add demo users in the preferred environment of the selected application.
Note: The permissions assigned to demo users are the existing application permissions configured in Application Settings and are not separate permissions exclusive to testing.
To add demo users:
- Navigate to the Settings in the development or stage environment of the preferred application. A settings pane will open.
- Click + Add Demo User under the Demo Users tab.
- A pop-up will be shown. Select the demo user in the drop-down Name field. The demo users are predefined, and you can test up to five users.
- Select the demo user type as User or Portal User based on your testing needs. Choose User if you want to assign roles and permissions within the application or Portal User to apply portal permissions defined in the application.
- Select permissions and roles for the demo user from the drop-down, then click Add.
- Only the permissions and roles added in the respective environment will be listed. The demo user will be able to perform actions in the app depending on the assigned permissions.
- Once the demo user has been added, you can access the application and select the added demo user from the dropdown to test the application according to the assigned permissions and roles.
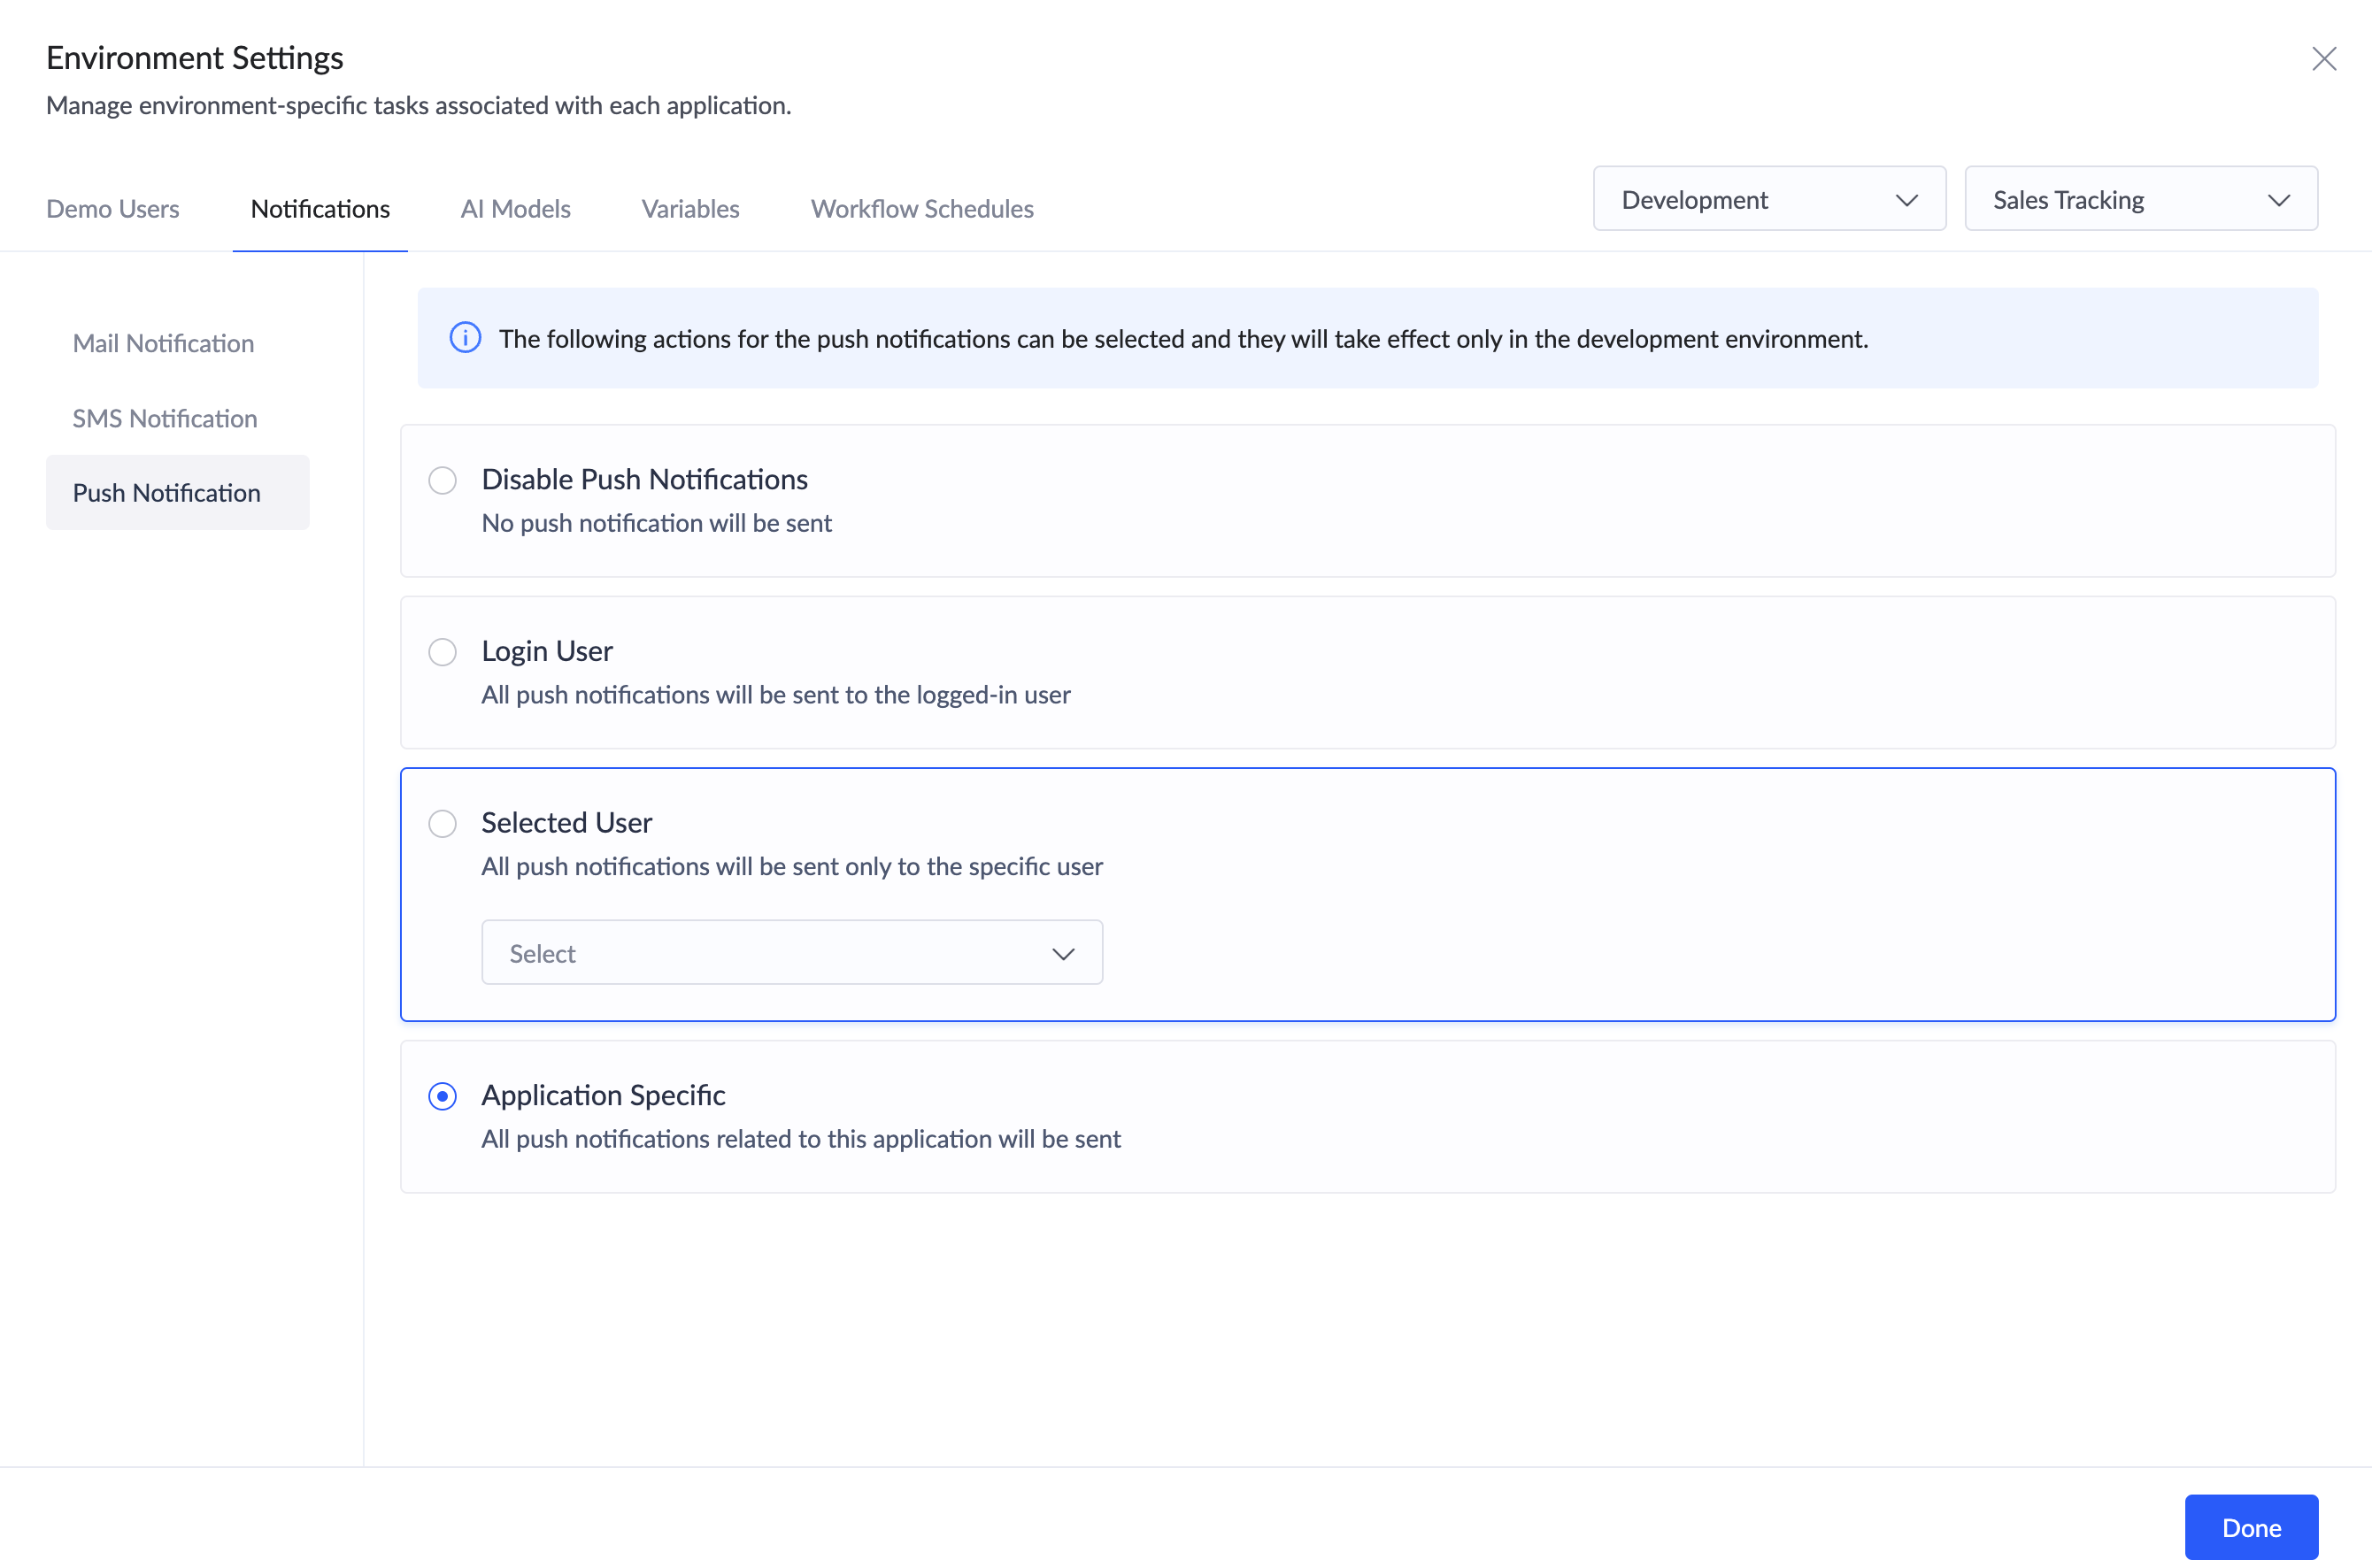
1.3.2. Notifications
Since the development and stage environments are used for testing, notifications configured in the application may not need to be triggered regularly. Admins and developers can be configured as proxy recipients to receive notifications while testing in these environments. This helps prevent unnecessary spam notifications from being sent to preconfigured recipients.
This section allows you to either disable notifications or route them to a specific address as a proxy. The following notifications can be controlled:
- Mail Notifications
- SMS Notifications
- Push Notifications
Note: Notifications here refer to notifications of the send mail task and SMS tasks in workflows and form submissions.
Mail Notifications
The following options are available for sending Mail notifications in the development and stage environments, regardless of the recipients preconfigured in the send email action and the send mail Deluge task in the workflows:
- Disable Emails: Emails will not be sent to any user irrespective of the preconfigured recipient.
- Login User: All emails will be sent only to the logged-in user who has triggered the notification, irrespective of the preconfigured recipient.
- Selected User: Emails will be sent only to a selected developer or admin from the dropdown irrespective of the preconfigured recipient.
- Application specific: Mail notifications will be sent to the recipients preconfigured in the send email action and send mail Deluge task within the workflows of the respective environment.
Select the preferred option and click Done to apply.
SMS Notification
The following options are available for sending SMS notifications in the development and stage environments, regardless of the recipients preconfigured in the send SMS action and the Deluge SMS integrations in the workflows:
- Disable: SMS notifications will not be sent to any user irrespective of the preconfigured recipient phone numbers in the workflows.
- Application specific: SMS notifications will be sent to the recipient phone numbers preconfigured in the send SMS action and the Deluge SMS integrations in the workflows of the respective environment.
Select the preferred option and click Done to apply.
Push Notification
The following options are available for sending push notifications in the development and stage environment, regardless of the recipients preconfigured in the send notification action and the push notifications Deluge task:
- Disable Push Notifications: Push notifications will not be sent to any user, irrespective of the preconfigured recipient.
- Login User: Push notifications will be sent only to the logged-in user who has triggered the notification, irrespective of the preconfigured recipient.
- Selected User: Push notifications will be sent only to the selected developer or admin from the dropdown, irrespective of the preconfigured recipient.
- Application Specific: Push notifications will be sent to the recipients preconfigured in the send notification action and the push notifications Deluge task.
Note: By default, the notification settings for this environment will be set to Application Specific, which can be changed according to your requirement.
Select the preferred option and click Done to apply.
3.3.3. Variables
Variables store and manage specific data across application components. They can only be created and managed from the application settings in the development environment, and their values for the respective environments are displayed here.
When created, a variable is assigned a defined value, which remains stored as the defined and current value of the variable unless modified through workflows. Any changes made via workflows update the current value of the variable. However, when the application is published to other environments, only the defined value is carried forward, and the current value is reset to the published defined value as specified in the development environment. As scripts execute in different environments, the current value of variables updates accordingly.
This section displays both the defined value and the current value of variables for their respective environments. Learn more about the variables publish flow.
- Variable: The name of the variable.
- Defined value: The value that is assigned to variables.
- Current value: The current values of variables that get updated in real-time based on script executions.
1.3.4. Workflow Schedules
Since the development and stage environments are used for testing, schedule workflows configured in the application will be triggered continuously in both environments. However, once tested, these schedules may no longer need to run continuously.
You can suspend scheduled workflows using one of the two options below, allowing you to halt execution without affecting the schedule configurations. This is an environment-specific setting, so choosing one of the below options will only affect the configured schedules for the respective development or stage environment in that application.
- Suspend All Schedules: All the schedule workflows configured for that application will be suspended in the respective development or stage environment. Enabling this option will suspend the execution of all schedule workflows irrespective of their individual status (enabled/disabled) in that application.
- Application-Specific: Enabling this option will allow the schedule workflows to be executed as per their defined status in that application. Only schedules with an enabled status on the workflows will be executed.
Notes:
- The selected option will only apply to the specific environment of an application where it is configured.
- The ability to suspend schedules specific to an environment is a valuable addition as it aids in efficiently managing schedule limits within that environment. For example, the development and stage environments share a combined limit of 20% of the total schedule limit based on your pricing plan. Instead of continuously triggering schedules, you can optimize this limit by suspending the schedules in the applications that are no longer needed in the environments.
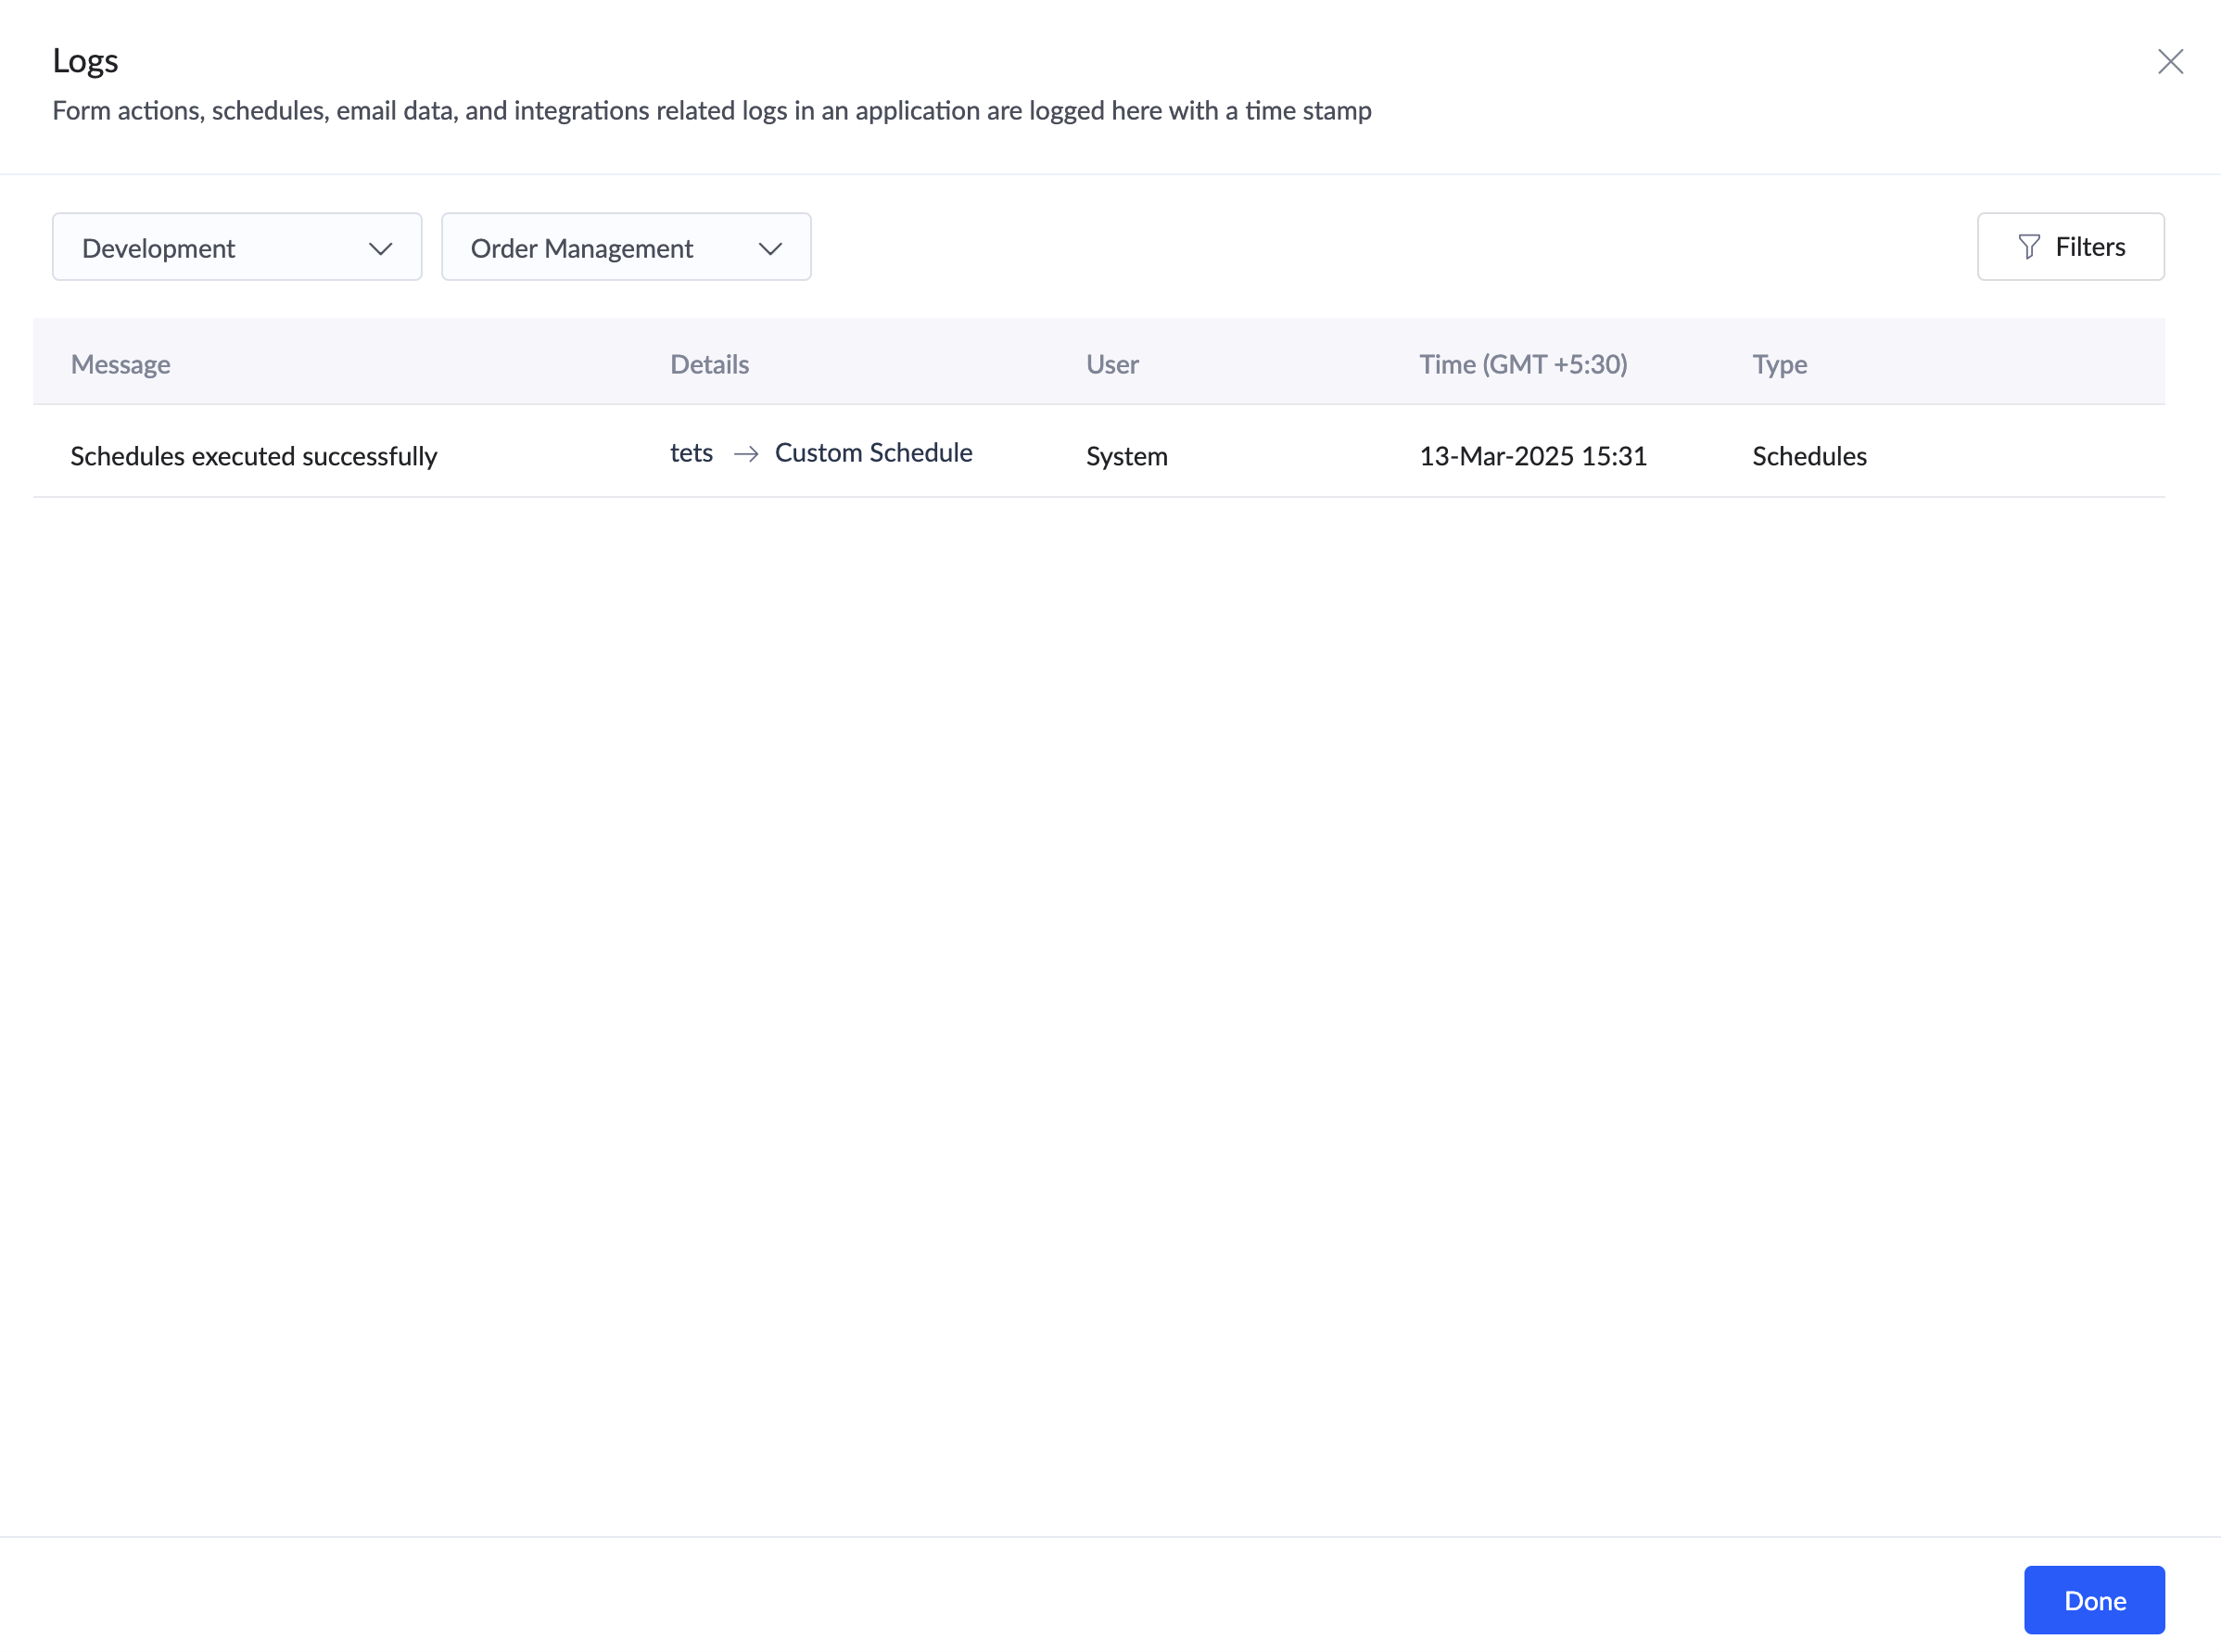
1.4. Logs
Logs are automatically-produced, time-stamped documentation of the history of actions related to Form Actions, Schedules, Integration, Pages, and Payments executed in an application in the respective environment. They are recorded for statistical, security, and debugging purposes. It also help you monitor application performance, track executed actions, and investigate issues when an action fails.
- Success logs display the success response, action details, the user who configured the action, the time of execution, and the type of action.
- Failure logs will also display additional error details.
You can filter the logs based on Time/Period and Type. The Time/Period options are Last one Hour/Day/Week/Month.
2. View Version History
When an application is published to the stage environment, each set of changes published at a given instance is recorded as a Version. The Version History provides a structured list of all published versions along with their corresponding changes, serving as a reference to track and review past updates. This page offers a clear, visual overview of component modifications, making it easier to monitor and manage the application's evolution efficiently.
To view the version history:
- Navigate to Environments and click the Version History button.
The Version History page containing the list of all versions will be displayed. It also provides you with the flexibility to filter versions either by the application name or version type. - Click on the preferred version to look at it in depth. You'll be shown the list of components present in the application.
- Click on a component to get a comprehensive view of changes made.
The changes will be displayed along with visual indicators that highlight the nature of the changes. The Version History page makes use of three specific markers as follows:
The below screenshot gives you an illustration of a component with an "Added"= marker.
3. Points to note
- When the application is added to environments, the users with the Developer role will be removed from the application. They can be re-added for development and stage environments as needed. Learn more about adding a developer to the application.
- The application can only be edited or modified in the development environment.
- In the production environment, the Settings will only contain Variables, as other sections such as Demo Users, Notifications, and Workflow Schedules are used solely for testing, which is conducted in the development and stage environments.
- The Demo Users in the environments are configured with the existing application permissions configured in Application Settings and are not separate permissions exclusive to testing.
- Script executions are environment-specific, so the current values of the variables may differ across environments based on script executions in different environments. Learn more about variable publish flow.
- You can only view the defined value and current value of variables specific to the environment in the Variables section of the environment Settings. To create or manage variables, you must access the application settings in the development environment.
- Current values of variables will not be carried forward when publishing the application to the consecutive environment. Instead, the current values will be replaced with the published defined values.
- Applications installed from the marketplace support environments except development, since they cannot be modified. You can install updates, test them in the stage environment, then publish them to the production application.
- Variables cannot be viewed or managed for the applications installed from the marketplace.