Create payment workflow

Note: The existing version of PayPal, PayflowPro, and Payments Pro has been deprecated on 26th September, 2024 and none of the payment transactions will be processed after this date. To ensure uninterrupted payment processing, migrate to the latest version. Learn more
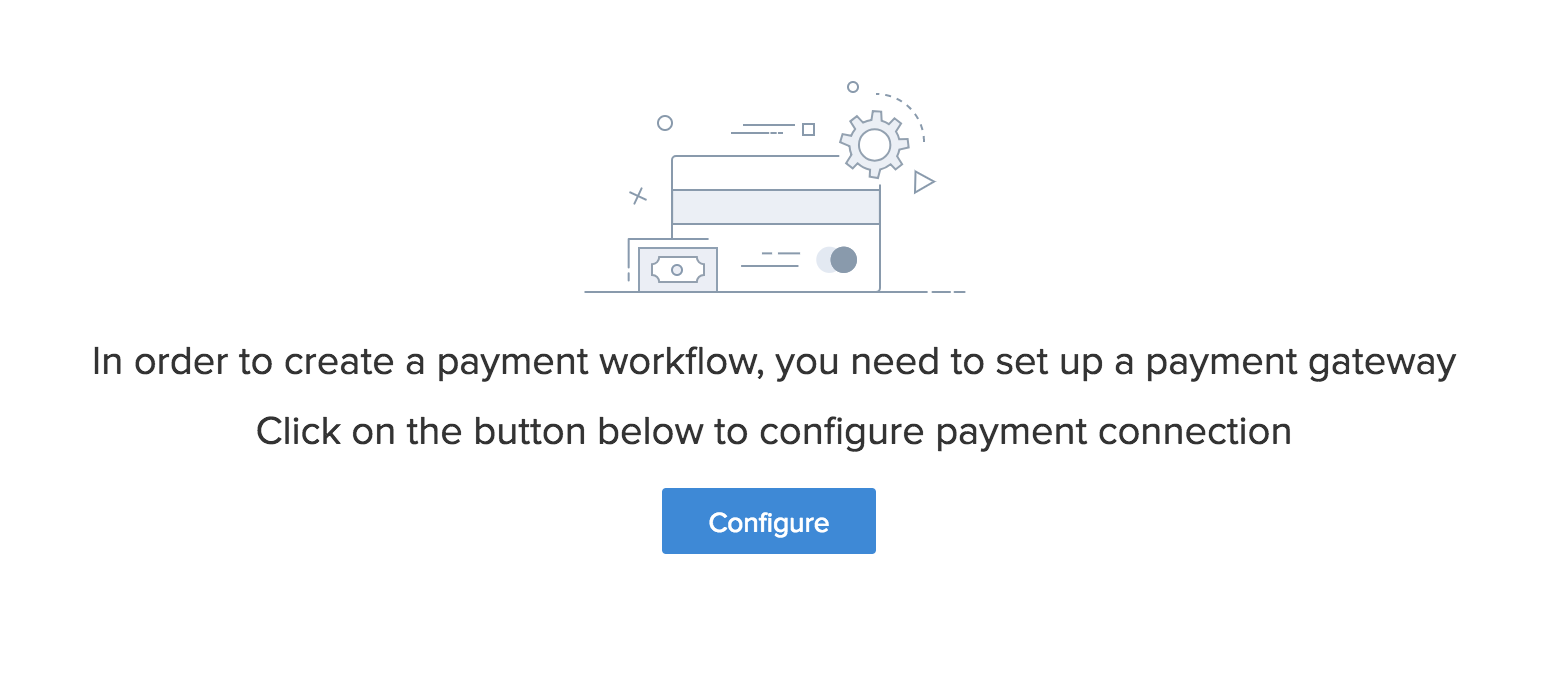
Before you create a payment workflow, you must establish a payment gateway by mapping your payment gateway credentials in Zoho Creator. This is a one-time process. Payment workflows now rely on Payment Gateways powered by Zoho Checkout. You must configure them in Operations > Payment Gateways to continue processing transactions. Learn more
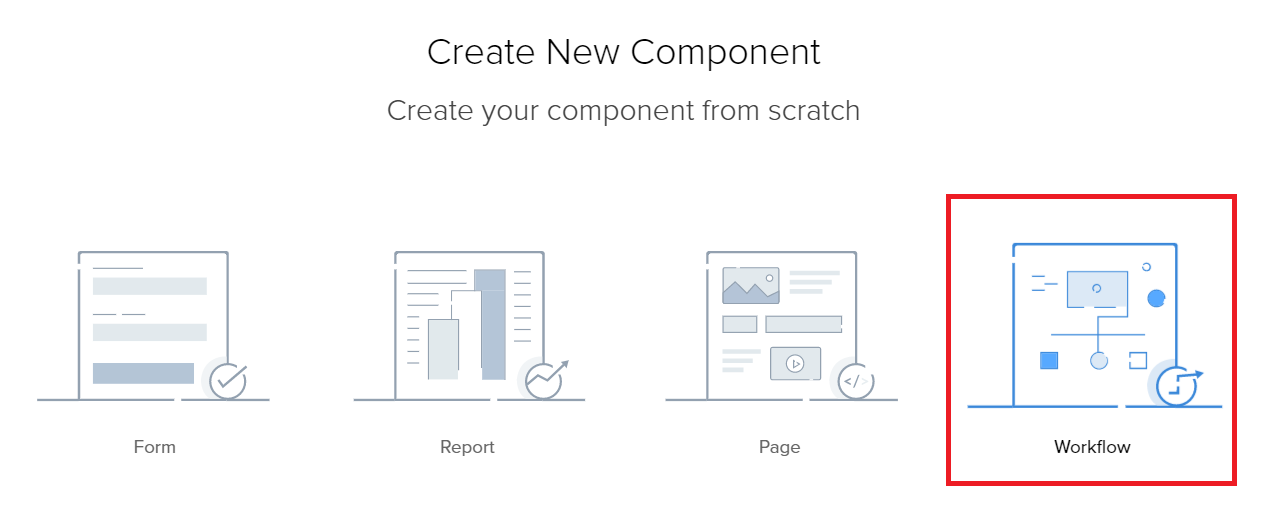
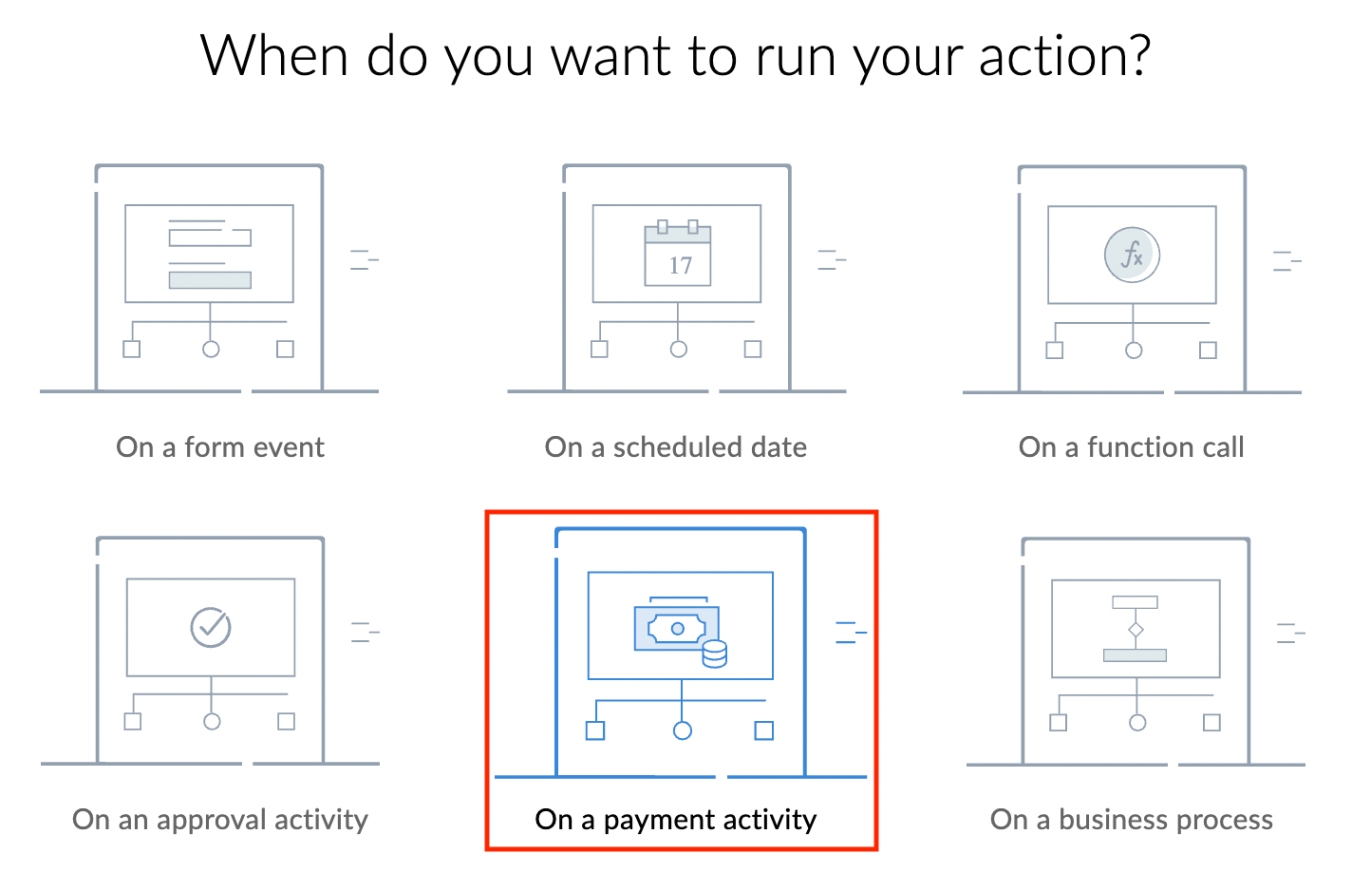
To create a payment workflow,
- Click the Add New(+) icon on the header bar.

- Select Workflow in the Create New Component window.
- Choose On a payment activity.
You must add a payment connection with any one of our supported payment gateways before proceeding to create a payment workflow. This is a one-time process. Once you configure a payment gateway, the connection will be added to your Zoho Creator account. The added connection will be set as the default payment gateway for all the payment workflows that you configure in your application. If you want to view/modify the payment connections in your account, go to Account setup -> Extensions -> Connections.
On successful authentication, the connection will be established and the gateway details will be stored in your Zoho Creator account. You can proceed to create the payment workflow for your form.
- Click Configure to set up a payment gateway.
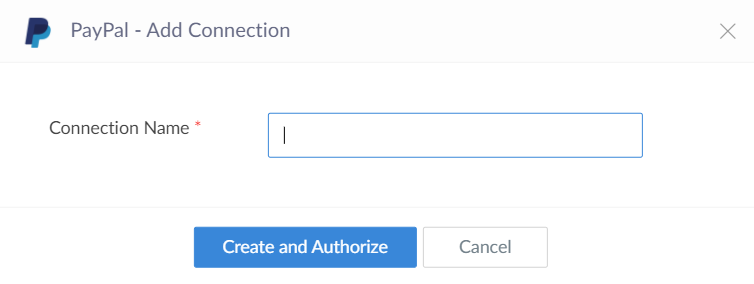
- Select the payment gateway that you want to configure the payment process.
- Next in the Add Connection popup enter the Connection name and click Create and Authorize.
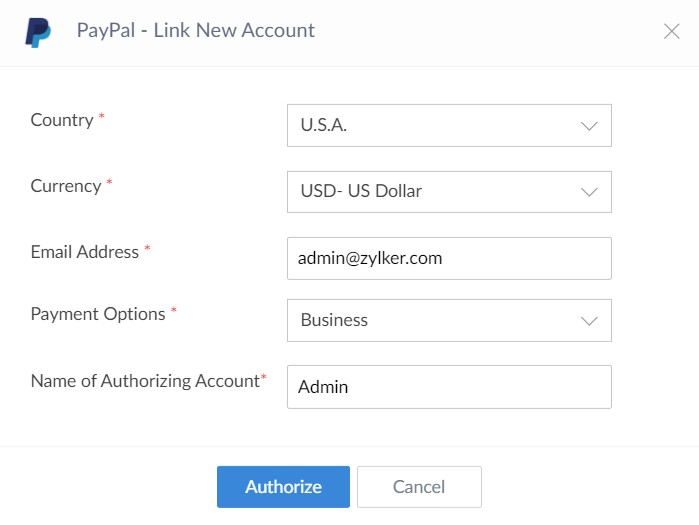
- Enter the gateway details such as country, the currency that you want to process the payment, email, and payment options and Name of authorizing account . Click Authorize.
- Choose the form that you want to configure the payment.
- Select the field value from the form that contains the payment value. This value will be processed for payment when you proceed to pay.
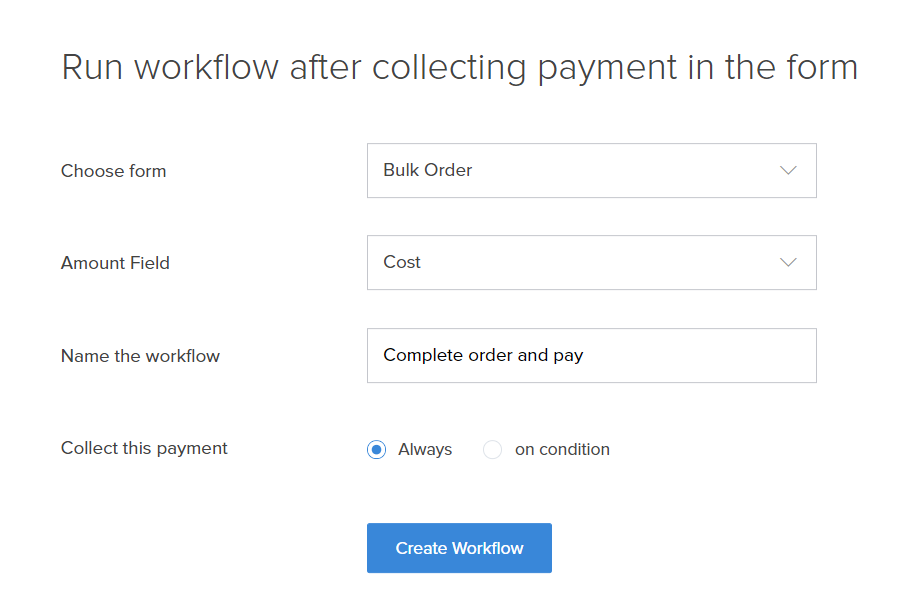
- Set a name for the workflow.
- Specify the criteria based on which you want to execute the workflow.
- Click Create Workflow.