Domain Authentication



Domain Authentication verifies your business email domain so appointment confirmations, reminders, and notifications can be sent from your domain instead of a generic Zoho domain. You can use Domain Authentication when sending appointment-related emails from your own business domain.
1. How domain authentication works
Domain authentication verifies your custom domain using DKIM records added to your DNS settings. Once authenticated, Zoho Bookings sends notifications using your domain instead of the default notification@zohobookings.com address, improving email trust and delivery rates.
For example, if you want to send booking notifications from support@zylker.com, you must first authenticate the zylker.com domain in Zoho Bookings. Once authenticated, emails sent from support@zylker.com are more likely to be trusted and are less likely to be marked as spam than emails sent from an unauthenticated domain.
Who can access this feature? | |
Available on | |
Can add and validate the custom domains | |
Admins | Can add the custom domain but cannot validate it |
Staff | Will not have access to view or manage the custom domains. |
2. Understanding the domain authentication process
Every time you add a new sender email address to your Zoho Bookings account, its domain is automatically listed in the Domain Authentication section with a 'Not Validated' status by default. This newly added domain needs to be authenticated using SPF and DKIM records so that emails can be sent from it and delivered successfully to recipients’ inboxes.
SPF record: Validating a domain using the SPF record enables the receiver's email server to verify whether the email has come from a trusted email server and that the email sender's details have not been modified.
DKIM record: Validating a domain using the DKIM record enables the receiver's email server to validate whether the emails are generated from authorised servers that are configured by the administrators of the sender's domain.
The SPF and DKIM records must be added to the DNS settings of the domain for authentication. Once the process is complete, the domain authentication status will automatically update to 'Validated'.
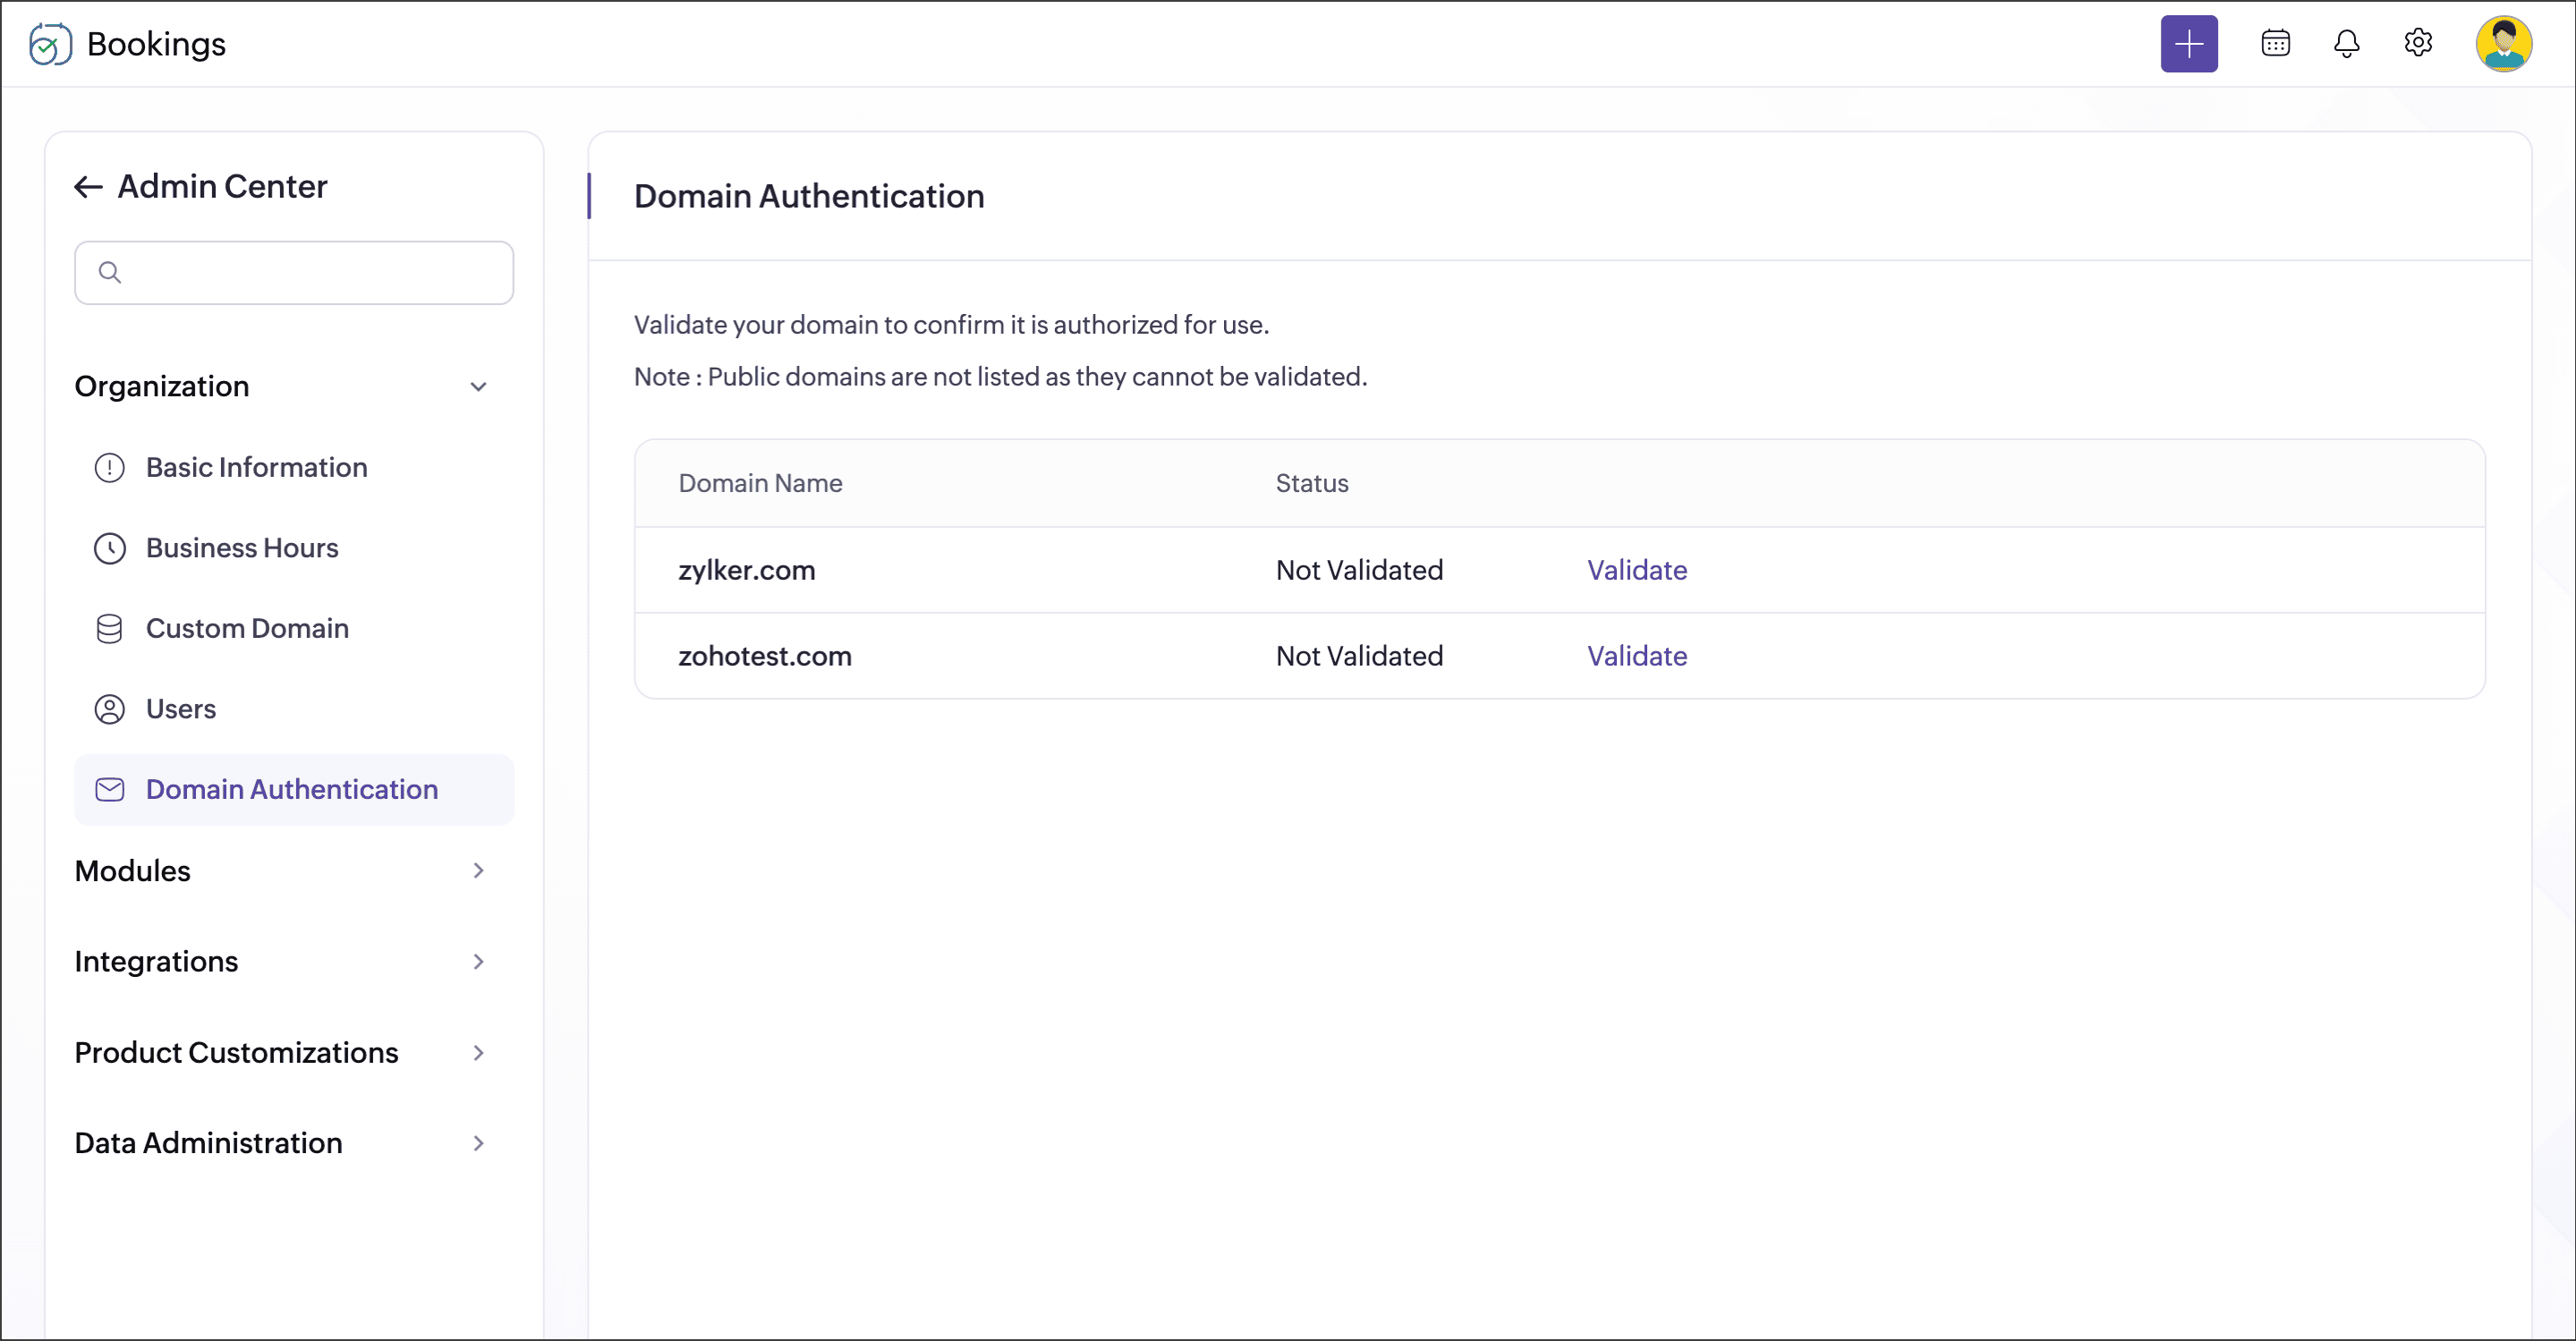
3. Steps to validate a domain

Note: Public domains will not be listed, as they cannot be validated.
- Click the Admin Center
icon in the top-right corner of the Bookings menu bar.
- Click Domain Authentication under the Data Administration section. This lists the custom domains added.
- Click the Validate button next to the domain you want to authenticate. A Domain Authentication slider will open.
- Once the records are added, return to Bookings and click Validate Now at the bottom. The DNS changes will be applied immediately, and the domain's authentication status will update to 'Validated'.
The authentication process is now complete.
Related links