Set Theme for your Application
Creator provides a bunch of theme layouts that you can choose from, as well as various colors and fonts that you can pick to go along with your chosen theme for web,
phone, and, tablet
modes. You can also customize color combinations for the application theme and icon. The logo of your application can now be placed as per your choice on the menu bar. Choosing all these different features also gives you a preview of your application with the applied options.
Set Theme for Web Application
The following is an example of a theme with sections and their components in separate panels in your browser.
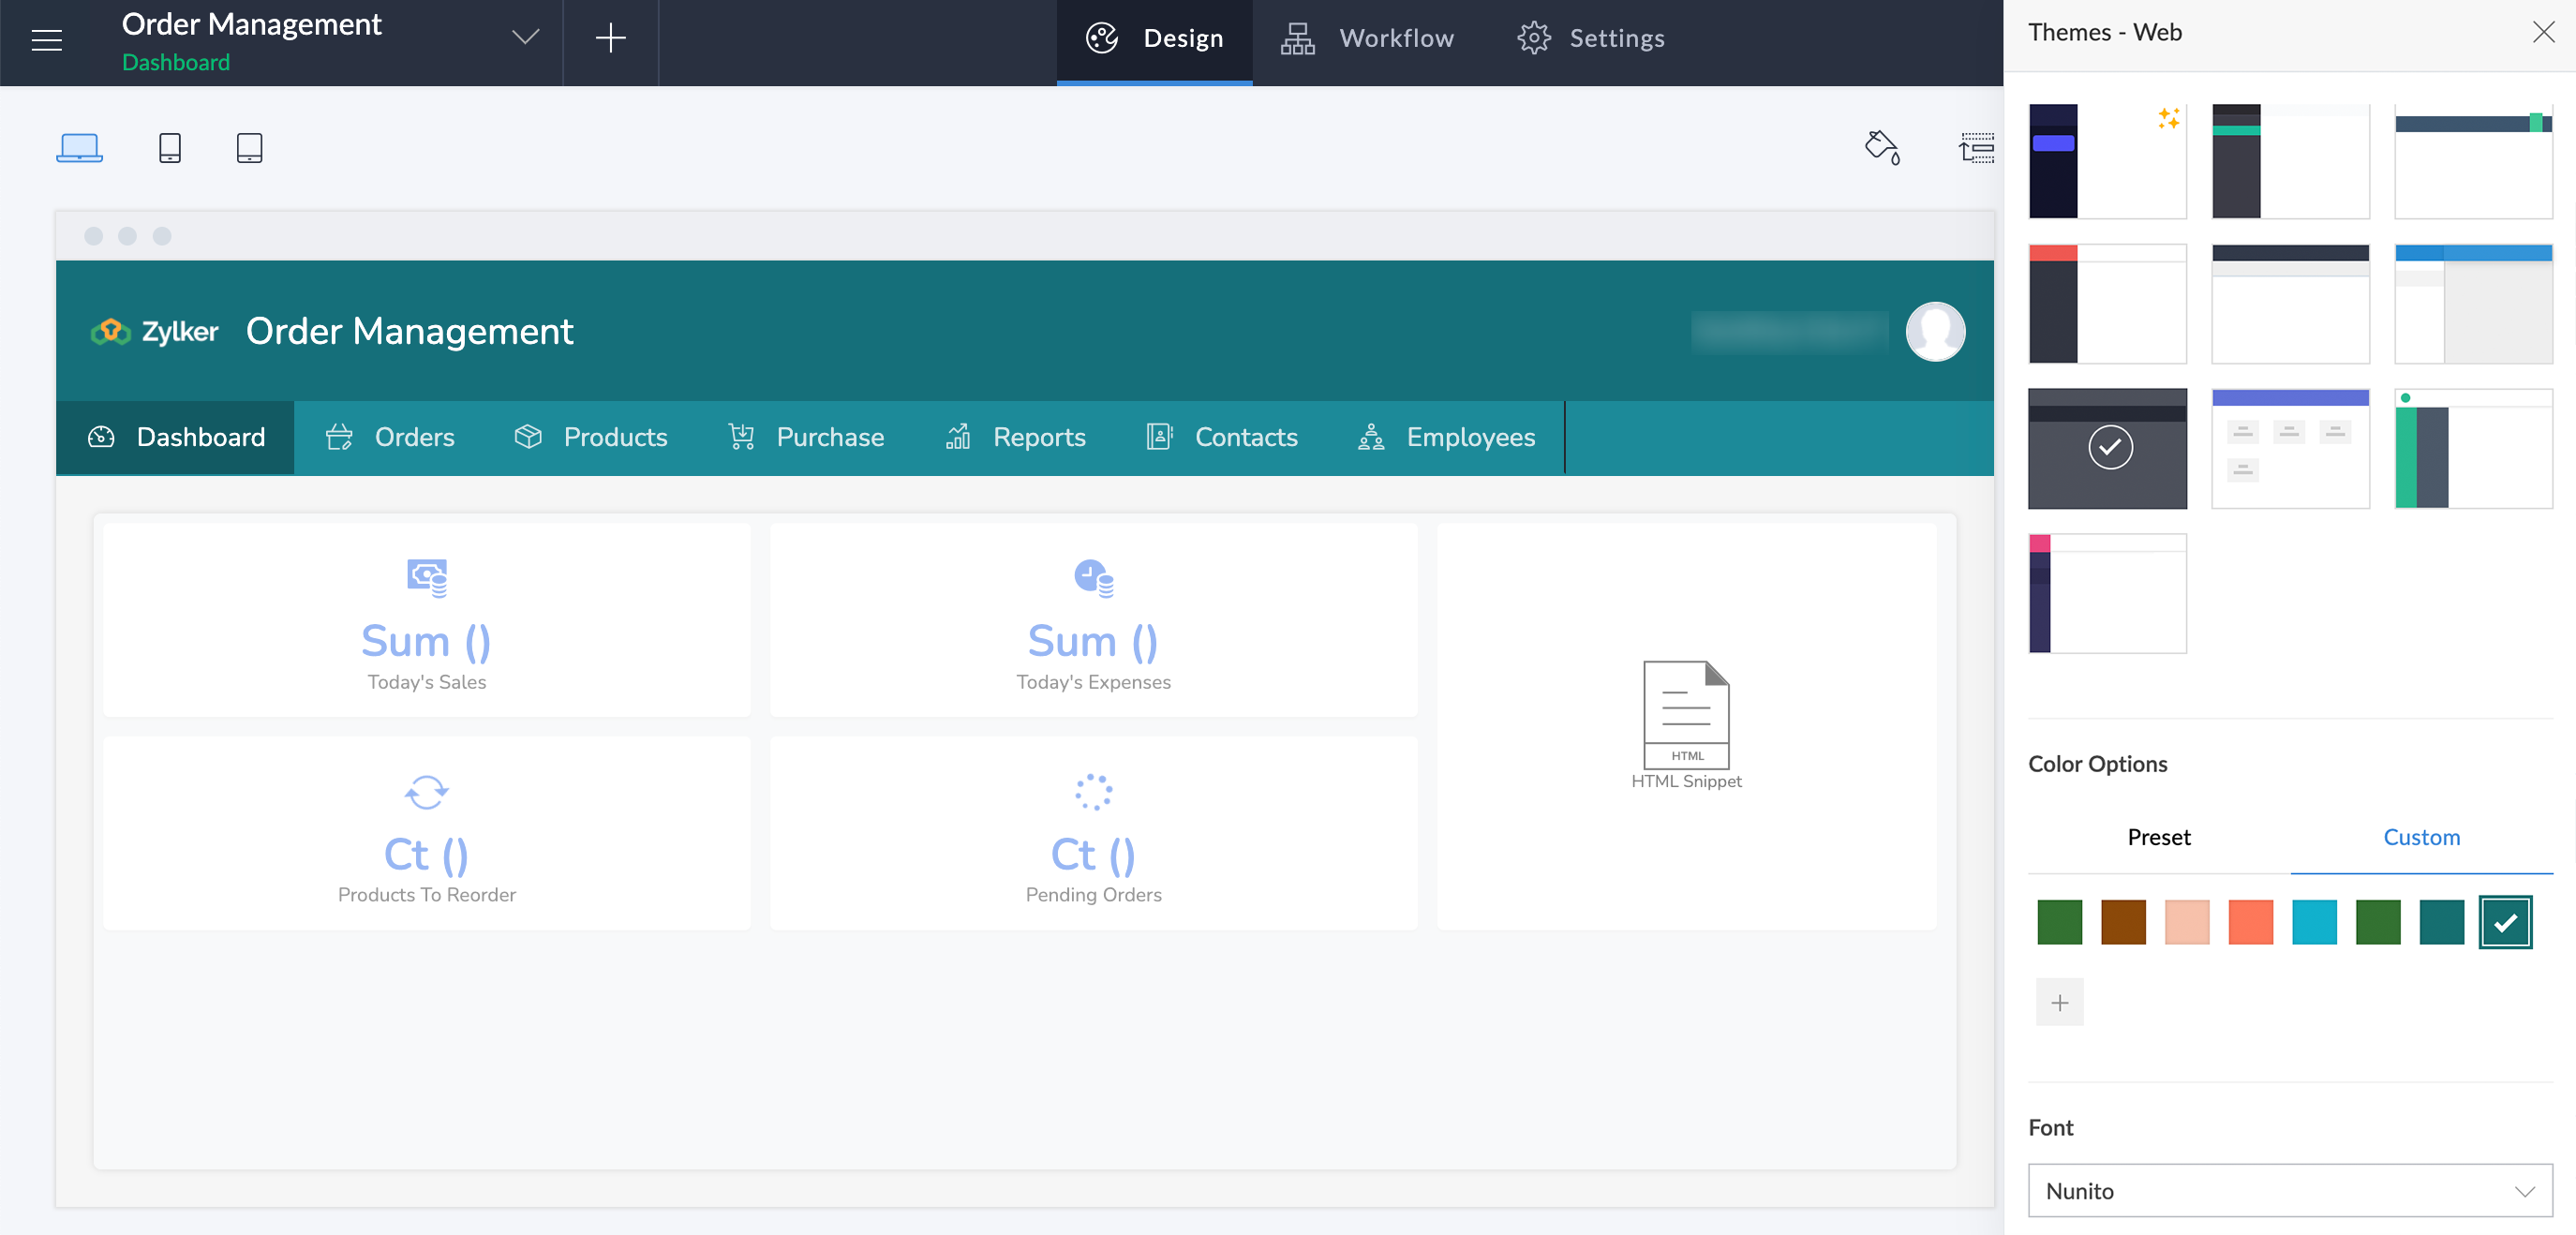
To set a theme for your application when accessed in web browser mode:
-
Navigate to the edit mode of your application.
-
Click the Web icon in the top-left corner.
-
Click the Themes icon in the top-right corner.
-
The Themes tab will slide in from the right. From here, you can choose from the following:
Choose Layout
- Navigate to the edit mode of your application.
-
Click the Themes icon in the top-right corner. The Themes tab will slide in from the right.
-
Choose a layout from the given options under the Layout section.
Logo Preference
- Navigate to the edit mode of your application.
-
Click the Themes icon in the top-right corner. The Themes tab will slide in from the right.
-
Click Logo Preference at the top-right corner of the Themes tab.
-
Choose a logo type:
-
Organization Logo
-
App Icon
-
None
 Note: Organization Logo will be available only when it is uploaded in the Organization module.
-
You can also select the placement of the organization logo. It can either be placed on the left of the organization name or on top of it.
 Note: Logo placement applies to only certain layouts.
-
Click the
Close
icon on top-right in the
Themes
tab. The changes will be saved automatically.
-
The chosen Logo Preference (Organization Logo/ App Icon) will be displayed in the live mode of the application.
Color Options
-
Theme/Brand color is used across application components, such as buttons, links, and dropdowns.
-
The color added here will be available to mobile and tablet devices automatically. However, you can also choose a different color for the respective devices if needed.
1. Navigate to the edit mode of your application.
2. Click the Themes icon in the top-right corner. The Themes tab will slide in from the right.
3. Under the
Colors
section, you can either choose a color from the available preset colors
or create a custom color
for your application theme.

Note: Custom colors can be used across apps, layouts and, devices in your Creator account.
5. In the
Custom Color
tab, you can customize a color for
Theme/Brand Color
as well as supporting colors for App Header, Menu, and Sub-Menu.

Note: Some supporting colors might not be applicable for certain layouts and will be disabled.
6. Click the color-picker icon beside Theme/Brand Color and choose a color from the given presets or click More Colors and pick a custom color from the color palette and click OK.

Note
:
7. Similarly, you can choose supporting colors for the
App Header,
Menu
and
Sub-Menu.
8. Click
Save. The colors will be applied automatically and it can be seen in the preview area.
9. To edit a custom color, hover over the chosen custom color and click the edit icon. Click
Update after making the necessary changes.
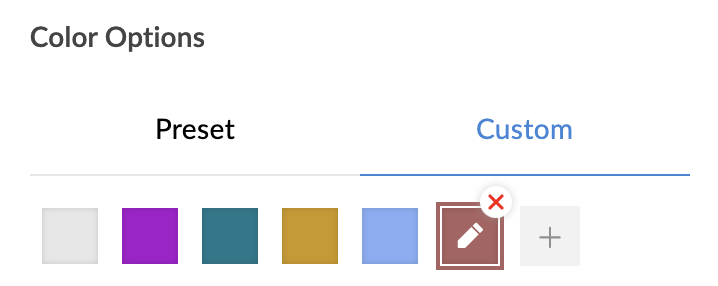
10. To delete a custom color, hover over the custom color and click the cross icon. If there is no reference, the color will be deleted automatically.
11. If any of the applications has a reference of this color, the popup window will mention the same. In that case, you need to perform the following steps:
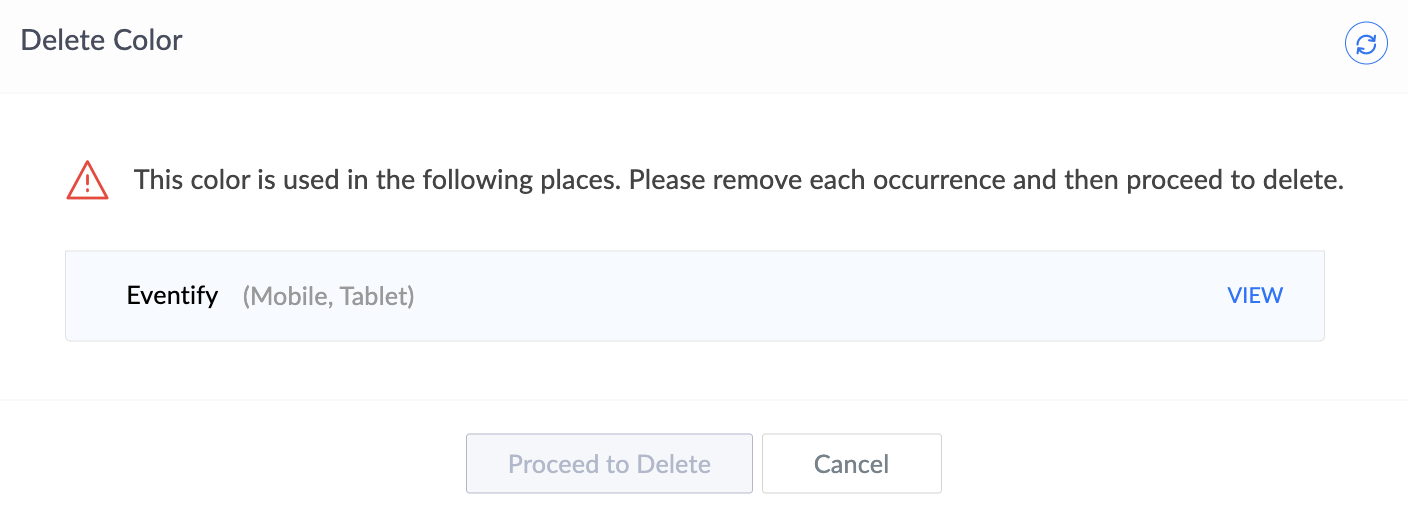
-
Click VIEW on the right side of each of the application mentioned. The application will open in a new tab.
-
Change the theme color to an alternate color.
-
Go back to the reference popup (previous tab) and click the refresh icon on the top right corner of the Delete Color popup window.
-
Click Proceed to Delete once all the references have been removed.
 Note: A maximum of 30 custom colors can be added to your Creator account.
Choose Font
- Navigate to the edit mode of your application.
-
Click the Themes icon in the top-right corner. The Themes tab will slide in from the right.
-
Under the Fonts section, select a font from the dropdown menu.
 Note: The user can select from a total of 12 different fonts.
-
The chosen font will be automatically applied across your application.
Set Theme for Phone
Below is an example of how the sliding pane theme looks like in an iPhone device. The sections and their components with the applied theme can be viewed by clicking the hamburger icon in the top-left corner of your device.
To set a theme for your application when accessed on a phone:
-
Navigate to the edit mode of your application.
-
Click the Phone icon in the top-left corner.
-
Click the Themes icon in the top right-corner.
-
The Themes tab will slide in from the right. From here, you can choose the following:
Choose Layout
- Navigate to the edit mode of your application.
-
Click the Themes icon in the top-right corner. The Themes tab will slide in from the right.
-
Choose a layout from the given options under the Layout section.
Logo Preference
- Navigate to the edit mode of your application.
-
Click the Themes icon in the top-right corner. The Themes tab will slide in from the right.
-
Click Logo Preference on the top-right corner of the Themes tab.
-
Choose a logo type:
-
Organization Logo
-
App Icon
-
Click the Close icon at the top-right to close the Themes tab. The changes will be saved automatically.
-
The chosen Logo Preference (Organization Logo/ App Icon) will be displayed in the live mode of the application.
Color Options
1. Navigate to the edit mode of your application.
2. Click the Themes icon in the top-right corner. The Themes tab will slide in from the right.
3. Under the
Colors
section, you can either choose a color from the available preset colors or create a custom color for your application theme.
4. Click
+
under the
Custom
tab to create custom colors for different interface components.

Note: Custom colors can be used across apps, layouts and, devices in your Creator account.
5. In the
Custom Color tab, you can customize color a for
Theme/Brand Color
and the supporting color for
Dark Mode.
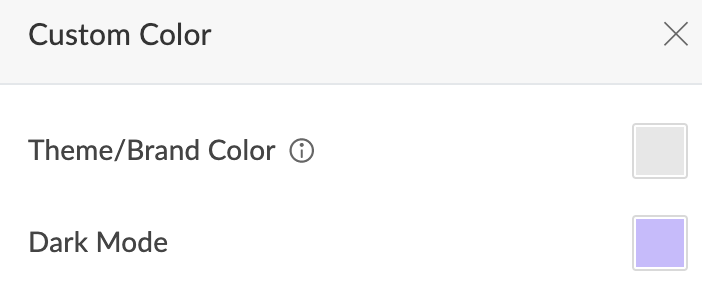
6. Click the color-picker icon beside
Theme/Brand Color
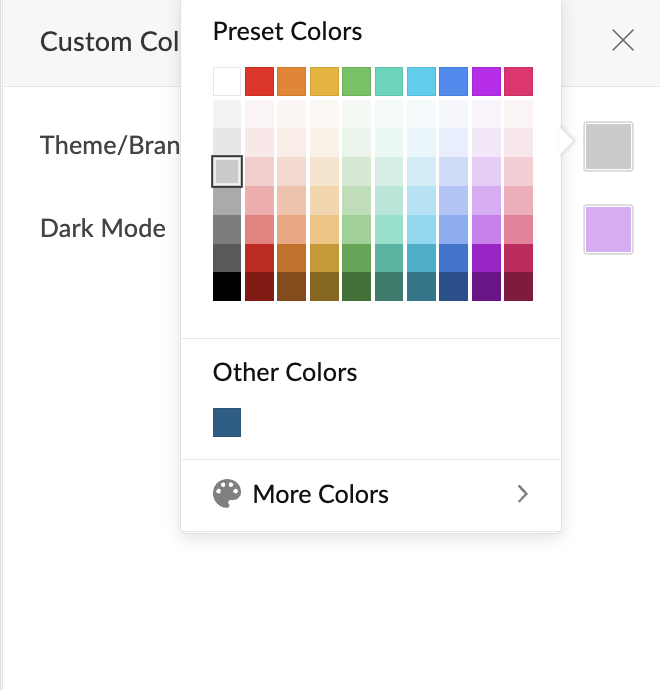
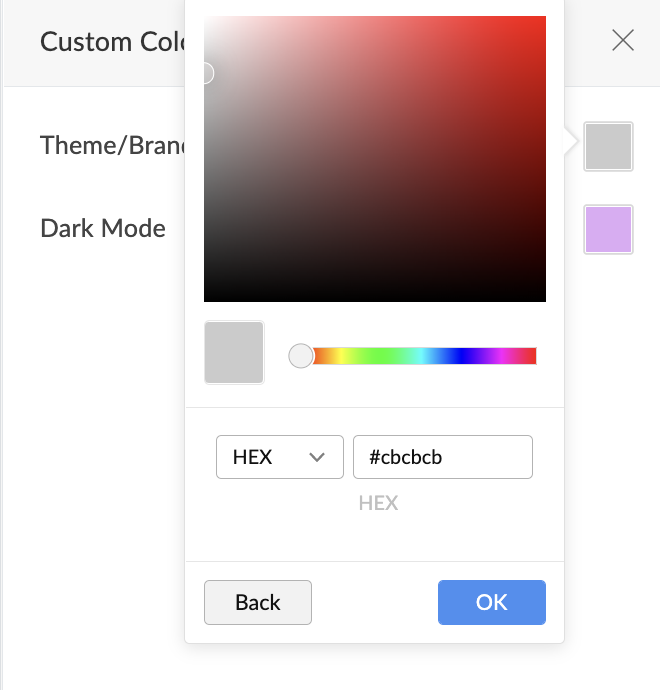
and choose a color from the given presets or click
More Colors
and pick a custom color from the color palette and click
OK. The color will be added to the
Customs
tab.

Note:
Theme/Brand Color
is used across components like buttons, links, dropdowns, etc.
7. Similarly, you can choose a supporting color for the
Dark Mode
as well.
8. You can toggle the button to fill the chosen color on the navigation bar on iPhone device. By default, this button will be toggled as No.
9. To edit a custom color, hover over the custom color and click the edit icon.
Click Update after making the necessary changes.
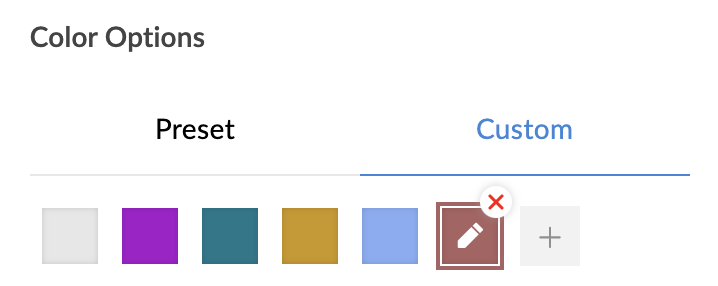
10. To delete a custom color, hover over the custom color and click the cross icon. If there is no reference, the color will be deleted automatically.
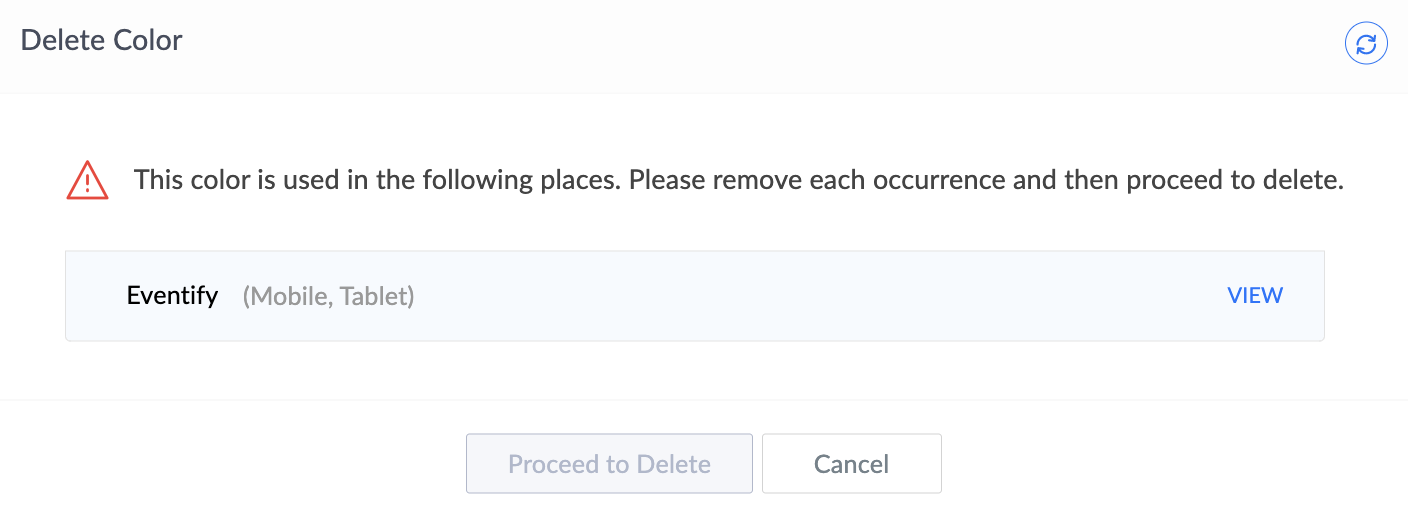
11. If any of the applications has a reference of this color, the popup window will mention the same. In that case,
-
Click VIEW on the right side of each of the application mentioned. The application will open in a new tab.
-
Change the theme color to an alternate color.
-
Go back to the reference popup (previous tab) and click the refresh icon in the top-right corner of the Delete Color popup window.
-
Click Proceed to Delete once all the references have been removed.

Note: A maximum of 30 custom colors can be added to your Creator application.
Choose Font
- Navigate to the edit mode of your application.
-
Click the Themes icon in the top-right corner. The Themes tab will slide in from the right.
-
Under the Fonts section, select a font from the dropdown menu.
 Note: The user can select from a total of 12 different fonts.
4. The chosen font will be automatically applied across your application.
Set Theme for Tablet
The following is an example of what the Bottom Bar
theme looks like in an iPad device. The sections and their components can be accessed from the bar at the bottom of your device.
To set a theme for your application when accessed on a tablet:
-
Navigate to the edit mode of your application.
-
Click the Tablet icon in the top-left corner.
-
Click the Themes icon in the top right-corner.
-
The Themes tab will slide in from the right. From here, you can choose from the following:
Choose Layout
- Navigate to the edit mode of your application.
-
Click the Themes icon in the top-right corner. The Themes tab will slide in from the right.
-
Choose a layout from the given options under the Layout section.
Logo Preference
- Navigate to the edit mode of your application.
-
Click the Themes icon in the top-right corner. The Themes tab will slide in from the right.
-
Click Logo Preference on the top-right corner of the Themes tab.
-
Choose a logo type:
-
Organization Logo
-
App Icon
-
Click the Close icon at the top-right to close the Themes tab. The changes will be saved automatically.
- The chosen Logo Preference (Organization Logo/ App Icon) will be displayed in the live mode of the application.
Color Options
1. Navigate to the edit mode of your application.
2. Click the Themes icon in the top-right corner. The Themes tab will slide in from the right.
3. Under the
Colors
section, you can either choose a color from the available preset colors or create a custom color for your application theme.
4. Click
+
under the
Custom
tab to create custom colors for different interface components.

Note: Custom colors can be used across apps, layouts and, devices in your Creator account.
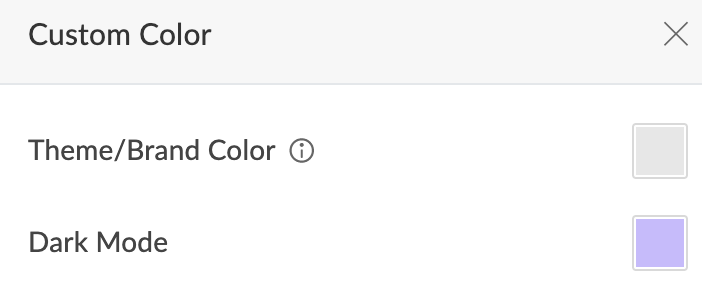
5. In the
Custom Color
tab, you can customize a color for
Theme/Brand Color
and a supporting color for the
Dark Mode.
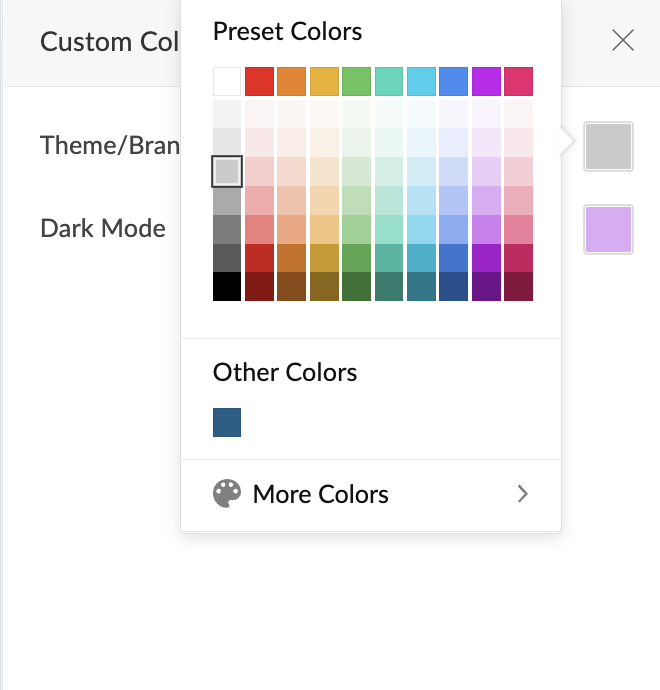
6. Click the color-picker icon beside
Theme/Brand Color
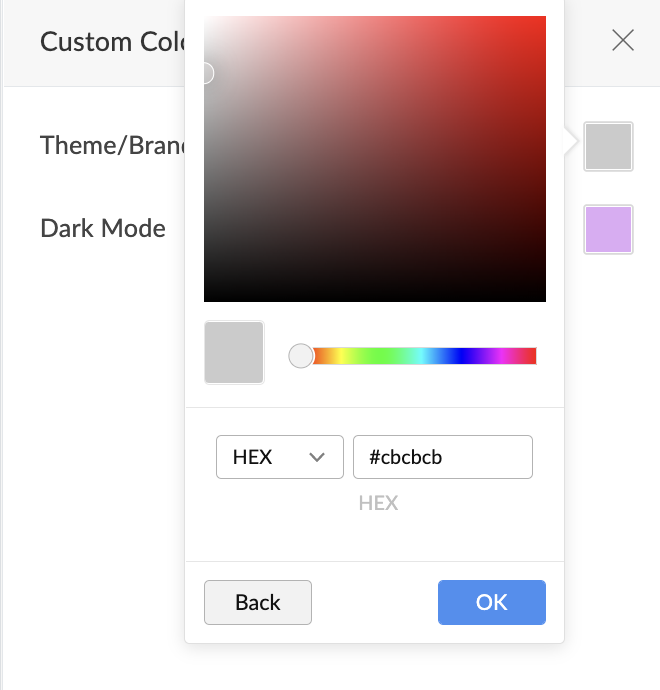
and choose a color from the given presets or click
More Colors
and pick a custom color from the color palette and click
OK. The color will be added to the
Customs
tab.

Note:
Theme/Brand Color
is used across components like buttons, links, dropdowns, etc.
7. Similarly, you can choose a supporting color for the
Dark Mode
as well.
8. You can toggle the button to fill the chosen color on the navigation bar on iPad device. By default, this button will be toggled as No.

9. To edit a custom color, hover over the custom color and click the edit icon.
Click Update after making the necessary changes.
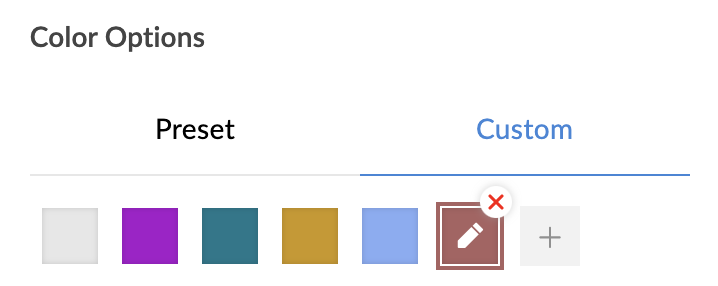
10. To delete a custom color, hover over the custom color and click the cross icon. If there is no reference, the color will be deleted automatically.
11. If any of the applications has a reference of this color, the popup window will mention the same. In that case,
-
Click VIEW on the right side of each of the application mentioned. The application will open in a new tab.
-
Change the theme color to an alternate color.
-
Go back to the reference popup (previous tab) and click the refresh icon on the top right corner of the Delete Color popup window.
-
Click Proceed to Delete once the references have been removed.

Note: A maximum of 30 custom colors can be added to your Creator application.
Choose Font
- Navigate to the edit mode of your application.
-
Click the Themes icon in the top-right corner. The Themes tab will slide in from the right.
-
Under the Fonts section, select a font from the dropdown menu.
 Note: The user can select from a total of 12 different fonts.
-
The chosen font will be automatically applied across your application.
Related Topics
Zoho CRM Training Programs
Learn how to use the best tools for sales force automation and better customer engagement from Zoho's implementation specialists.
Zoho DataPrep Personalized Demo
If you'd like a personalized walk-through of our data preparation tool, please request a demo and we'll be happy to show you how to get the best out of Zoho DataPrep.
Centralize Knowledge. Transform Learning.
All-in-one knowledge management and training platform for your employees and customers.
New to Zoho Writer?
You are currently viewing the help pages of Qntrl’s earlier version. Click here to view our latest version—Qntrl 3.0's help articles.
Zoho Sheet Resources
Zoho Forms Resources
New to Zoho Sign?
Zoho Sign Resources
New to Zoho TeamInbox?
Zoho TeamInbox Resources
New to Zoho ZeptoMail?
New to Zoho Workerly?
New to Zoho Recruit?
New to Zoho CRM?
New to Zoho Projects?
New to Zoho Sprints?
New to Zoho Assist?
New to Bigin?
Related Articles
Modes of an application
Overview Zoho Creator has two modes through which you can establish an application from start to finish. You can create an application from scratch or from a template and customize it according to your needs in an app-building space. During that ...Set description
Set descriptions for fields using tooltips and help texts Applicable to the following field types: All except auto number , formula , and add notes . Refer to this page to learn about describing fields. Open the form builder. Select the required ...Understand Application Themes
Themes enable you to choose the color scheme and design that will be applied to your Creator application. They define the overall visual appeal of your application as well as assist users on how to navigate around the components in your application. ...Understand Application Sections
Sections display the components in your application in separate divisions. This provides your users with a visual and logical grouping of your application components, which makes navigation easier. When you access your Creator application, you will ...Understanding application themes
Note: This feature is currently in beta phase and is available through our Early Access program. To use it, please go to Operations -> Early Access Features and enable the feature for your account. Application themes in Zoho Creator let you customize ...
New to Zoho LandingPage?
Zoho LandingPage Resources


