Create Forms Using Zia Assistance
1. What Does This Page Cover?
Learn how you can build a Creator form using Zia AI's assistance by simply communicating your app's requirements to the AI, thereby accelerating form creation.
You also get in-form guidance using natural language processing (NLP) to help you generate relevant field suggestions.


2. Availability
Zia-assisted forms
- Is available only for paid plans of Creator
- Can only be enabled, created, and managed by the super admin. Admins and developers can create and manage AI-assisted forms, while other users can access those forms and add their data
- Zoho LLM is currently available for use only in US and IN data centres (DCs), while EU, AU, CA DCs will continue with the OpenAI Bring-Your-Own-Key (BYOK) approach as before.
3. Setting Up Zia for Creating AI-assisted Forms
Setting up Zia is a one-time process that grants access to all Zia features, including creating applications and forms, enabling next field suggestions, and generating scripts. To know more about the prerequisites, click here.
3.1 AI-Assisted Form Creation Flow
3.2 See How To Configure
3.3 Configure Zia
- To know more about the prerequisites, click here.
- Only the super admin and admins can configure Zia in Creator.
- For Zoho LLM, follow step 7 and then you can directly start creating apps without configuring any integration.
1. Navigate to Operations in your Creator account.
2. Click Zia in the Applications card. The Settings screen will appear.

If you have already added an API key, then proceed to step 7.
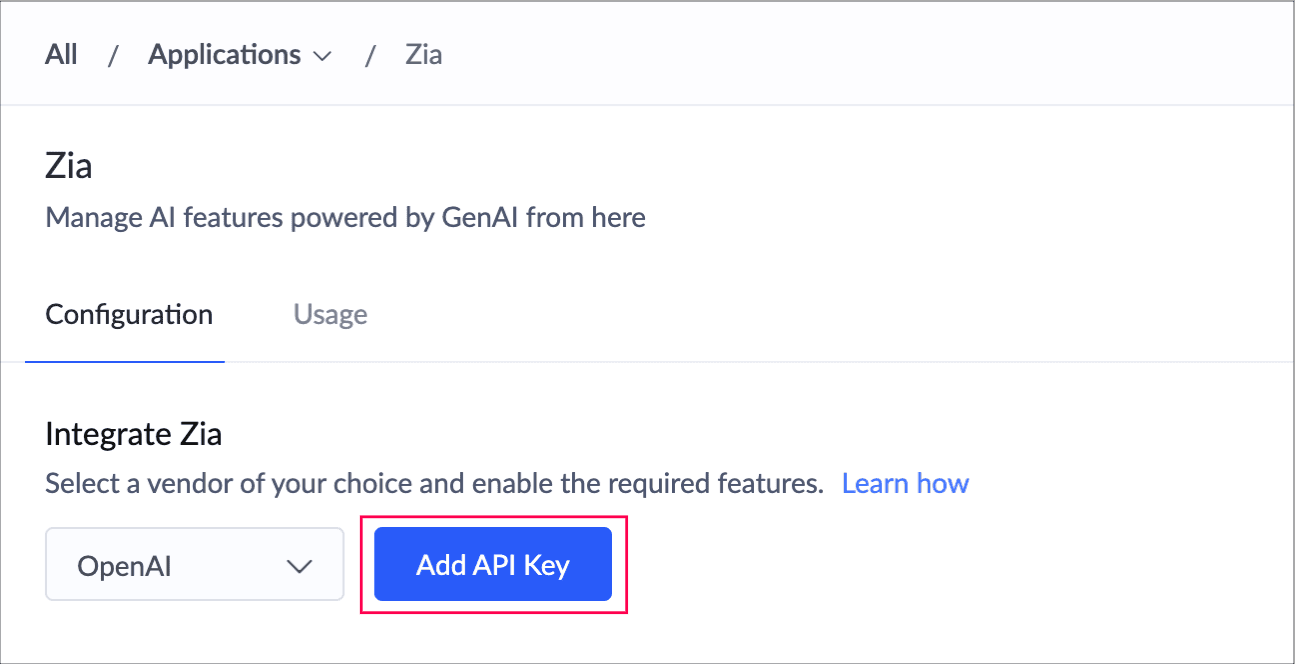
3. Select the required LLM
- If you've chosen OpenAI, Anthropic, or Google you need to add your API key (go to step 4).
- If you've chosen Zoho LLM, go to step 7 directly.
4. Click Add API Key in the Configuration tab. A popup will appear.
5. Enter your API Key and click Add.
6. To edit or update the key after adding it, click Edit. Update the key in the pop-up that appears, and click Save.
Refer to this page to know more OpenAI's authentication.7. Toggle the Enable buttons beside Create Form option in the Select Features section.
Only super-admin can enable these two options.
8. Click Enable in the popup that appears. This will allow you to use the combined capabilities of Zia and other AI vendors to create forms and also receive suitable field suggestions for your form.

As an super admin,
- You can disable the toggle button as required. This will disable this feature for your Creator account.
- You can enable it again as required.
4. Create a form with the help of Zia
Before you can create forms using Zia, ensure to configure your API key in Zia Settings.
1. Navigate to the Solutions page in your Creator account.
2. Hover over the required application card and click the Edit icon. You'll be taken to the edit mode of your application.
3. Create a form as follows.
- If you're creating the first form in your app, click the Create New Form button at the center and go to Step 5.
- If you've already created forms, click the Add New icon displayed at the top of the Design page.
4. Select Form, as shown below.
5. Click the Using Zia card beneath the On my own section.
- If you haven't configured the Zia - AI integration (refer to above section), click Go to Settings in the popup that appears.
- If you've already configured the Zia - AI integration, go to step 6.
- If you've configured the integration or chosen Zoho LLM, but disabled the toggle button beside Create Forms in Zia Settings, then click Yes in the popup that appears. You'll be taken to the Zia Settings page, where you need to enable the toggle beside Create Form option.
After enabling Create Form option in Zia Settings, you can start creating a form using Zia's assistance.
6. Provide a brief description of the form you want to create and click Suggest Form Fields.
Ten suitable form fields will be generated based upon the form description you've provided.
4.1 Review fields and create form
1. Tick the checkbox beside each field to deselect fields that are not required. All fields will be selected by default.
Note:
- You need to select at least one field to create a form using Zia.
- To know the list of field types that will not be included in the generated suggestions, you can click here. However, you can add these fields post accessing your created form.
2. Click Create Form after reviewing the field suggestions.
5. Limitations
Rate limit restrictions
Rate limit restrictions
- Zia does not consumes any AI calls or API calls from Zoho Creator. However, API rate limits may still apply. These limits are restrictions that the LLM provider imposes on the number of times a user or client can access their services within a specified period of time and vary based on their usage tier and the model consumed.
- Rate limits for LLM providers can be found in their respective official documentation.